How to access your project's WFS in ArcGIS Pro: Difference between revisions
Jump to navigation
Jump to search

No edit summary |
No edit summary |
||
| Line 15: | Line 15: | ||
<gallery mode=nolines> | <gallery mode=nolines> | ||
File:Add_WFS_server_ArcGIS_Pro.JPG|4. Add a WFS URL | File:Add_WFS_server_ArcGIS_Pro.JPG|4. Add a WFS URL | ||
File:Add_wfs_connection.JPG 5. Paste the URL and remove the token part. Add the token and value as a custom parameter. | File:Add_wfs_connection.JPG| 5. Paste the URL and remove the token part. Add the token and value as a custom parameter. | ||
File:Data_in_ArcGIS_Pro.JPG 7. Add the data | File:Data_in_ArcGIS_Pro.JPG| 7. Add the data | ||
</gallery> | </gallery> | ||
Revision as of 09:55, 25 March 2020
This article is a stub.
The Tygron Platform allows you to access geographical features through a WFS endpoint, making the data available to view and edit via other GIS application.
How to access the WFS of your project in ArcGIS Pro:
- Select the export option of the geo data source you wish to access.
- For the export option "Web Feature Service", select "Copy URL". This will store the URL on your clipboard.
- Open ArcGIS Pro.
- Add a WFS Connection.
- As URL for the server connection, paste the URL copied to the clipboard earlier without the token part (the question mark and beyond)
- Add the token parameter and its value to the custom parameters and click ok.
- Open the "Servers" tab, to display the list of available layers and add the desired layer to your map.
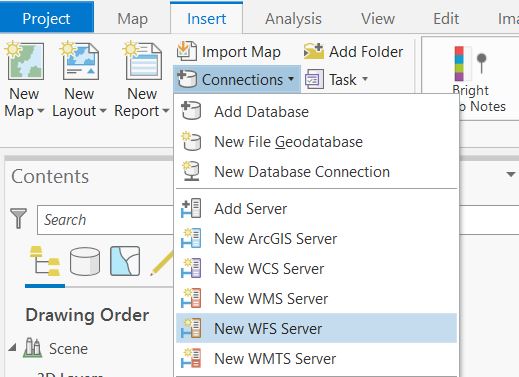
4. Add a WFS URL
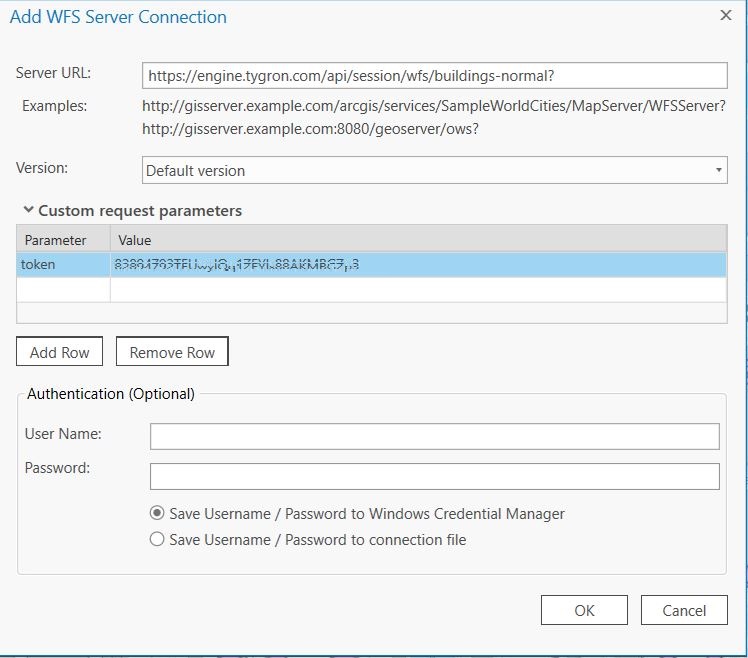
5. Paste the URL and remove the token part. Add the token and value as a custom parameter.
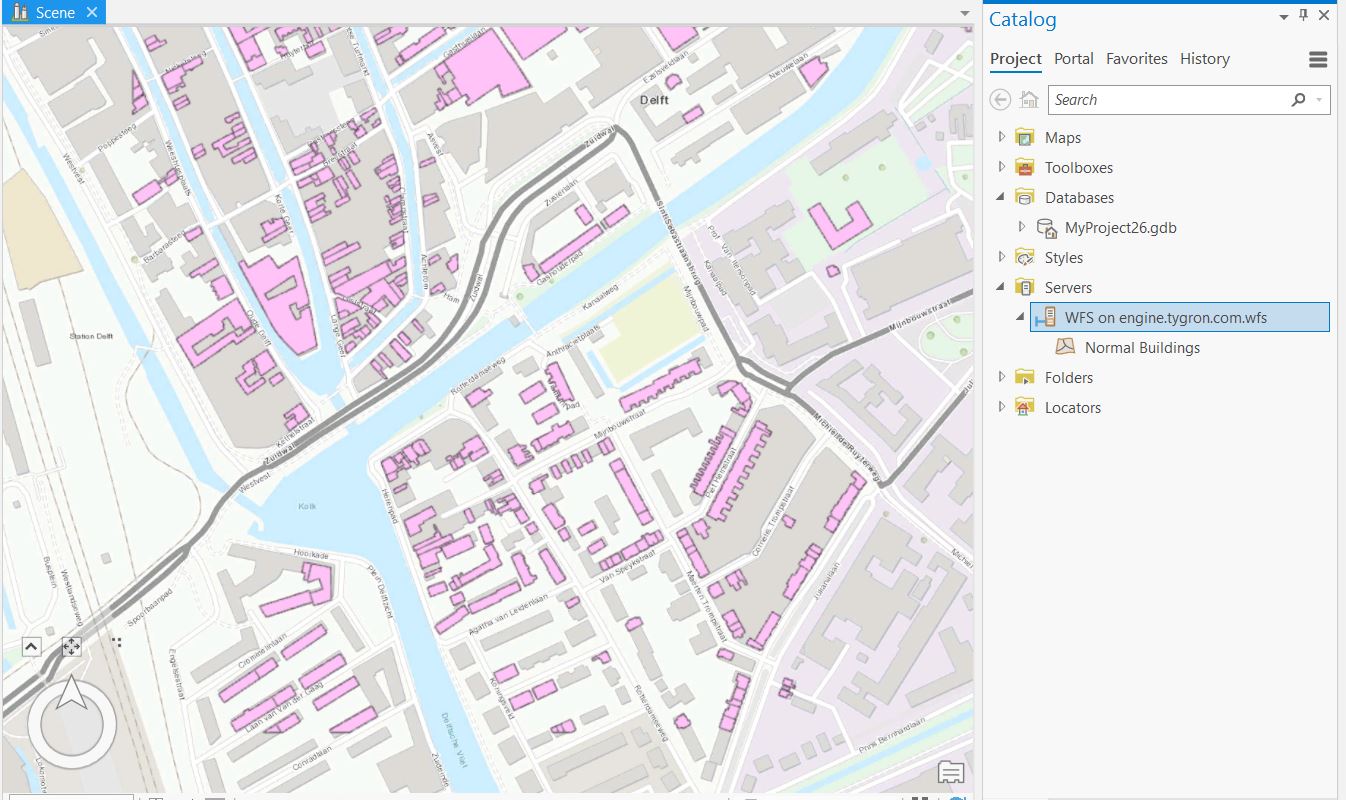
7. Add the data


Notes
- Currently version 2.4 of ArcGIS Pro supports adding a Tygron Platform WFS.
- The WFS is currently only available when a project is active in the editor.
- The WFS url includes an authentication token which ties the validity of the url to a specific session. If the editing session is closed and reopened at a later time, the url will need to be renewed. See also these notes for more information.