How to simulate water overflowing river barrier: Difference between revisions
Jump to navigation
Jump to search
No edit summary |
No edit summary |
||
| Line 3: | Line 3: | ||
{| class="wikitable" | {| class="wikitable" | ||
|1 | |1 | ||
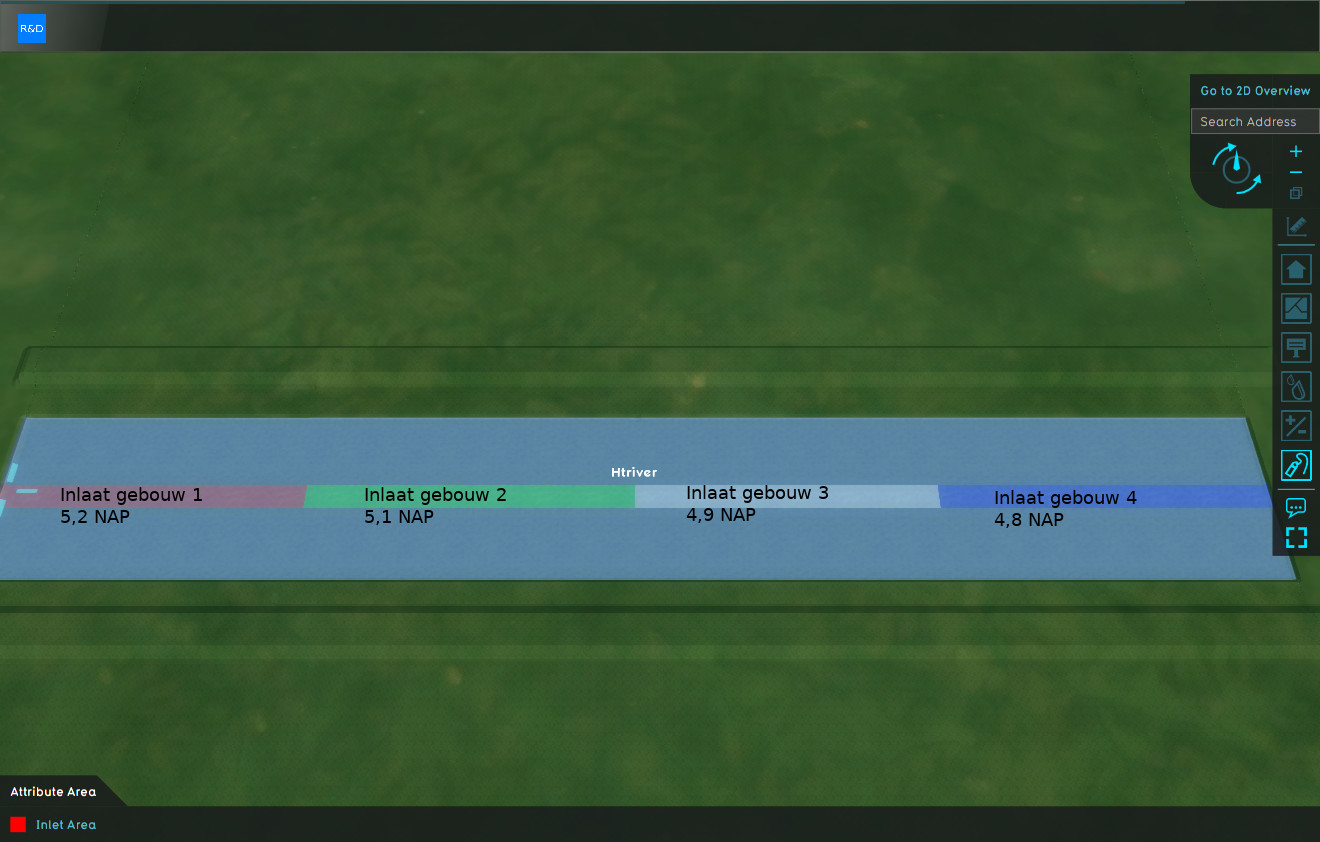
|Divide the river of your interest in ‘[[inlet building]]’ [[areas]]. For instance, if you work with water level measurements for each kilometer, create an area for each kilometer. See example: each area is an ‘inlet building in the middle of a fictional river. | |Divide the river of your interest in ‘[[Inlet (Water Overlay)|inlet building]]’ [[areas]]. For instance, if you work with water level measurements for each kilometer, create an area for each kilometer. See example: each area is an ‘inlet building in the middle of a fictional river. | ||
|[[File:thriver-1vlakken.jpg|thumb|200px|Dividing a fictional river into areas]] | |[[File:thriver-1vlakken.jpg|thumb|200px|Dividing a fictional river into areas]] | ||
|- | |- | ||
|2 | |2 | ||
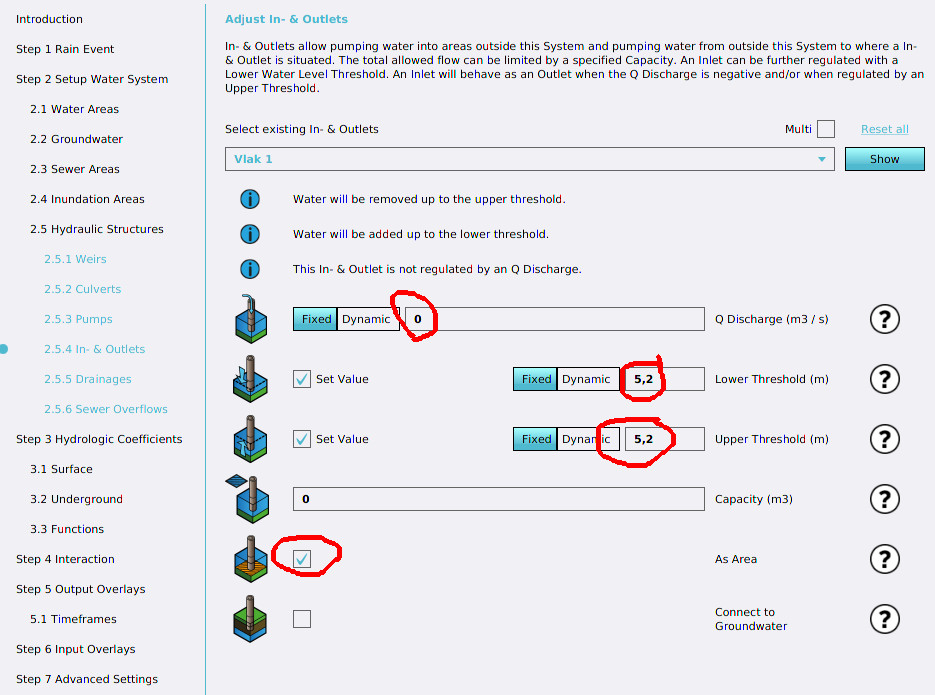
|Give the inlets a [[LOWER_THRESHOLD]] and an [[UPPER_THRESHOLD]] with a similar water level value. Set [[INLET_Q]] to 0. This way, you make sure the inlet continuously transfers water in order to keep the given water level. Please note that you can vary the water level over time by uploading a [[dynamic .csv file]]. | |Give the inlets a [[Inlet lower threshold (Water Overlay)|LOWER_THRESHOLD]] and an [[Inlet upper threshold (Water Overlay)|UPPER_THRESHOLD]] with a similar water level value. Set [[Inlet q (Water Overlay)|INLET_Q]] to 0. This way, you make sure the inlet continuously transfers water in order to keep the given water level. Please note that you can vary the water level over time by uploading a [[How to import a time sequence with a CSV|dynamic .csv file]]. | ||
|[[File:htriver-2-inlets.jpg|thumb|200px|In- and outlet settings]] | |[[File:htriver-2-inlets.jpg|thumb|200px|In- and outlet settings]] | ||
|- | |- | ||
Revision as of 11:37, 18 November 2021
This page describes how to simulate overflow of river barriers. Please note that this is a simplification, the flooding (volume and flow direction) does not influence the water level in the river. However, for small floodings this should be realistic
| 1 | Divide the river of your interest in ‘inlet building’ areas. For instance, if you work with water level measurements for each kilometer, create an area for each kilometer. See example: each area is an ‘inlet building in the middle of a fictional river. | |
| 2 | Give the inlets a LOWER_THRESHOLD and an UPPER_THRESHOLD with a similar water level value. Set INLET_Q to 0. This way, you make sure the inlet continuously transfers water in order to keep the given water level. Please note that you can vary the water level over time by uploading a dynamic .csv file. | |
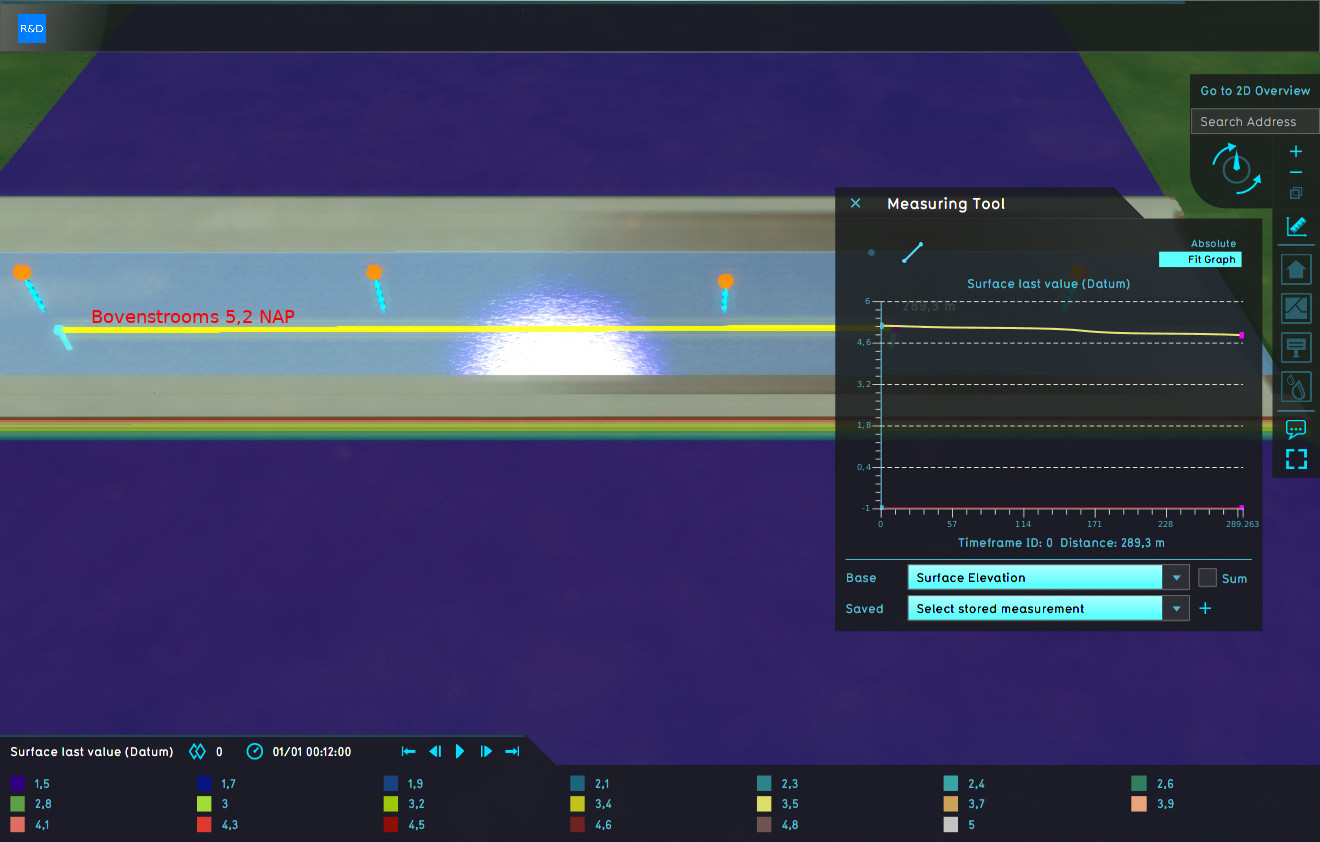
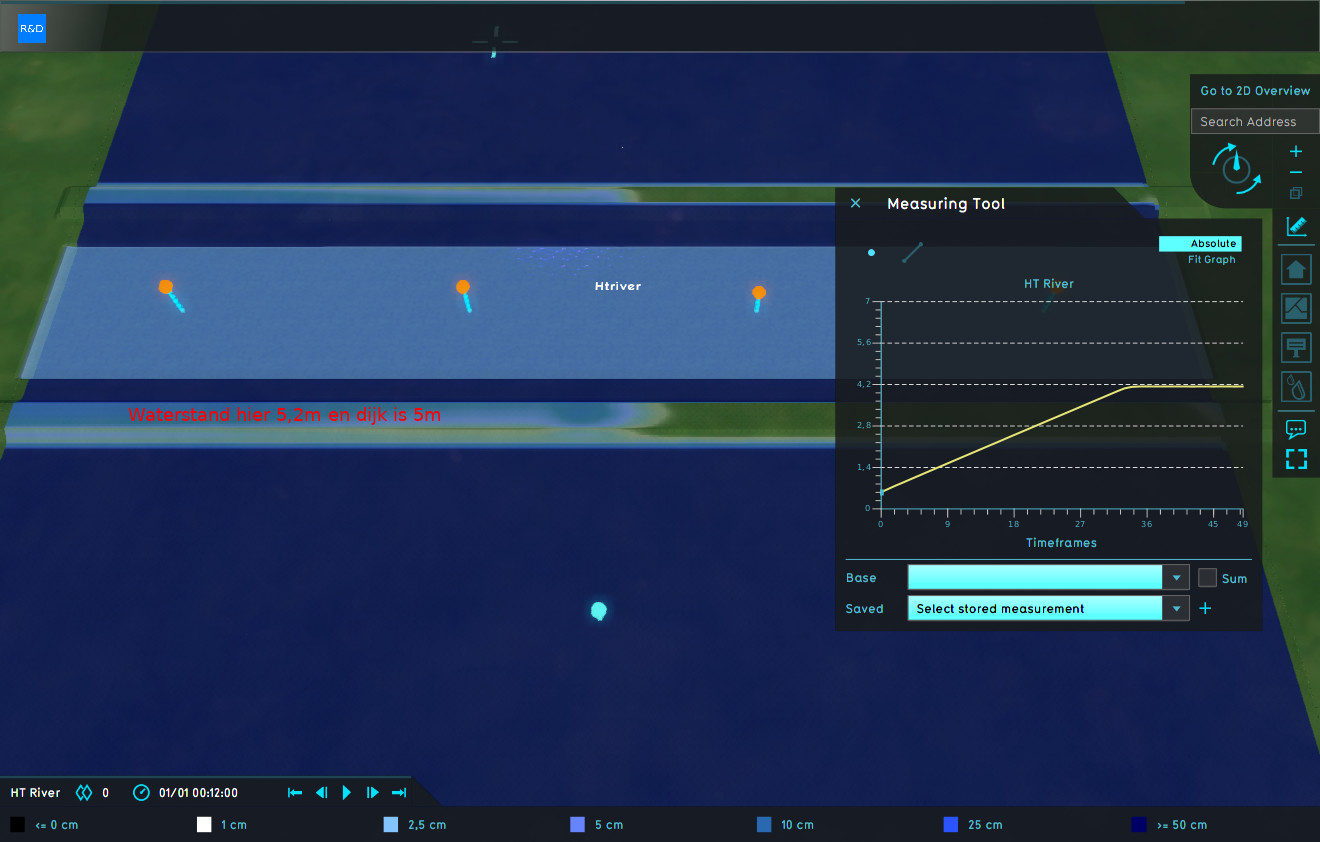
| 3 | Now, you have set the water level for the river. In the example here, the level starts at 5.2 NAP and ends at 4.8 NAP. The water barrier by the river is 5m NAP, meaning that there will be overflow (flooding) upstream, but not downstream. | |
| 4 | Over time, the land next the river fills up with water, but only in the upstream part. |


