How to import AutoCAD BLOCKS with attributes: Difference between revisions
Jump to navigation
Jump to search
mNo edit summary |
mNo edit summary |
||
| Line 43: | Line 43: | ||
* [[How to export a DXF reference file for a project]] | * [[How to export a DXF reference file for a project]] | ||
* [[How to add spatial elements to measure from a DXF file]] | * [[How to add spatial elements to measure from a DXF file]] | ||
* [[How to set the | * [[How to set the geo-location of a DXF]] | ||
* [[How to set the unit of measurement for a DXF]] | * [[How to set the unit of measurement for a DXF]] | ||
* [[How to create a Geo Plugin to import Buildings from a DXF]] | * [[How to create a Geo Plugin to import Buildings from a DXF]] | ||
Revision as of 07:23, 12 December 2023
DWG drawings from AutoCAD can contain BLOCK data with specific attributes.CAD blocks are named groups of objects that act as a single 2D or 3D object. You can use them to create repeated content, such as drawing symbols, common components, and standard details. In this example we will be using theTygron NLCS Basis interpretatie Template as a Geo Plugin. This Geo Plugin contains a layer which can recognize an attribute from an incoming AutoCAD BLOCK. Let us first examine this Geo Plugin link to see how this works.
How to examine "Basis NLCS Interpretatie" template:
- Create a new project if your current project does not have the "Basis NLCS interpretatie" Geo Plugin.
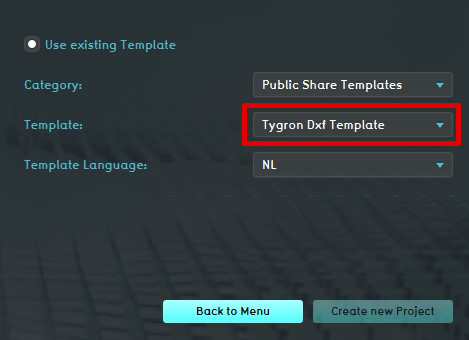
- When giving your project a name select "Use existing Template" and choose "Tygron Dxf Template". This will make sure that the "Basis NLCS interpretatie" is added tot your new project.
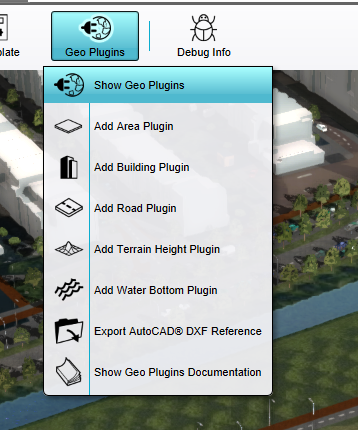
- When your project is loaded, go to Tools and click on Geo Plugins.
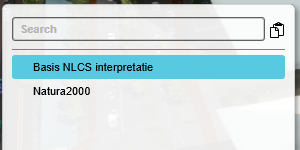
- In the left panel click on "Basis NLCS interpretatie"
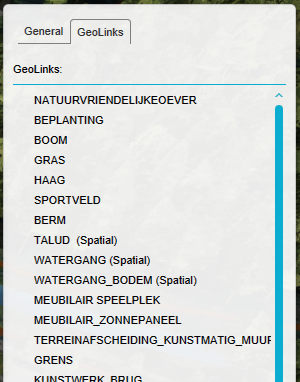
- In the right panel click on the GeoLinks tab to display all Links available in the Geo Plugin.
- Scroll down to locate the "BOOM BLOCK REFERENCE" and click on it. The bottom panel will open.
- In the bottom panel click on the "General" tab (if it is not already open).
- You can see that the Tygron Function "Standaard loofbomen" is chosen for this link. (Dutch for Decidious trees)
- Click on the next tab "Matching attributes" and notice that 2 attributes have been configured. One is called "LAYER" and the other "HEIGHT".
- Click on the "LAYER" attribute and note the value on the right side has been set to "BOOM BLOCKS". This value corresponds with the AutoCAD layer name when you export this project to a DXF Reference.
- Click on the HEIGHT attribute. No value is attached to this because we want this value to be filled dynamically by incoming DXF files which have a HEIGHT attribute in one of their BLOCK layers.
- Next go to the "Mapped Attributes" tab and click on the HEIGHT attribute. In this tab you can match incoming attributes with a specific Tygron attribute. In this case the HEIGHT attribute is mapped to "FLOOR_HEIGHT_M". In this example the "FLOOR_HEIGHT_M" functions as the height of a tree.
-
Tygron DXF Template
-
Geo Plugins
-
Basis NLCS interpretatie Geo Plugin
-
Geo Links
-
BLOCK Reference link
-
Matching attributes
-
Mapped attributes
How to import DXF with BLOCK attribute information:
- In this example we want to import a DXF which has a layer where trees are drawn. We also want these trees to be different heights instead of the standard Tygron tree height.
- Make sure that your DXF has the layer "BOOM BLOCK". In this layer the BLOCKS with the tree drawings must be located.
- Make sure that these BLOCKS have an attribute called HEIGHT and that every tree has a numerical value attached to this attribute. This will correspond with the height of the actual tree.[1]
- When ready, export the drawing to DXF.
- Finally import the DXF as a building or as a Measure from Future Design as normal.
- The Geo Plugin will match all incoming layers with the available Geo Links.
Notes
- You can also export your current Tygron Project to a DXF reference where all the layers from the Geo Plugin will be exported to AutoCAD layers.
How-to's
- How to import a DXF
- How to export a DXF reference file for a project
- How to add spatial elements to measure from a DXF file
- How to set the geo-location of a DXF
- How to set the unit of measurement for a DXF
- How to create a Geo Plugin to import Buildings from a DXF
- How to deal with a long processing DXF import
Videos

References
- ↑ About Defining and Attaching Block Attributes ∙ Found at: https://help.autodesk.com/view/ACD/2020/ENU/?guid=GUID-67A2DDAD-2217-412F-8AEF-D4495192F45B ∙ (last visited: 08-12-2023)
