How to update an existing GeoTIFF: Difference between revisions
Jump to navigation
Jump to search
No edit summary |
No edit summary |
||
| Line 6: | Line 6: | ||
|For the GeoTIFF you wish to update, select the "update" icon, and select the GeoTiff file you wish to update the existing file with. | |For the GeoTIFF you wish to update, select the "update" icon, and select the GeoTiff file you wish to update the existing file with. | ||
|The GeoTIFF file is now updated. Close the GeoTIFF Manager by selecting "Cancel". | |The GeoTIFF file is now updated. Close the GeoTIFF Manager by selecting "Cancel". | ||
}} | |||
{{article end | |||
|notes= | |||
* Using "Cancel" when updating data is recommended, to prevent accidentally applying a GeoTIFF to the component used to open the GeoTIFF Manager. | |||
|seealso=*[[GeoTIFF]] | |||
}} | }} | ||
[[Category:How-to's]] | |||
Latest revision as of 16:18, 30 January 2024

For some components in the Tygron Platform a GeoTIFF can be selected as data. All components referencing that data will keep a link to the selected GeoTIFF. The GeoTIFF can be updated in-place, which will cause all components with a link to it to use the new data.
How to update an existing GeoTIFF:
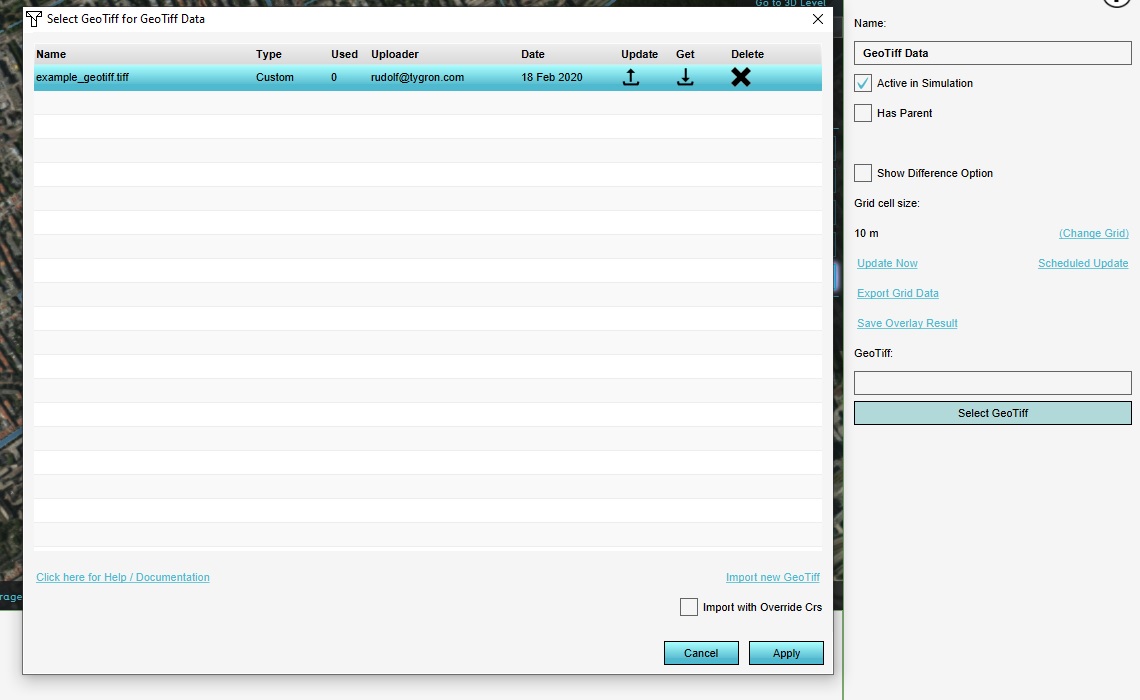
- Select any component with a GeoTIFF, and opt to select a GeoTIFF to open the GeoTIFF Manager.
- For the GeoTIFF you wish to update, select the "update" icon, and select the GeoTiff file you wish to update the existing file with.
- The GeoTIFF file is now updated. Close the GeoTIFF Manager by selecting "Cancel".
Notes
- Using "Cancel" when updating data is recommended, to prevent accidentally applying a GeoTIFF to the component used to open the GeoTIFF Manager.