How to add and remove a Zone

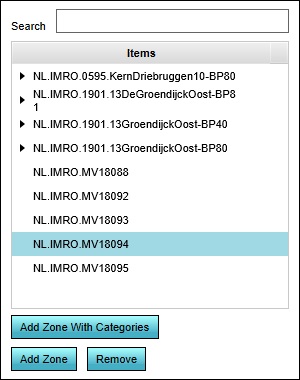
New zones can be added to the project by opening the Zoning panel in the editor. In the left panel, one or more new zones can then be added. To add a zone which does not restrict the categories of buildings allowed within it, select "Add Zone". To add a zone which does restrict the categories of buildings allowed, select "Add Zone With Categories". A new zone will appear in the list of zones.
Note that when a new zone is added, it is not yet present in the 3D world. Its contour must still be drawn in the 3D world for it to apply.
Existing zones can be removed by selecting them, and then selecting "Remove". When a zone is removed with child zones (displayed in the left panel as being one or more subitems of the zone), the child zones remain.
- Open the Zoning panel
- Select "Add Zone".
- Open the Zoning panel
- Select "Add Zone".
- Select "Add Zone With Categories".
- Open the Zoning panel
- Select the zone you wish to remove.
- Select "Remove"