How to configure the Water Overlays
This page describes several use cases and examples of configurations in the Flooding Overlay.
Simulate a levee breach scenario by a 3D waterbody
In this scenario we want to simulate a levee breach near an adjacent waterbody. In this example, the whole waterbody is present in the 3D project. This is important to have, to use the correct volume of the waterbody. If your waterbody is too large or your project is smaller, you can model the breach area differently, see therefore the use case below.
In the steps here, the breach area is drawn in the Editor. It is also possible to import a GeoJSON file with the location of the breach.
To determine wat the level is of the breach floor, a tip is to click in the 3D- world on several places near where you want to have the breach to know the ground height and also click in the adjacent waterbody to know the depth. With these parameters, you can determine your breach floor. For example:
- The waterbody has a depth of -2.5 and the water level is -1
- The land next to the dike has a height of -4
- The breach in the dike can then have a depth ranging from -4 to -1. In this use case we would probably set in on -2.
- In the Editor go to GEO Data --> Areas
- Add a new area by clicking in the bottom left corner.
- Select the newly created area (named Area) and give it a fitting name on the right
- Zoom in to the location where you want to have the breach and click on the Adjust area button
- Select the location of your breach and click on Apply settings.
- Go to the tab attributes and set the breach floor attribute.
- Add a Flooding Overlay and go to the Configuration Wizard of the Flooding Overlay.
- In step 2.1 select the attribute that specifies your breach floor so the software knows which area is your breach area.
- Click on Next.
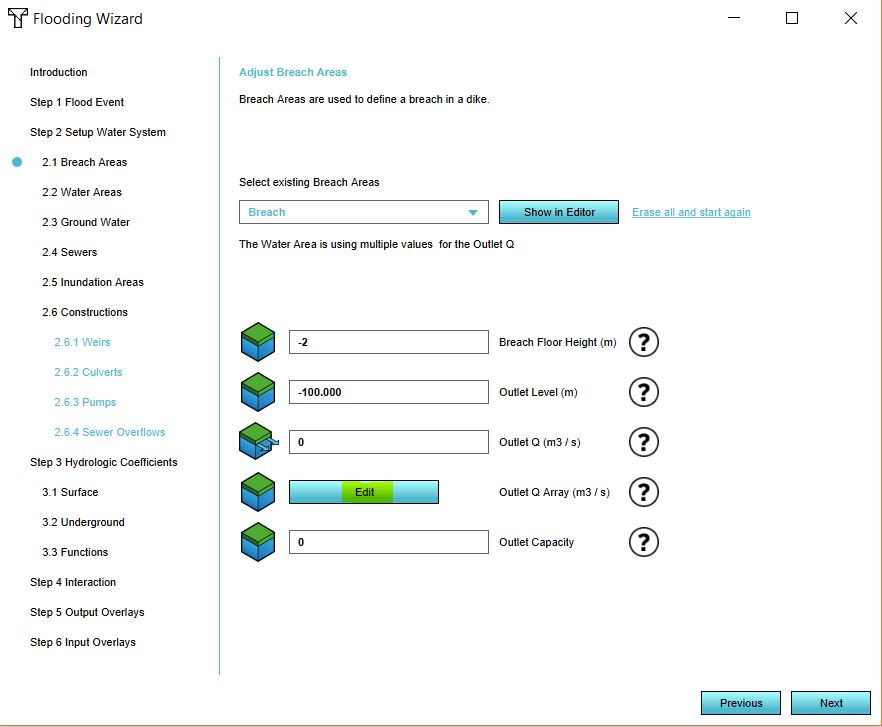
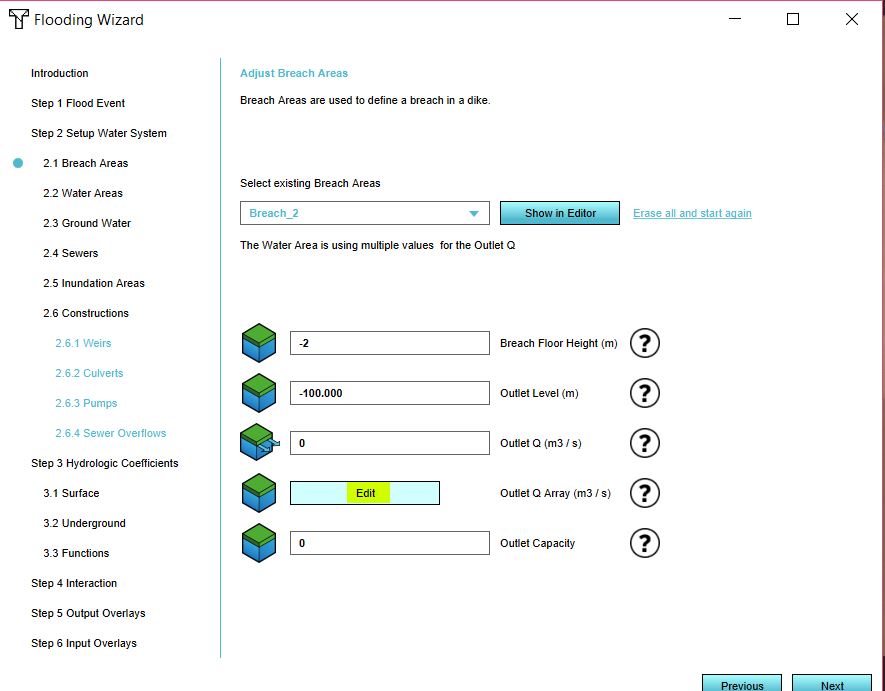
- In the dropdown menu choose the name of your breach area and check if the attributes correspond with what you have set as attributes or change them here.
- In step 2.2 import your water level areas with at least a water level attribute. Make sure the water level areas do not overlap the breach area. If they do, minimalise the wizard and remove the part of the areas in the Areas menu or solve it in a GIS and import the water levels again.
- Finish the Wizard and refresh the Overlay.
- After the flooding is calculated, check the Water Balance to get more insight in your scenario.
Time-controlled flow rate in a Breach area
To create a variable Outlet Q in a breach area, a CSV (comma-separated values) file can be imported. Below the steps on how to create such a breach area. For this example we create the CSV in Excel, but you can also use another program to create the CSV.
- Open Excel.
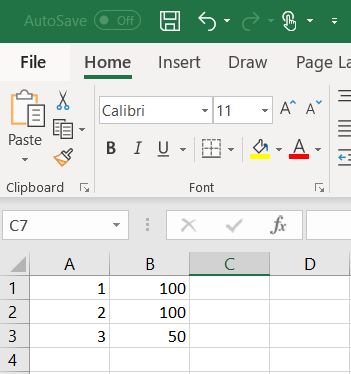
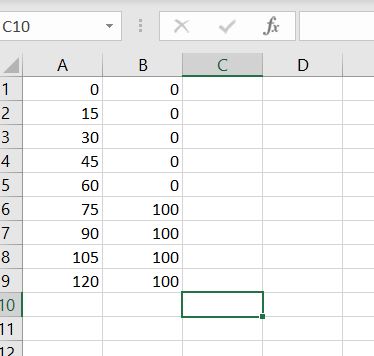
- In the first column, define your time steps. This can be in seconds, minutes, hours or days.
- Add the corresponding flow rates per step in the second column.
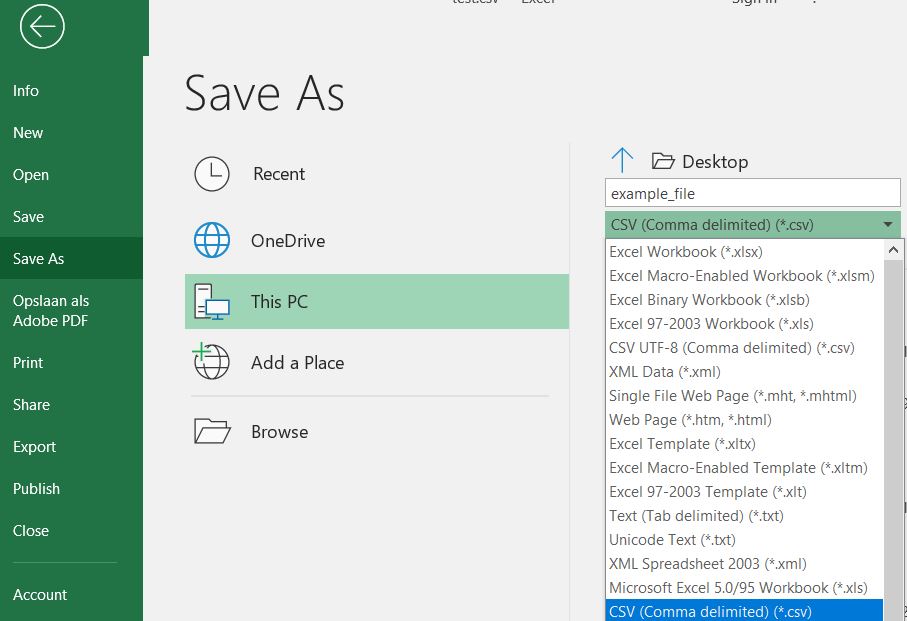
- Save the Excel as a CSV.
- Either add a breach area or have your GeoJSON file with your breach area ready. The area should have at least a breach floor attribute.
- Add a Flooding Overlay.
- Go to the Configuration Wizard of the Flooding Overlay.
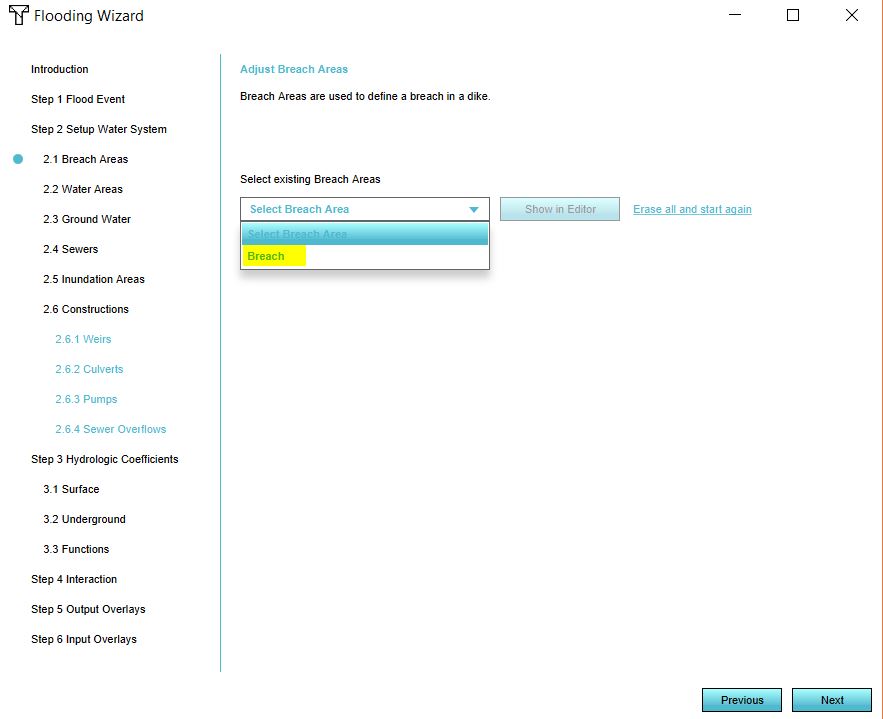
- In step 2.1 either select the attribute that specifies your breach floor or import your GeoJSON file.
- Click on Next.
- In the dropdown menu, select your breach area. Now click on Edit.
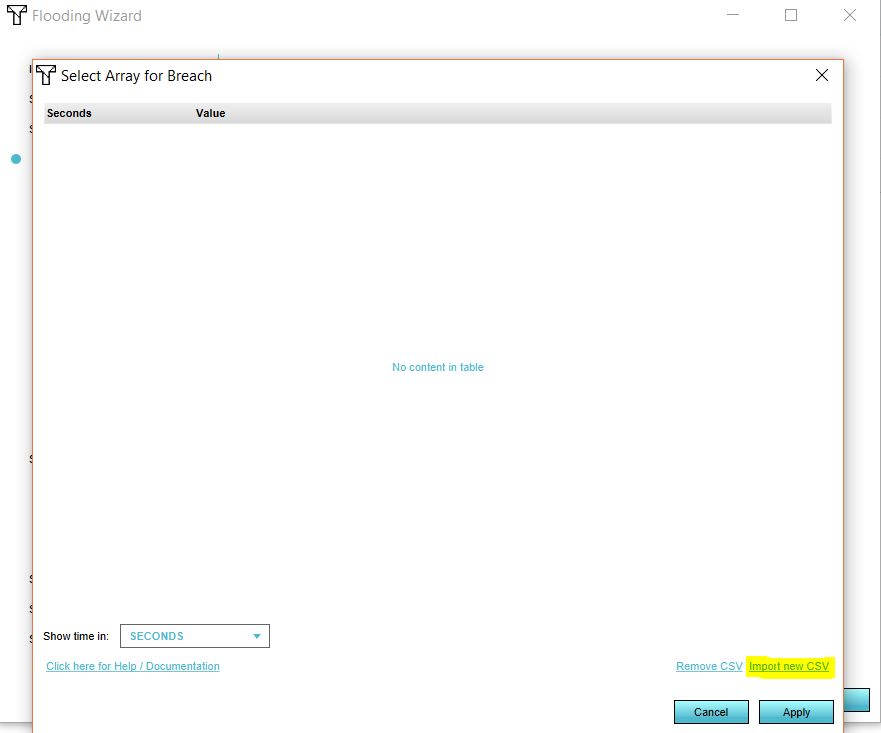
- Import your CSV file by selecting the CSV file.
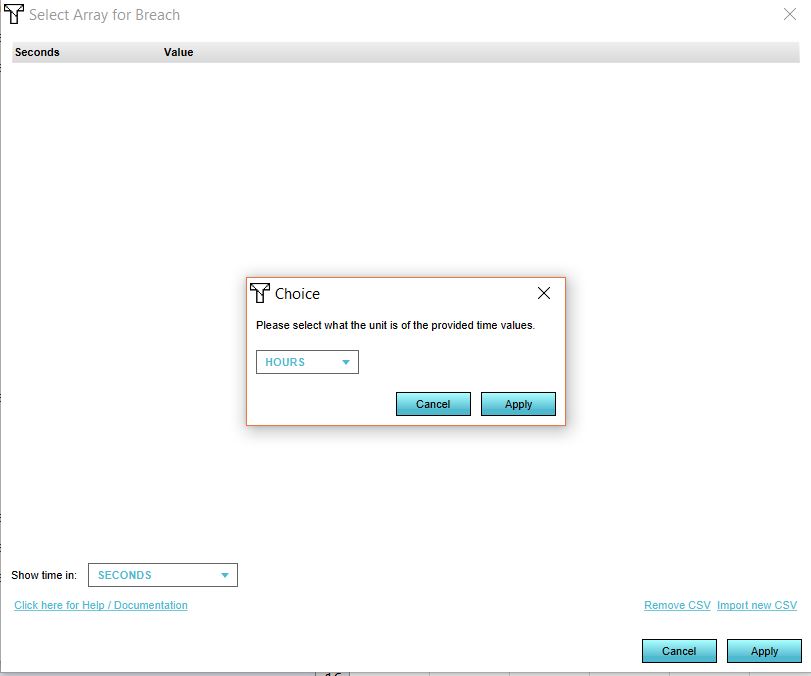
- Select the time units in your file.
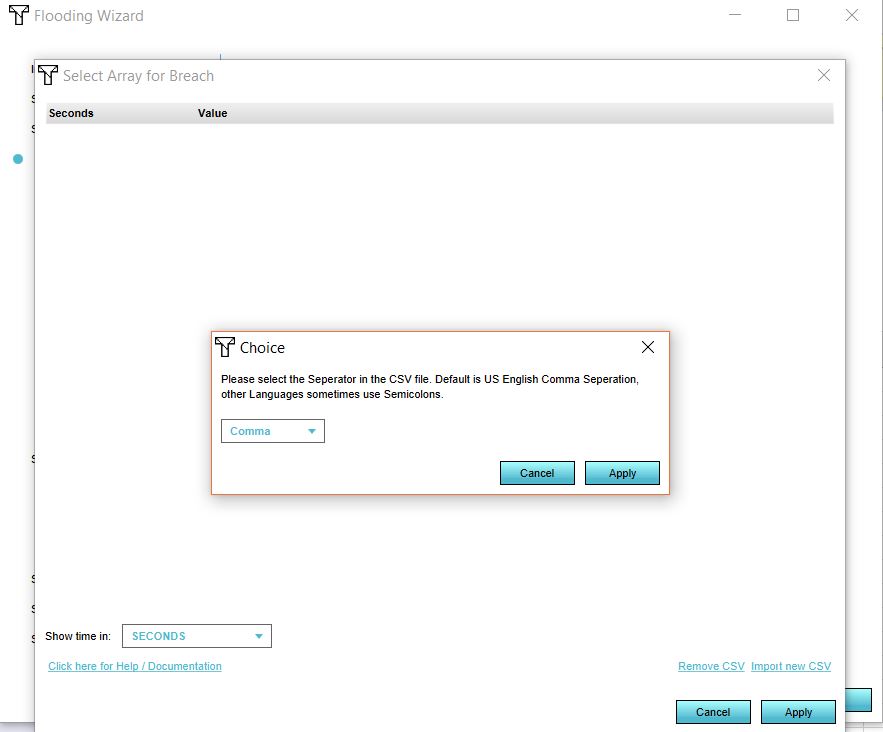
- Select the seperator for your file.
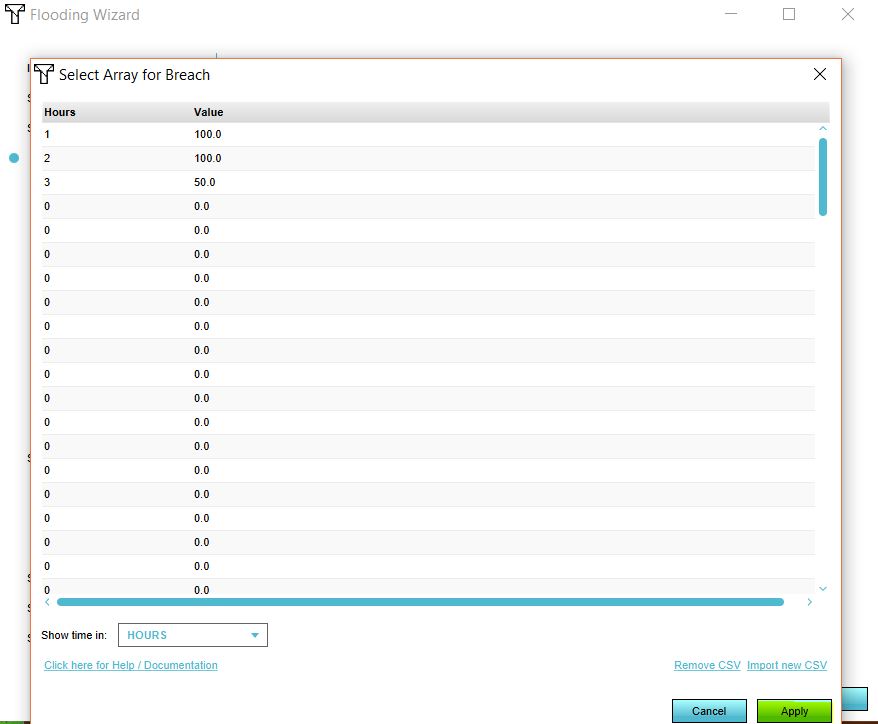
- Click on Apply.
Multi breach simulation
It is also possible to simulate a situation in where there is first one levee breach, following by another (or multiple). Therefore we also make use of the variable Outlet Q as mentioned above in the previous use case. In the steps below, two breaches are demonstrated, but the same steps apply to multiple breaches.
- Either add two breach areas or have your GeoJSON file with your breach areas ready. The areas should have at least a breach floor attribute.
- Add a Flooding Overlay.
- Go to the Configuration Wizard of the Flooding Overlay.
- In step 2.1 either select the attribute that specifies your breach floor or import your GeoJSON file.
- Click on Next.
- In the dropdown menu, select the breach area that breaks second.
- Click on Edit and import the CSV file. Structure the data in the CSV in a way that at the start of the simulation, the outlet is 0.
- Finish the Wizard and refresh the Overlay.
Import waterdepth data
Create in- and outlet areas
To simulate a scenario of for example a flood wave in a river, you can create in- and outlet areas. These are basically breach areas. The inlet area demonstrates the inflow of water, the outlet area demonstrates the outflow of water.
- Draw two areas at the one side of the river where water will flow in and at the other side of the river where the water flows out. It is also possible to import a GeoJSON file with these areas.
- The areas should have a breach floor attribute. Give the inlet area an outlet level and/or outlet Q. This depends on the data you have of the scenario. If you know for example the water level of a flood wave, use the outlet level. If you know the flow rate, use the outlet Q. Both is also possible, then the outlet level has precedence over the outlet Q. For the outlet area, enter, a negative outlet Q value and/or an outlet level.
- Add a Flooding Overlay and go to the Configuration Wizard of the Flooding Overlay.
- In step 2.1 either select the attribute that specifies your breach floor or import your GeoJSON file.
- Click on Next.
- In the dropdown menu, check if the attributes of the areas correspond with what you have set as attributes.
- In step 2.2 import your water level areas with at least a water level attribute. Make sure the water level areas do not overlap the in- and outlet areas. If they do, minimalise the wizard and remove the part of the areas in the Areas menu or solve it in a GIS and import the water levels again.
- Finish the Wizard and refresh the Overlay.
- After the flooding is calculated, check the Water Balance to get more insight in the scenario.
