How to add and configure hydraulic structures (Water Overlay)
Hydraulic structures can be manually drawn in a project or imported if you have a file with the structures and their locations. It is also possible to export the structures. Read below for the steps.
Manually add and remove hydraulic structures
How to add a hydraulic structure (example: inlet):
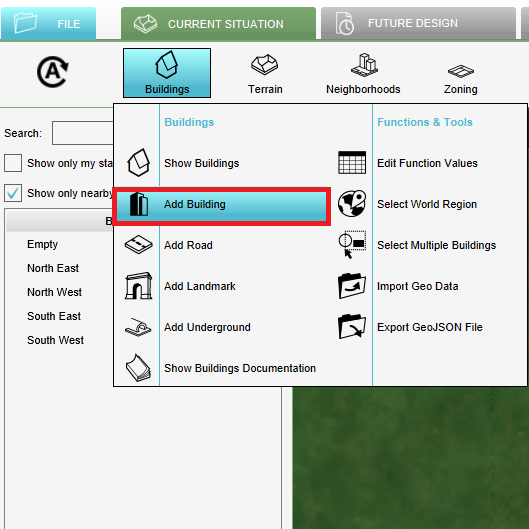
- From the Buildings dropdown select "Add Building".
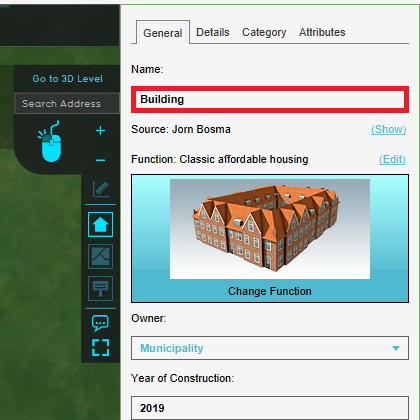
- Name your new building.
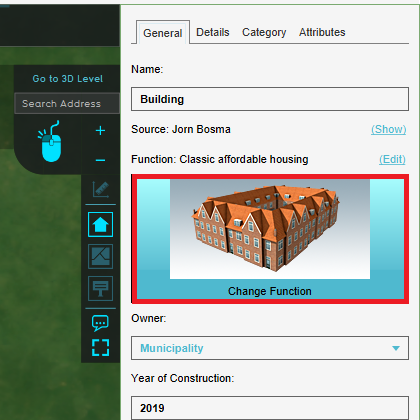
- Click Change Function.
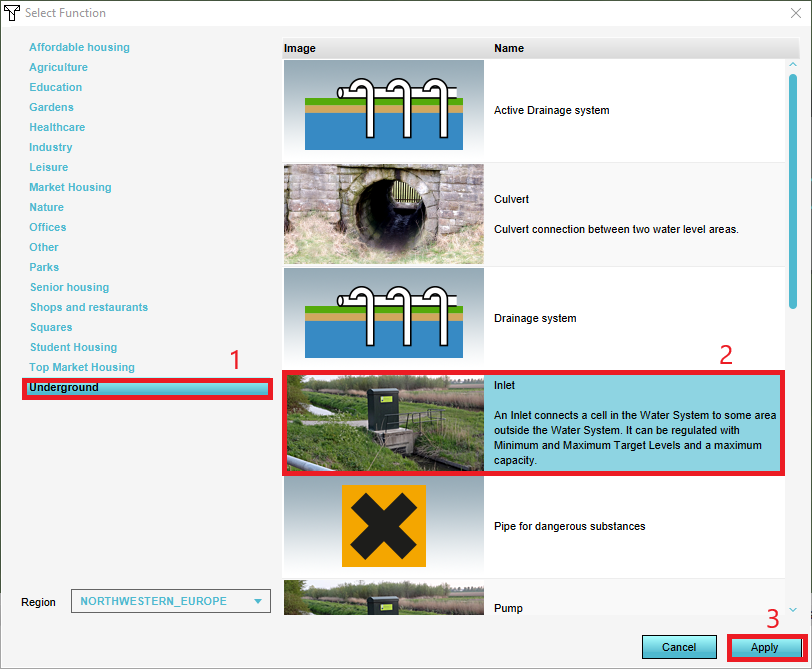
- Select (1) the correct category > (2) the desired function > (3) click Apply.
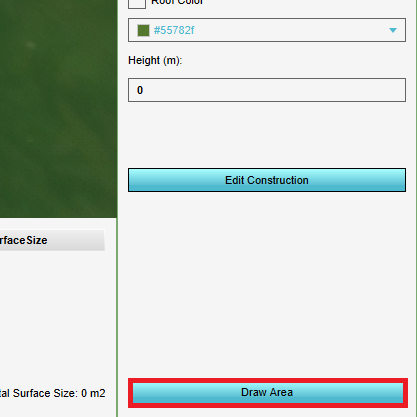
- Click Draw Area.
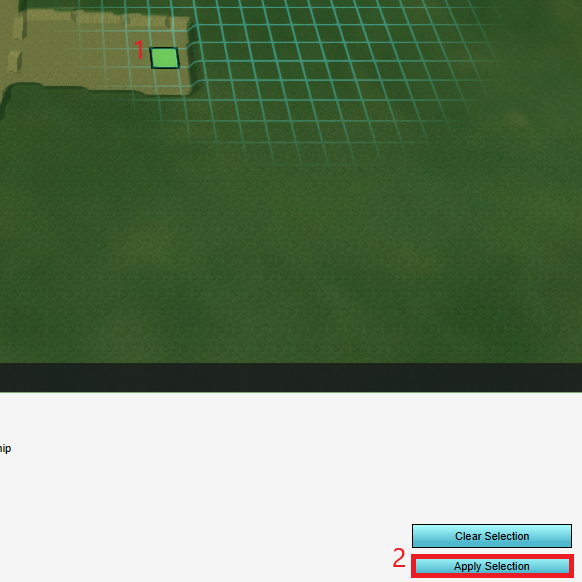
- Select (1) one or more grid cells on the map for the desired location of the new building > (2) Apply Selection.
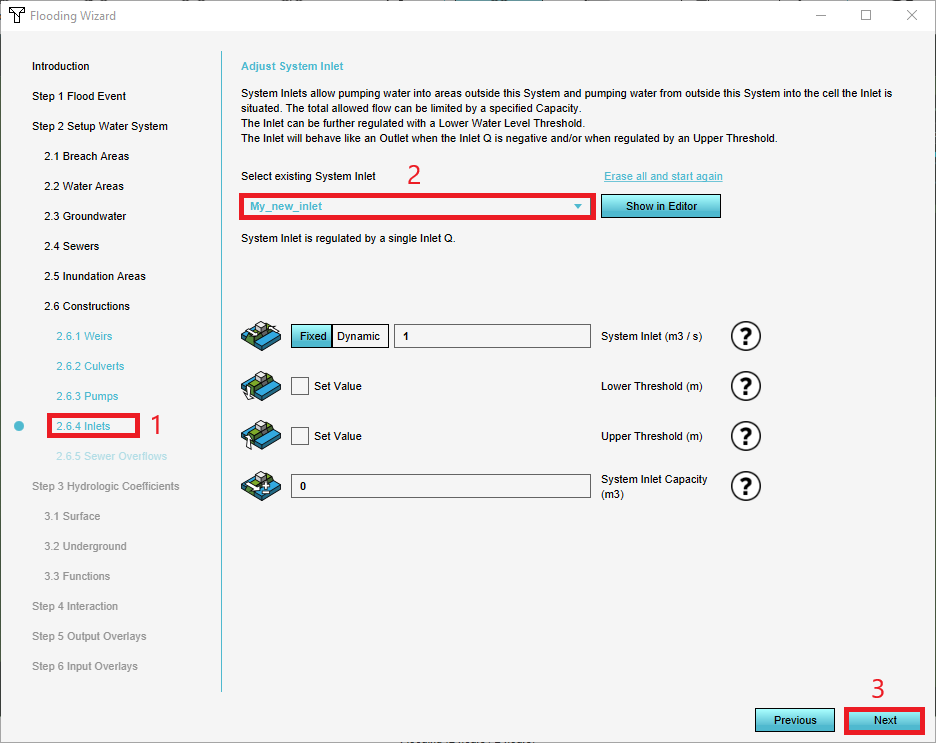
- In the Configuration Wizard of the Flooding Overlay at (1) the corresponding step > select (2) the new building > (3) Next.
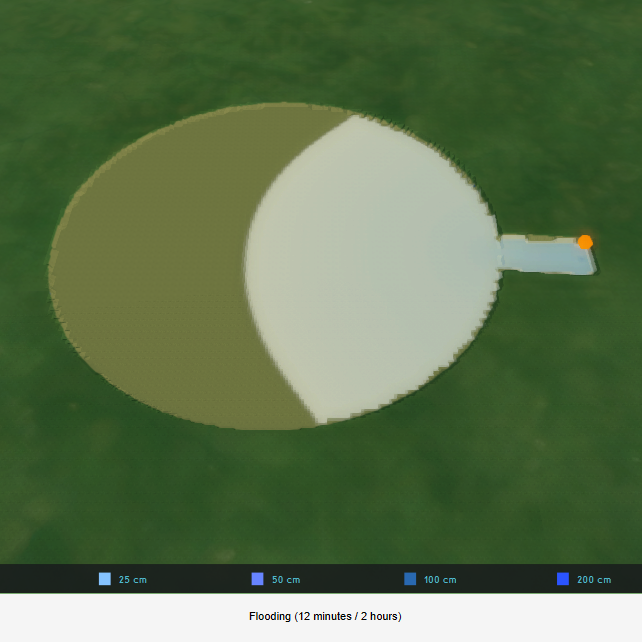
- Finally, test the new hydraulic structure by updating the overlay and running the simulation.
-
1. Select Add Building.
-
2. Name your new building.
-
3. Click Change Function.
-
4. Select (1) the correct category > (2) the desired function > (3) click Apply.
-
5. Click Draw Area.
-
6. Select (1) one or more grid cells on the map for the desired location of the new building > (2) Apply Selection.
-
7. In the Configuration Wizard of the Flooding Overlay at (1) the corresponding step > select (2) the new building > (3) Next.
-
8. Finally, test the new hydraulic structure by updating the overlay and running the simulation.
How to remove a hydraulic structure (example: inlet):
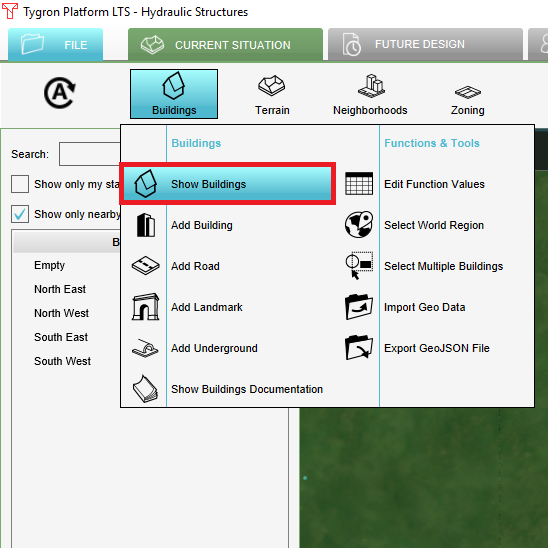
- From the Buildings dropdown select "Show Buildings".
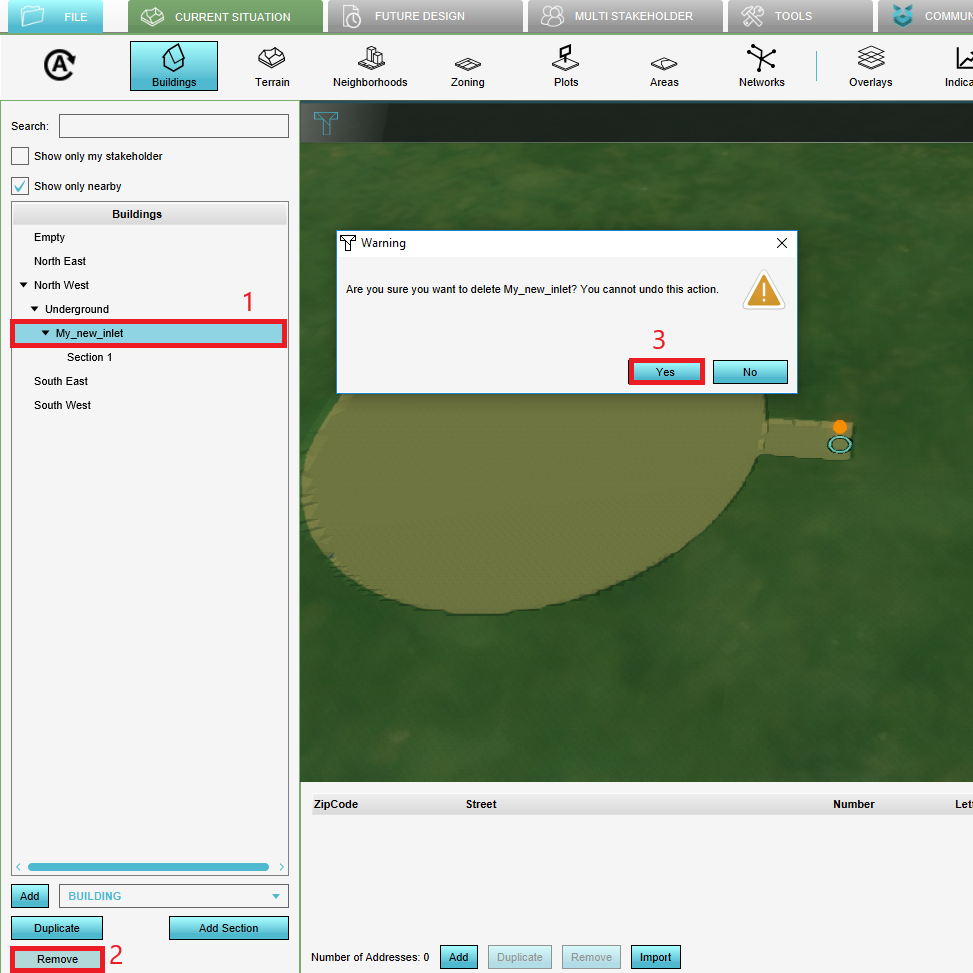
- Select (1) the building you whish to remove > (2) Remove > (3) Yes.
-
1. Select Show Building.
-
2. Select (1) the building you wish to remove > (2) Remove > (3) Yes.
Import and export hydraulic structures
How to import a hydraulic structure:
- After adding a Water Overlay, open the Water Overlay Wizard from the right panel.
- Click Next until you are at the step that represents the hydraulic structure you want to import.
- Click the second option to import the structure and start the Geo Data Wizard by clicking on the blue import button.
- Proceed by following the steps as stated on the Geo Data Wizard page.
- In the last stap, select the attribute names that represent the Overlay keys.
-
3. Select Import Geo Data.
-
5. Connect the attributes to the Overlay keys.
How to export a hydraulic structure:
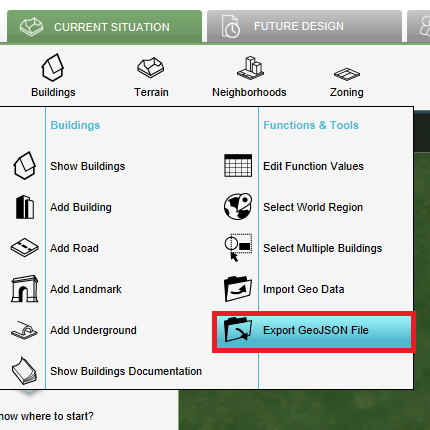
- From the Buildings dropdown select "Export GeoJSON File".
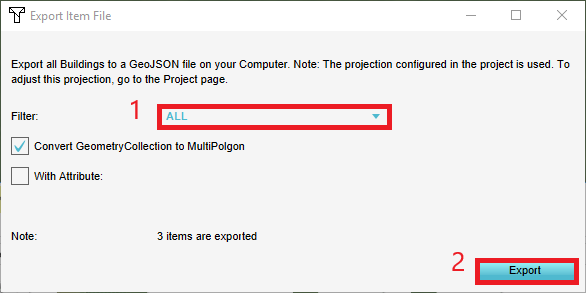
- (1) Filter on the building type you wish to export > (2) click Export.
- Proceed by going through the subsequent steps.
-
1. Select Export GeoJSON File.
-
2. (1) Filter on the building type you wish to export > (2) click Export.
