How to add a breach with external area manually: Difference between revisions
Jump to navigation
Jump to search


No edit summary |
No edit summary |
||
| Line 20: | Line 20: | ||
*For an example of the external breach area, take a look at the [[Testbed_water_module#1._Flooding_related_components|Testbed Water Module project]] available in all domains. | *For an example of the external breach area, take a look at the [[Testbed_water_module#1._Flooding_related_components|Testbed Water Module project]] available in all domains. | ||
* | * | ||
}} | |||
{{Water Module buttons}} | {{Water Module buttons}} | ||
Revision as of 17:12, 18 January 2023
How to add a breach with an external area to a Flooding Overlay manually:
- Add a new Area to the project. This will be the breach area.
- Draw the breach area in the 3D world, in the location where the water from the breach should emerge (see tips below in gallery).
- Add an Attribute to the created Area, with the breach height attribute name and a height value.
- Open the Flooding Overlay wizard.
- Continue to the step concerning breaches.
- Set the values of external area, external water level, and external surface level.
- The configuration wizard of the Flooding Overlay can now be closed.

It is best to draw the breach area not too close to the water body. Also, the breach area does not have to cover the whole levee, but only the slope of the levee on the side of the area that is going to inundate.
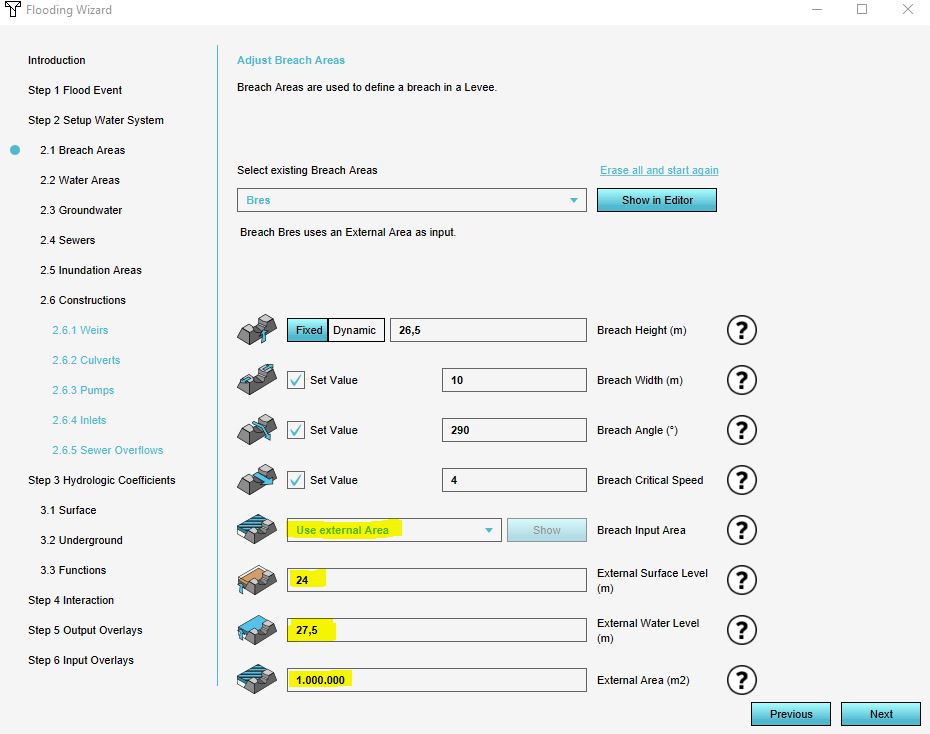
Select the external option in the wizard and fill in the external water level, surface level and area.


