How to add a breach with input area manually: Difference between revisions
No edit summary |
No edit summary |
||
| Line 26: | Line 26: | ||
For an example of the internal breach area, take a look at the [[Testbed_water_module#1._Flooding_related_components|Testbed Water Module project]] available in all domains. | For an example of the internal breach area, take a look at the [[Testbed_water_module#1._Flooding_related_components|Testbed Water Module project]] available in all domains. | ||
}} | }} | ||
Revision as of 12:45, 18 January 2023
- Add an Area to the project. This will be the breach area.
- Draw the breach area in the 3D world, in the location where the water from the breach should emerge (see tips below in gallery).
- Add an Attribute to the created Area, with the breach height attribute name and value.
- Add another Area to the project. This will be the input area.
- Draw the input area in the 3D world, in the location from where water should feed into the breach (see tips below in gallery).
- Add an Attribute to the created Area, with the breach input area attribute name and value.
- Open the Overlay's Flooding overlay wizard and continue to the step concerning breaches.
- For the breach input area, select the created input area.
- Continue with the wizard.

It is best to draw the breach area not too close to the water body. Also, the breach area does not have to cover the whole levee, but only the slope of the levee on the side of the area that is going to inundate.
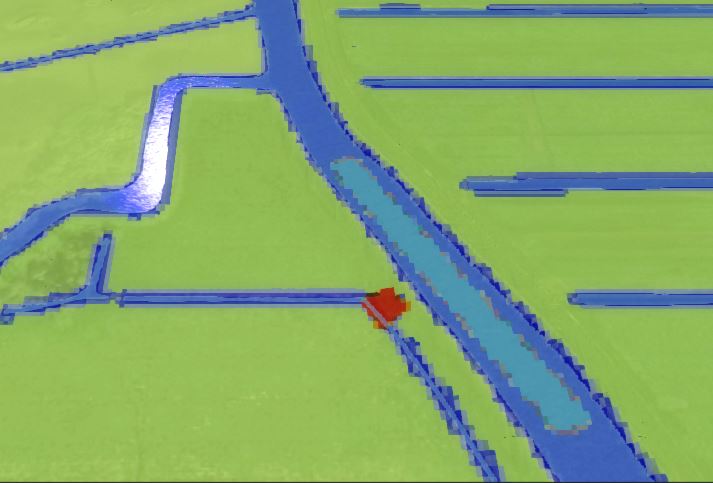
Since the breach is a local terrain height manipulation (red area in image), the internal breach area (light blue in image) should also be a small locally defined area, close to the breach.
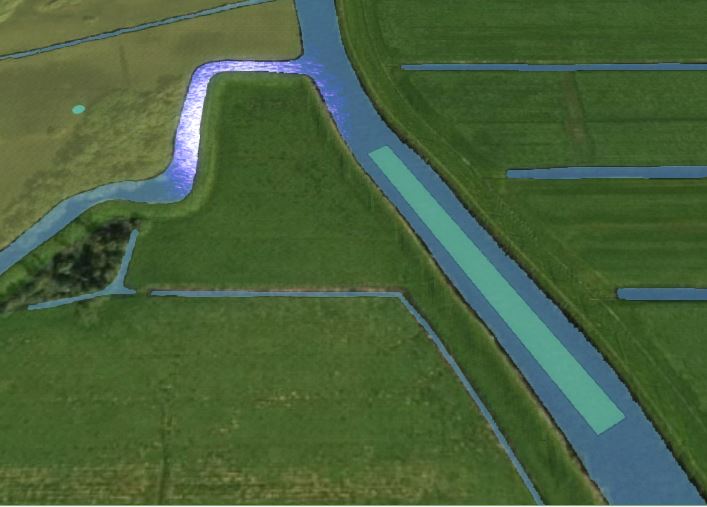
On the location of the internal area, the terrain height should be uniform. Therefore make sure the area is not too close to the edges of your waterway, since at the edges the terrain will be higher.
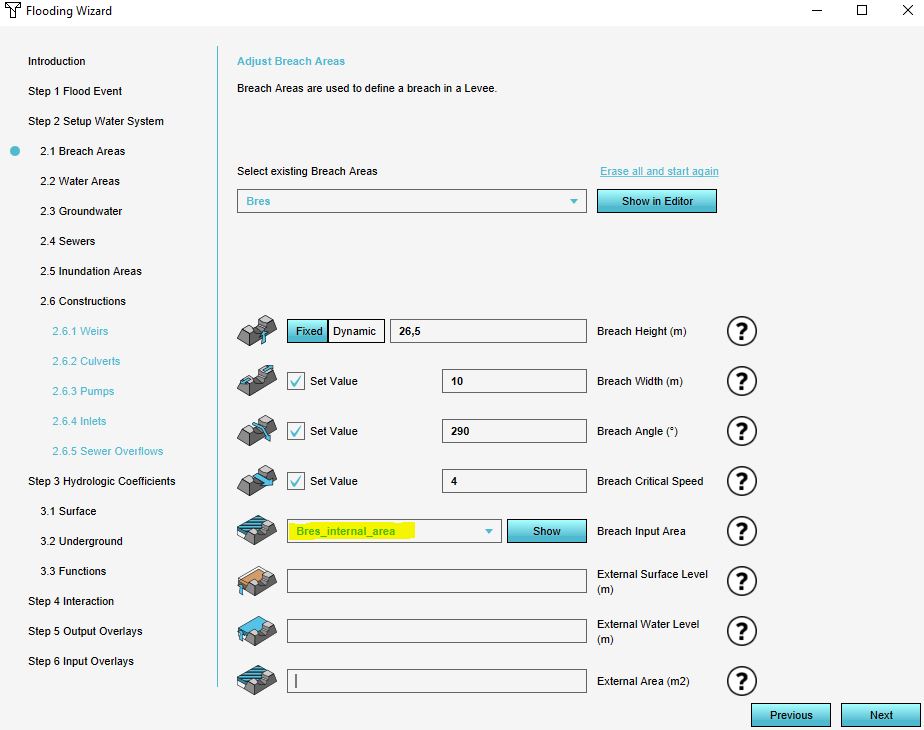
In the wizard, select the internal breach area. If the name of the area is not in the dropdown menu, make sure the area has a breach input area attribute name and value.


Notes
Currently, it is only feasible to create a breach with an input area via the configuration wizard, requiring the Flooding overlay specifically.
If the Water Overlay you are adding the breach to has a changed key for the breach height (or any other attributes of the breach), make sure that the Attribute you add to the Area has the name the key is set to.