How to import and assign a texture in ArcGIS Pro: Difference between revisions
Jump to navigation
Jump to search
No edit summary |
No edit summary |
||
| (5 intermediate revisions by 3 users not shown) | |||
| Line 1: | Line 1: | ||
Below the steps on how to import and assign a texture to 3D models in ArcGIS Pro. | Below the steps on how to import and assign a texture to 3D models in [[ArcGIS Pro]]. | ||
{{editor steps|title=import texture map and assign to model in ArcGIS Pro|In ArcGIS Pro select the imported multipatch model from the contents pane.|Got to "Edit" and select the "Modify" button from the "Features" Section of the tab. The "modify features" pane appears on the right side.|Expand "Reshape" and click Multipatch texture.|In the pane, click Active Select and select the multipatch feature.|The selected feature appears in a list, and the editing toolbar appears at the bottom of the scene.|Click Load Texture. A file browser appears|Click Apply.}} | {{editor steps|title=import texture map and assign to model in ArcGIS Pro | ||
|In ArcGIS Pro select the imported multipatch model from the contents pane. | |||
|Got to "Edit" and select the "Modify" button from the "Features" Section of the tab. The "modify features" pane appears on the right side. | |||
|Expand "Reshape" and click Multipatch texture. | |||
|In the pane, click Active Select and select the multipatch feature. | |||
|The selected feature appears in a list, and the editing toolbar appears at the bottom of the scene. | |||
|Click Load Texture. A file browser appears | |||
|Click Apply. | |||
}} | |||
To learn more about applying textures to a multipatch feature in ArcGIS Pro go to | To learn more about applying textures to a multipatch feature in ArcGIS Pro go to https://pro.arcgis.com/en/pro-app/help/editing/apply-textures-to-a-multipatch-feature.htm (Applying textures to Multipatch feature) | ||
<gallery mode="nolines"> | <gallery mode="nolines"> | ||
| Line 10: | Line 18: | ||
File:Load_texture.jpg|Load texture | File:Load_texture.jpg|Load texture | ||
</gallery> | </gallery> | ||
{{article end| | |||
notes= | |||
* When importing the model into the {{software}}, keep in mind that currently wrap mode: repeat is not supported in atlas textures | |||
* Also only textures in JPEG format are supported | |||
}} | |||
{|class="wikitable" style="margin: auto; background-color:#ffffcc;" | |||
| [[How_to_create_an_SLPK_file|<<Back to SLPK manual]] | |||
|} | |||
[[Category:How-to's]] | |||
Latest revision as of 15:25, 30 January 2024
Below the steps on how to import and assign a texture to 3D models in ArcGIS Pro.
How to import texture map and assign to model in ArcGIS Pro:
- In ArcGIS Pro select the imported multipatch model from the contents pane.
- Got to "Edit" and select the "Modify" button from the "Features" Section of the tab. The "modify features" pane appears on the right side.
- Expand "Reshape" and click Multipatch texture.
- In the pane, click Active Select and select the multipatch feature.
- The selected feature appears in a list, and the editing toolbar appears at the bottom of the scene.
- Click Load Texture. A file browser appears
- Click Apply.
To learn more about applying textures to a multipatch feature in ArcGIS Pro go to https://pro.arcgis.com/en/pro-app/help/editing/apply-textures-to-a-multipatch-feature.htm (Applying textures to Multipatch feature)
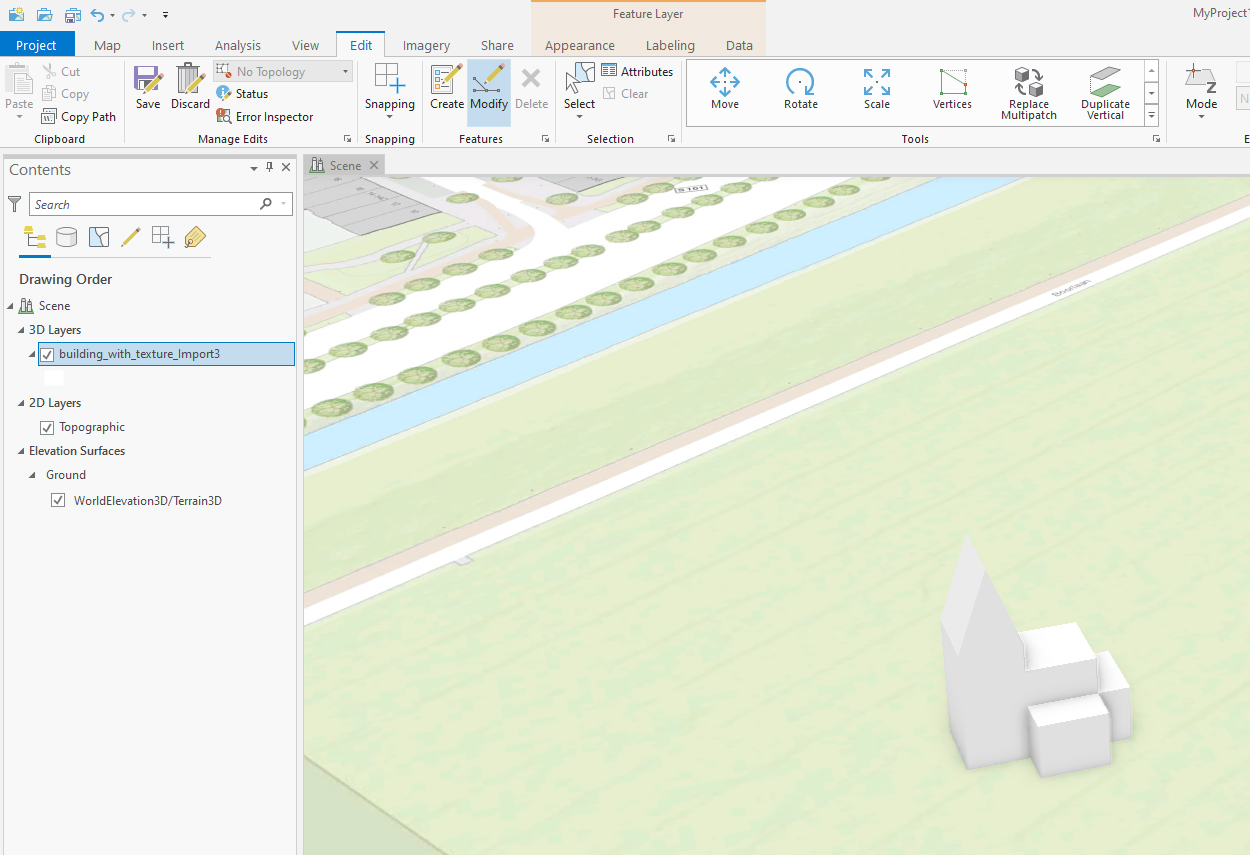
Modify
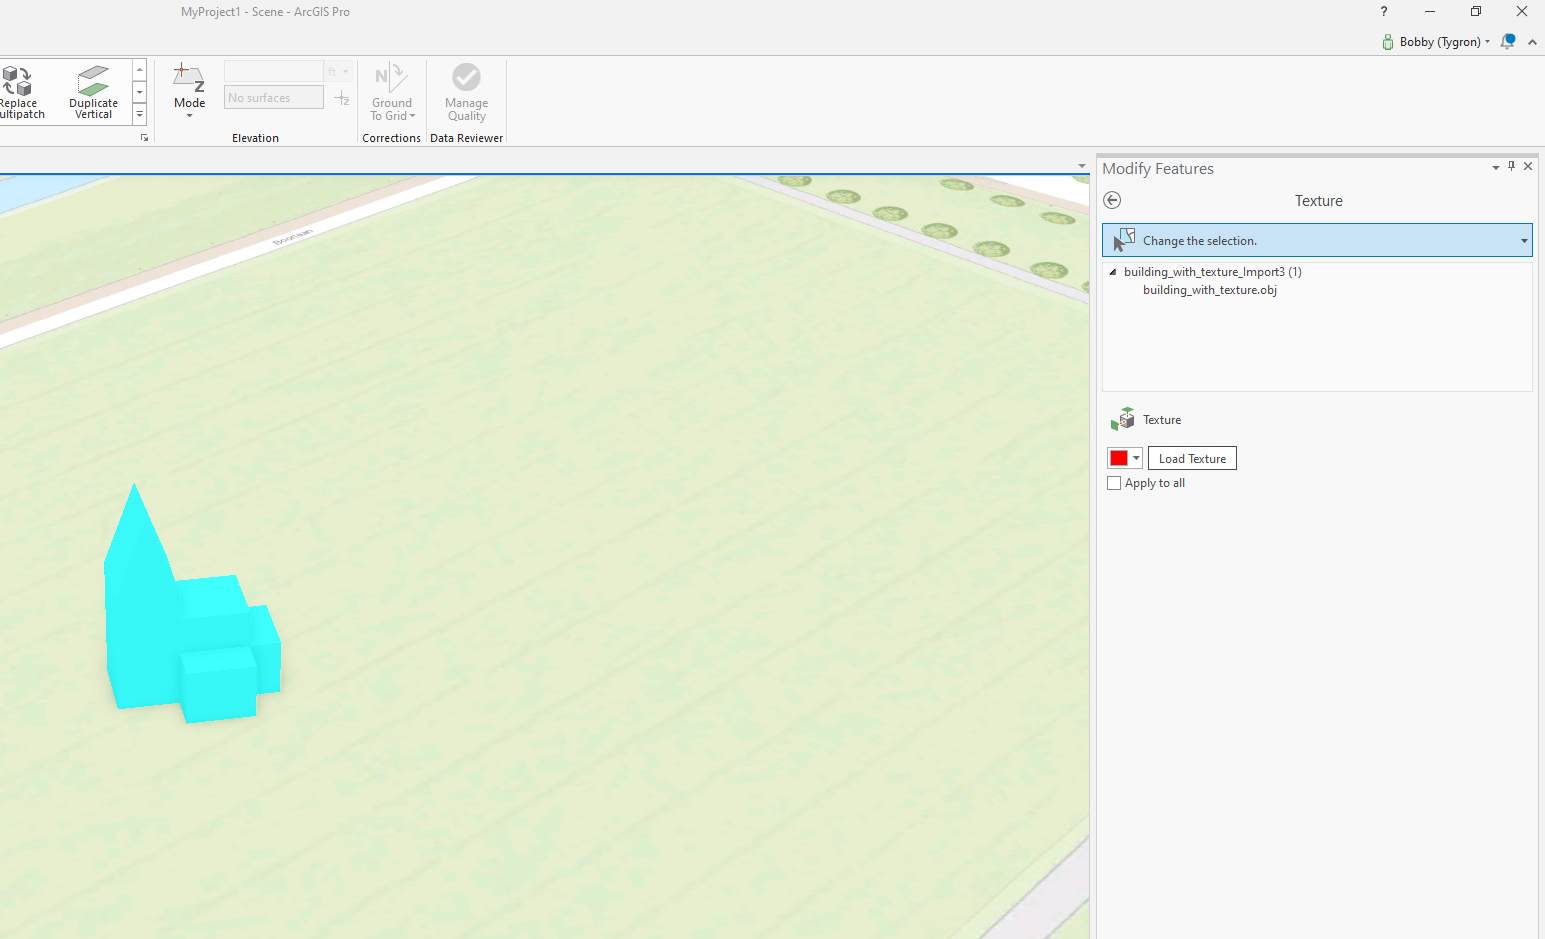
Active Select
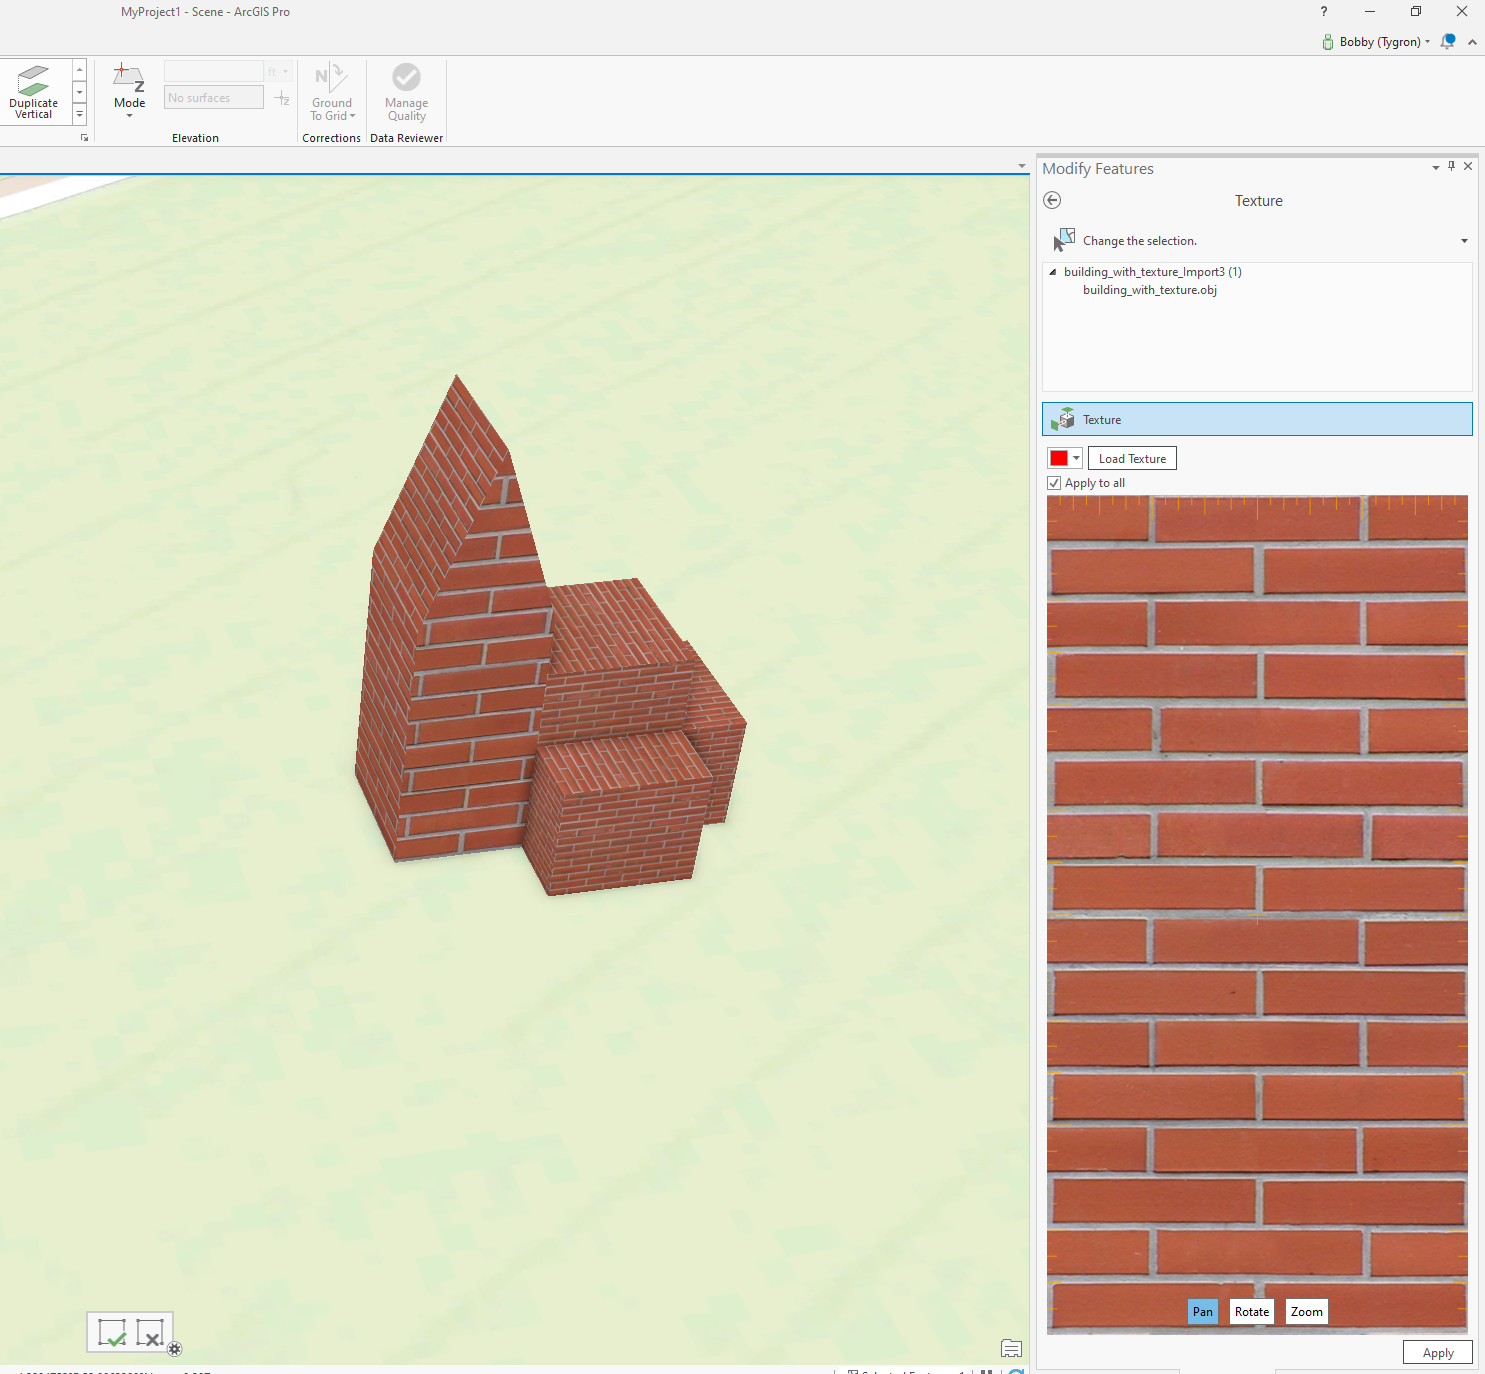
Load texture


Notes
- When importing the model into the Tygron Platform, keep in mind that currently wrap mode: repeat is not supported in atlas textures
- Also only textures in JPEG format are supported
| <<Back to SLPK manual |