How to prepare BIM data to import in ArcGIS Pro: Difference between revisions
Jump to navigation
Jump to search
No edit summary |
No edit summary |
||
| (8 intermediate revisions by 3 users not shown) | |||
| Line 1: | Line 1: | ||
There are multiple options to import BIM data in [[ArcGIS Pro]]. Here we describe one of the options by first making use of ArcMap and the Data Interoperability extension to prepare and convert the BIM data to another 3D format and then importing this dataset in [[ArcGIS Pro]]. | |||
There are multiple options to import BIM data in ArcGIS Pro. Here we describe one of the options by first making use of ArcMap and the Data Interoperability extension to prepare and convert the BIM data to another 3D format and then importing this dataset in | |||
{{editor steps|title=prepare BIM data to import in ArcGIS Pro | |||
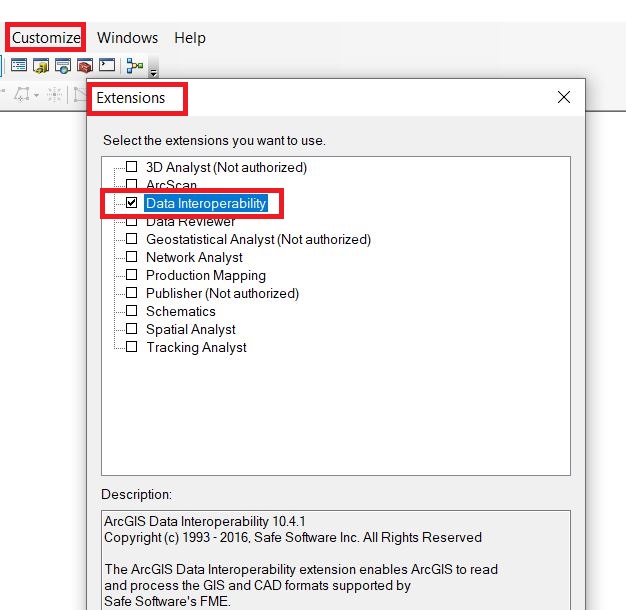
| Open ArcMap and make sure the Data Interoperability Extension is turned on | |||
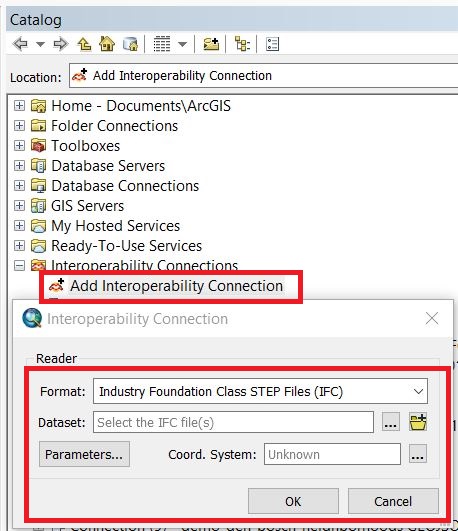
| Add a new interoperability connection and choose as format IFC. | |||
| When the connection is established, add the data to the map. | |||
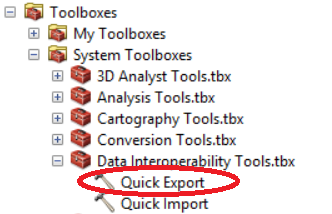
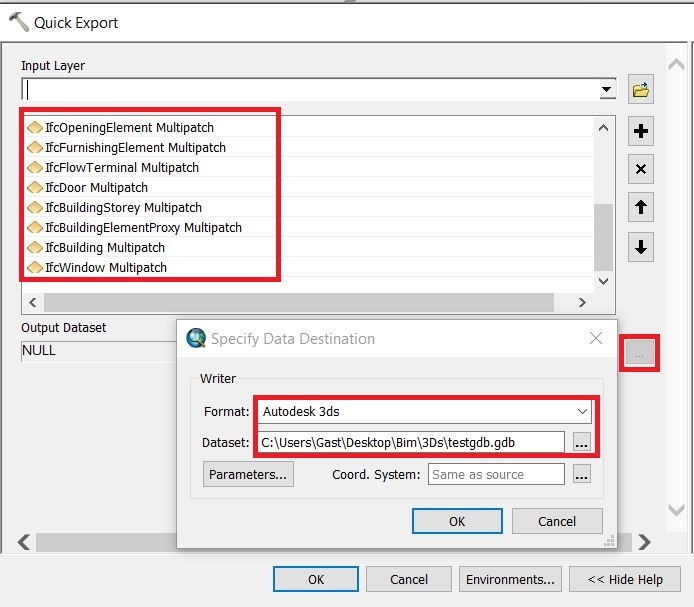
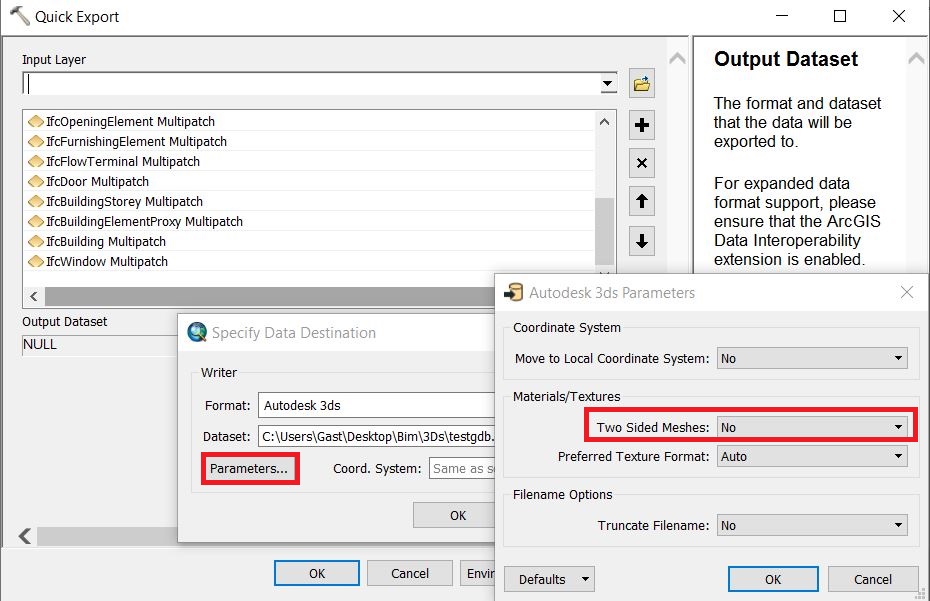
| Then open the Quick Export tool and choose as format 3ds. As input choose only the Multipatch layers. | |||
| In the parameters panel,uncheck the two sided meshes option. Then run the tool. | |||
| For each Multipatch layer, a 3ds file is created. | |||
| [[How to import a 3D model in ArcGIS Pro|Import the 3ds files in ArcGIS Pro]]. | |||
}} | |||
<gallery mode="nolines"> | <gallery mode="nolines"> | ||
File:Arcmap_data_interop_etension.JPG|Step 1 | |||
File:Add_interop_connection.JPG|Step 2 | |||
File:Quick_export.png|Step 4 | |||
File:Quick_export_to.JPG|Step 4 | |||
File:Parameters_quick_export_tool.JPG|Step 5 | |||
</gallery> | </gallery> | ||
{{article end | |||
|seealso= | |||
*[[ArcGIS Pro]] | |||
}} | |||
{|class="wikitable" style="margin: auto; background-color:#ffffcc;" | {|class="wikitable" style="margin: auto; background-color:#ffffcc;" | ||
| [[ | | [[How_to_create_an_SLPK_file|<<Back to SLPK manual]] | ||
|} | |} | ||
[[Category:How-to's]] | |||
Latest revision as of 15:54, 30 January 2024
There are multiple options to import BIM data in ArcGIS Pro. Here we describe one of the options by first making use of ArcMap and the Data Interoperability extension to prepare and convert the BIM data to another 3D format and then importing this dataset in ArcGIS Pro.
How to prepare BIM data to import in ArcGIS Pro:
- Open ArcMap and make sure the Data Interoperability Extension is turned on
- Add a new interoperability connection and choose as format IFC.
- When the connection is established, add the data to the map.
- Then open the Quick Export tool and choose as format 3ds. As input choose only the Multipatch layers.
- In the parameters panel,uncheck the two sided meshes option. Then run the tool.
- For each Multipatch layer, a 3ds file is created.
- Import the 3ds files in ArcGIS Pro.
Step 1
Step 2
Step 4
Step 4
Step 5


See also
| <<Back to SLPK manual |