How to remove areas with a filter: Difference between revisions
Jump to navigation
Jump to search
No edit summary |
No edit summary |
||
| Line 7: | Line 7: | ||
File:Add_area_001.jpg|Select "Areas" | File:Add_area_001.jpg|Select "Areas" | ||
File:Add_filter_001.jpg|Select "Group by Attribute" | File:Add_filter_001.jpg|Select "Group by Attribute" | ||
File: | File:Group_by.PNG|Type in the name of the attribute. | ||
File:Add_filter_005.jpg|Go to the attributes tab on the right panel to see which attribute to use. | File:Add_filter_005.jpg|Go to the attributes tab on the right panel to see which attribute to use. | ||
File:Add_filter_003.jpg|The Areas are grouped under the filter. | File:Add_filter_003.jpg|The Areas are grouped under the filter. | ||
Revision as of 09:21, 18 January 2021
Removing areas with a filter selection
To remove multiple areas wich share the same attribute:
How to remove multiple areas with a filter:
- Select "Areas" in the ribbon bar.
- Select "Group by Attribute" in the left panel.
- Type in the name of the attribute all te areas share which you would like to remove.Click on "OK". (The attributes can be assigned in the properties panel on the right side under the tab attributes. You can choose an existing or make a new one.)
- The filter is added to the list and the areas with the attribute are grouped under it.
- Select the filter and click on "Remove".
- When prompted if you want to delete all children choose "yes".
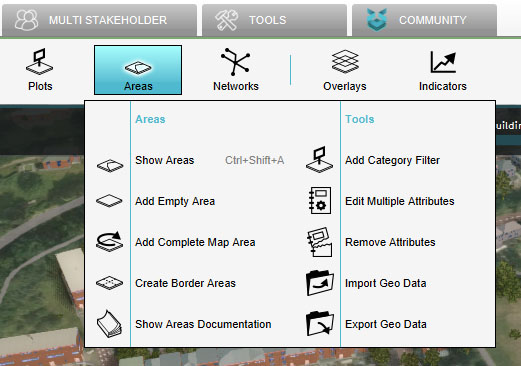
Select "Areas"
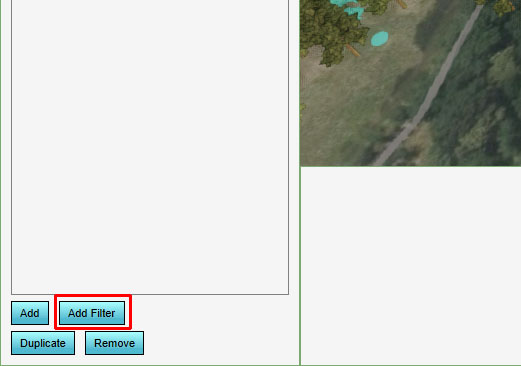
Select "Group by Attribute"

Type in the name of the attribute.
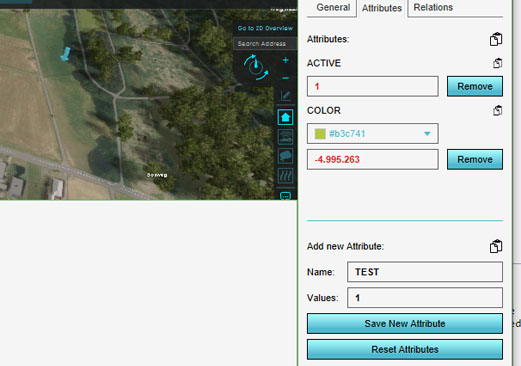
Go to the attributes tab on the right panel to see which attribute to use.
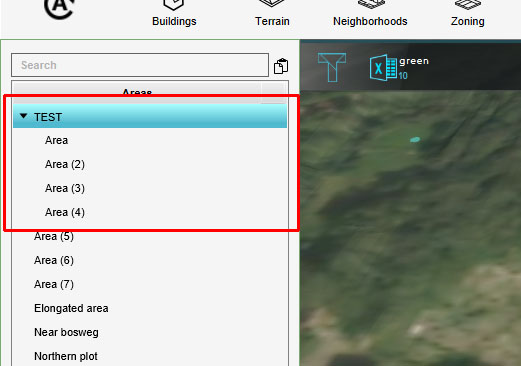
The Areas are grouped under the filter.
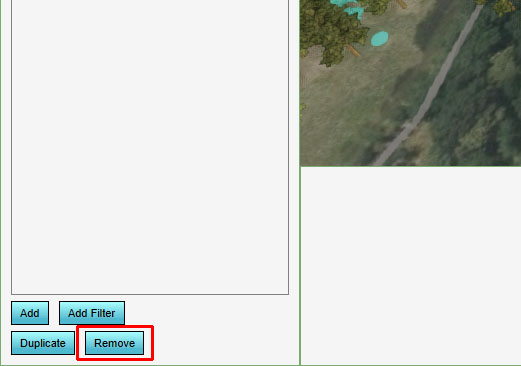
Click on Remove
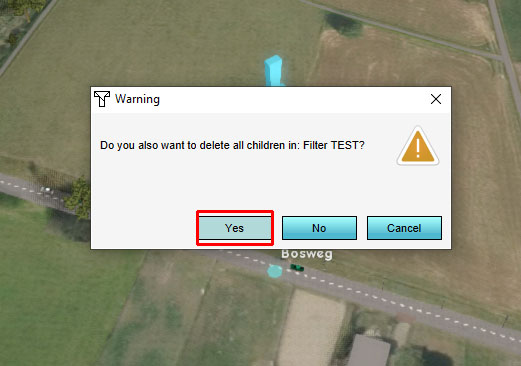
Click on yes to remove the entire filter group.


