How to use Unity to visualize data from a Session: Difference between revisions
Jump to navigation
Jump to search

No edit summary |
mNo edit summary |
||
| Line 1: | Line 1: | ||
{{stub}} | |||
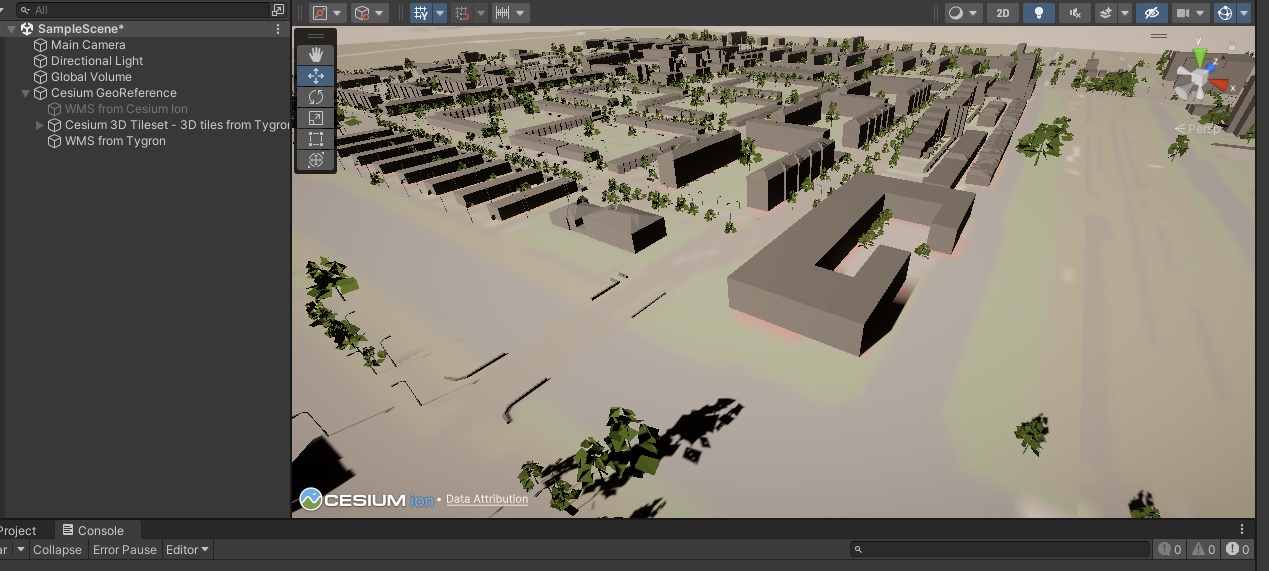
[[File:TygronUnityCesiumExample1.jpg|thumb|right|350px|Data from a Tygron [[Session]] visualized in Unity.]] | [[File:TygronUnityCesiumExample1.jpg|thumb|right|350px|Data from a Tygron [[Session]] visualized in Unity.]] | ||
Depending on use-cases or the intended audiences for the results of calculations in the {{software}}, it may be desirable to have external tooling or applications read data from a running [[Session]] for visualization. One environment which forms a powerful framework for a variety of use-cases is Unity. Using the Cesium plugin for Unity, it is possible to directly connect to a [[Session]] and obtain visualization data from it, so that it can be viewed as a complete 3D world in Unity. | Depending on use-cases or the intended audiences for the results of calculations in the {{software}}, it may be desirable to have external tooling or applications read data from a running [[Session]] for visualization. One environment which forms a powerful framework for a variety of use-cases is Unity. Using the Cesium plugin for Unity, it is possible to directly connect to a [[Session]] and obtain visualization data from it, so that it can be viewed as a complete 3D world in Unity. | ||
Revision as of 12:40, 9 June 2023
This article is a stub.

Data from a Tygron Session visualized in Unity.
Depending on use-cases or the intended audiences for the results of calculations in the Tygron Platform, it may be desirable to have external tooling or applications read data from a running Session for visualization. One environment which forms a powerful framework for a variety of use-cases is Unity. Using the Cesium plugin for Unity, it is possible to directly connect to a Session and obtain visualization data from it, so that it can be viewed as a complete 3D world in Unity.
How to set up Cesium components to read data from a Tygron Session:
- Ensure you have a 3D Unity Project with a Universal Rendering Pipeline (URP), or HDRP.
- Add the Unity registry to the Unity Project's package manager.[1]
- From the Unty registry, install Cesium for Unity.[1]
- Add a GameObject "Cesium Georeference". Name it "Cesium Georeference".
- As child of the "Cesium Georeference", add a GameObject. Name it "Tygron 3D Tileset".
- To the "Tygron 3D Tileset" add a "Cesium 3D Tileset" component. For that component:
Set the Tileset Source to "From Url".
Set the URL to the 3D Tiles endpoint of the intended running Session. - As child of the "Cesium Georeference", add a GameObject. Name it "Tygron WMS".
- To the "Tygron WMS" add a "Cesium 3D Tileset" component. For that component:
Set the Tileset Source to "From Cesium Ion".
Set the Ion Asset ID to "1".[2]
Set the Ion Access Token to a valid Cesium Ion account token. (See references for a valid token to the Cesium example assets)[2] - To the "Tygron WMS" add a "Cesium Web Map Service Raster Overlay" component. For that component:
Set the Base URL to the WMS endpoint of the intended running Session.
Notes
- After creating the Scene, additional GameObjects and functionality can be added to the Scene, such as an interactive camera.[3]
References
- ↑ 1.0 1.1 Cesium for Unity quickstart ∙ Found at: https://cesium.com/learn/unity/unity-quickstart/ ∙ (last visited: 9-6-2023)
- ↑ 2.0 2.1 Cesium for Unity examples ∙ Found at: https://github.com/CesiumGS/cesium-unity-samples/blob/main/Assets/CesiumSettings/Resources/CesiumRuntimeSettings.asset ∙ (last visited: 9-6-2023)
- ↑ Controlling Unity Camera Behavior ∙ Found at: https://learn.unity.com/tutorial/controlling-unity-camera-behaviour ∙ (last visited: 9-6-2023)