Unit Type
Untis
- Units are the various means of transportation that can be displayed in the 3D world.
How do units relate to the Tygron Engine?
- The available units can be added to the 3D world in order to complete the dynamic feel of the 3D world. For the vehicles that are situated on the roads the units not only complete the visualization of the real life situation, they also are used for the traffic density calculations of the various types of roads. For example, a highway has more units per hours than a brick road. The amount of units per hour can be edited and is used for calculations and visualisation of traffic overlays.
Types of available units
- In the Tygron Engine, there are multiple types of units available. Each type of unit has its own properties consisting of its name, color and if it ist active or inactive in the 3D world.
- Pickup
- Bus
- Sedan car (multiple color types)
- Tractor
- Truck
- Scooter
- SUV
- Mini Cooper (multiple color types)
- Ambulance
- Street sweeper
- Smokey truck
- Delivery truck
- Small car
- Police car
- Yellow cab
- US ambulance
- US firetruck
- Container truck
- Grain truck
- Oil truck
- Bio truck
- E-car
- Canoe
- Sailboat
- Cargo ship
- Riverboat small
- Riverboat medium
- Riverboat langre
- Oil tanker
- Spray boat
- Airplane
- Tram
- Transrapid
Editing units
Adding and removing units
This section deals with adding units to the 3D world.

Adding units
- By selecting the Add button on the bottom of list of units, a new units appears on the list. The list is alphabetical per units type. The new unit is not present in the 3D World yet, since the Active in Simulation checkbox has not been selected yet.
- Select Visuals
- Select Units on the ribbon bar
- Select 'Add' from the bottom of the list
- Select the desired unit type from the popup panel and apply
- Notice a new unit has been added to the unit data overrides list
- Menu.png
Select Visuals
- Menu2.png
Select Units from ribbon bar
- Add unit.png
Select 'Add' from the bottom of the list
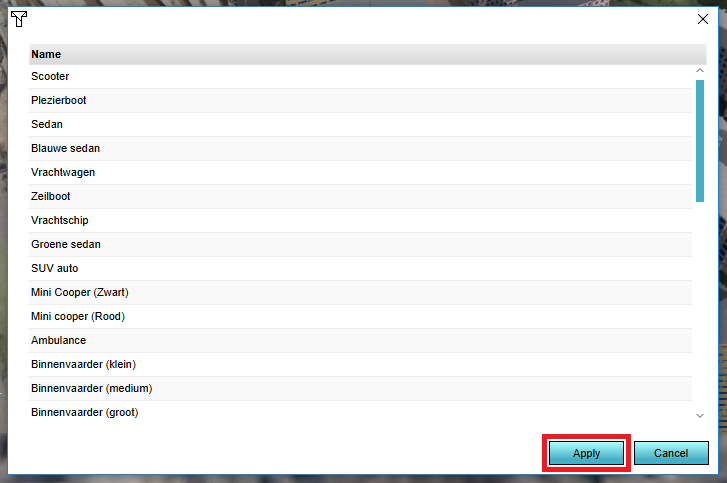
Select desired unit type and apply

Removing units
- To completely remove a construction, including its slot from the construction list, select Constructions, highlight the construction to be removed and select 'Remove'. This will open a confirmation message to ensure no constructions are deleted by accident.
- Open the Building Panel
- Highlight the construction to be removed
- Select "Remove" on the bottom of the list
- Confirm the deletion on the popped up message panel
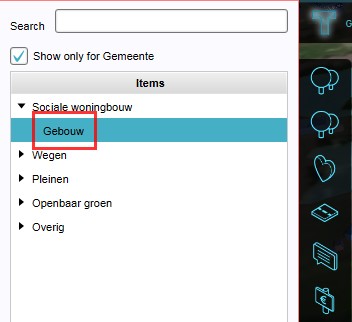
Select Construction to be removed
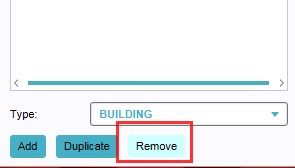
Select 'Remove'
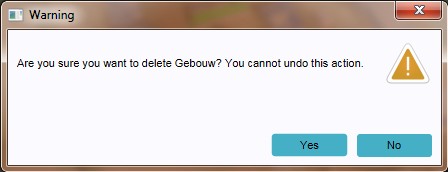
Confirmation Message


Changing units

Changing an already existing construction is similar to assigning a construction to a newly created empty slot. By highlighting an already existing construction (or empty slot) on the left side Construction Panel, the main view of the 3D world will jump to the constructions location and the existing construction can be edited and changed accordingly on the detail panel on the right side of the editor main view. It is also possible to select an existing construction in the 3D world, the construction on the left side will be highlighted in the list and can be edited on the detail panel on the right side.
- Select Constructions from 3D World
- Search in the list or the 3D world for the construction to be changed
- Select the name or construction.
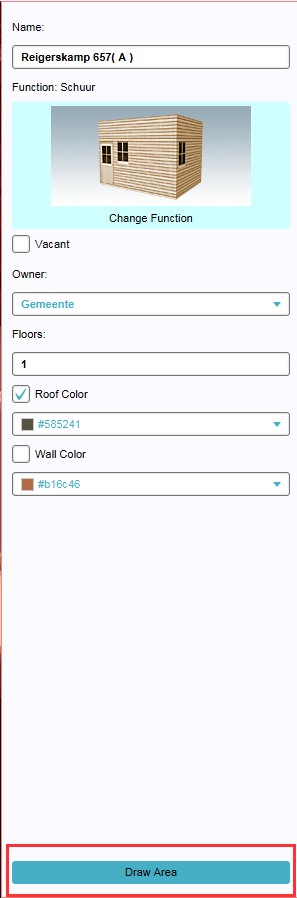
- On the detail panel on the right side, change the construction name in the "Name" field
- Select the construction type by clicking on the image
- Select if a building is vacant, by marking the check box named "Vacant"
- Select the construction owner from the drop down menu
- Use the entry field to set the "Amount of floors"
- Select to use the default roof/ wall colours or to use custom colours (check box & color menu)
- Select the "Draw" Button to draw the construction in in the 3D world
Name

- In the "Name" field, a specific name for the construction can be entered, replacing the default naming. Please note that the default name of a construction often refers to the actual address of the construction in real life. See also "Editing addresses of constructions"
Function (Construction Type)
- Main article: Function


- By clicking on the image, the actual construction type can be selected from a newly opened panel - the Choose Function list.
Vacancy
- Vacancy can be turned on for a construction with the check box marked "Vacant". When a building is vacant, livability will be reduced in the area. The costs to demolish a vacant building are lower, as there is no need to buy out any occupants.
Owner

- This drop down menu contains all available stakeholders in the project. Also non-playable stakeholders can be selected. Ownership affects interactions such as zoning planning, building permits and land transactions.
Amount of floors

- In this field the amount of floors can be set for a construction. The numbers between brackets after the title 'Floors' indicates the allowed minimum and maximum number of floors for the selected function. Please note that not all constructions have the option to add floors.
Year of Construction

The Tygron Engine uses the actual year of construction for most buildings when a project is based on real data. In case a new construction is added, or no date is available, it is possible to enter a year of construction by hand in this field. In case no value is entered on a new construction that is added to a project, the current simulation year is used.
Roof & Wall Color

By marking the check box, the default roof and wall color, based on the satellite map, can be overwritten with any color from the drop down menus below the check boxes.
Roof Height

This field indicates the height from the ground to the roof edge. The value can not be changed and is used to verify the height of the building minus any roof structures, such as a slanted roof. For example, a building with 3 floors and a roof height of 15 meters has an average height of 5 meters per floor.
Draw area
- Now the construction can be drawn into the 3D world by selecting the 'Draw Area' button on the bottom of the panel. A new panel - the Brush Panel - becomes available under the editor main view port:
Draw Area Button

Brush Panel
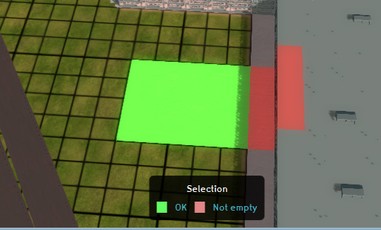
Brush Panel Area Selection

- By dragging the cursor, while left clicking on on the 3D world's main view, the ground plan for the construction is drawn. Colors indicate if the area is available for the selected construction. Different Selection Types can be selected; rectangles for buildings, lines for roads, etc. By selecting 'Apply Selection', the construction is confirmed. 'Clear Selection' removes the selection from the 3D world. The option 'Remove Building' can be used to remove any constructions that are already in the 3D world present. This option only removes the actual drawn-in construction, the building slot will remain in the list of constructions, as an empty slot.
Editing addresses of constructions
- With a construction selected on the left panel, it is possible to edit its address on the bottom panel. In case a (newly added) construction lacks an address, it is possible to select 'import'. The address will then be assigned automatically to the selected construction, if available. In case a construction is in such a planning state that no address is already known, it is also possible to enter a desired address in the name field of the construction. By selecting the 'Add' button on the bottom panel, the address-as-name will be added to the construction as address property. It is also possible to duplicate or remove addresses from this list.
