New Project Wizard: Difference between revisions
| Line 41: | Line 41: | ||
{{article end | {{article end | ||
|notes= | |notes= | ||
* When using the [[drag-and-drop]] function to select a location for a [[Project]], the newly calculated extent is buffered 10 meters in each direction. This means the [[Project]] will be slightly larger than the provided polygons. | |||
* When using the [[drag-and-drop]] function to select a location for a [[Project]], the sliders for the [[Project]] size are automatically updated to reflect the new extent's size, but will display a value which is rounded to the nearest valid step in size. | |||
|howtos= | |howtos= | ||
* [[How to create a new Project]] | * [[How to create a new Project]] | ||
Revision as of 14:51, 2 March 2022
Redirect to:
The New Project Wizard guides a user through the creation of a new Project. It allows for the setting of a Project's most important Project Metadata, as well as the geographical properties of a Project and which Project Sources to base it on.
Project properties

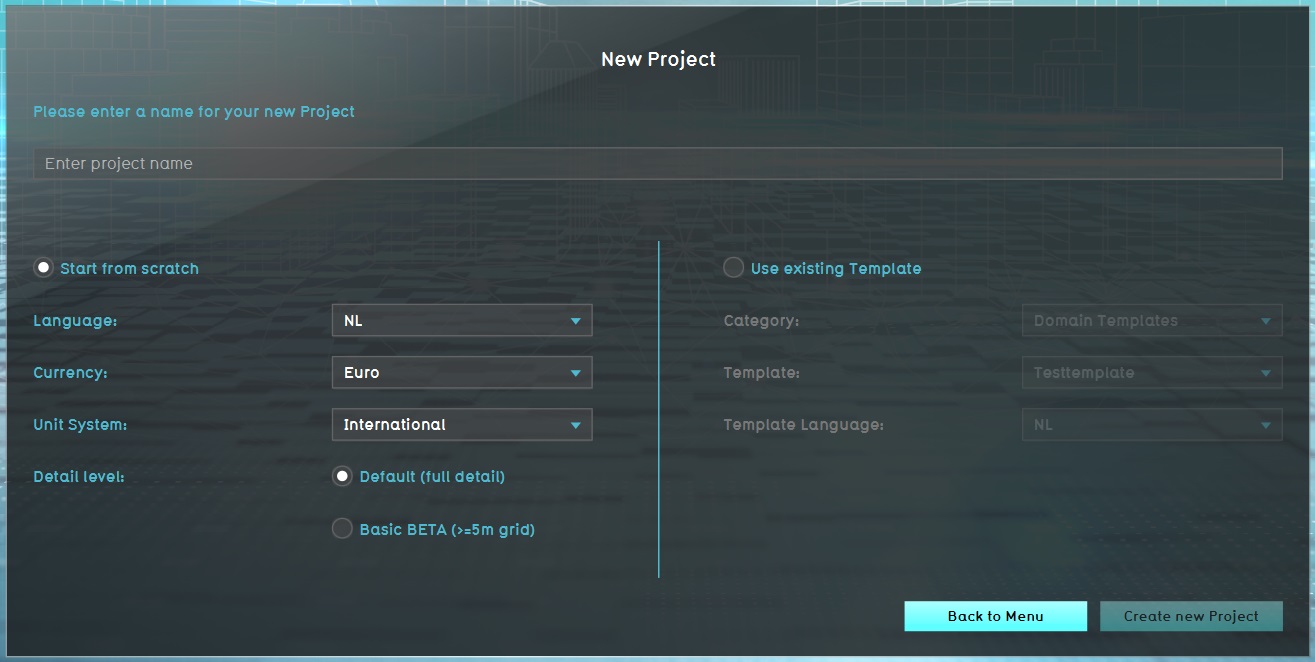
Creating a new Project begins with setting the general information of the Project. The following information must be provided:
- The name of the Project
- The currency of the Project
- The unit system of the Project
- The language of the Project
- The Project Type
After setting these details, progressing through the New Project Wizard starts a Session for the new Project, in which all additional configuration is effected.
Using a Project Template

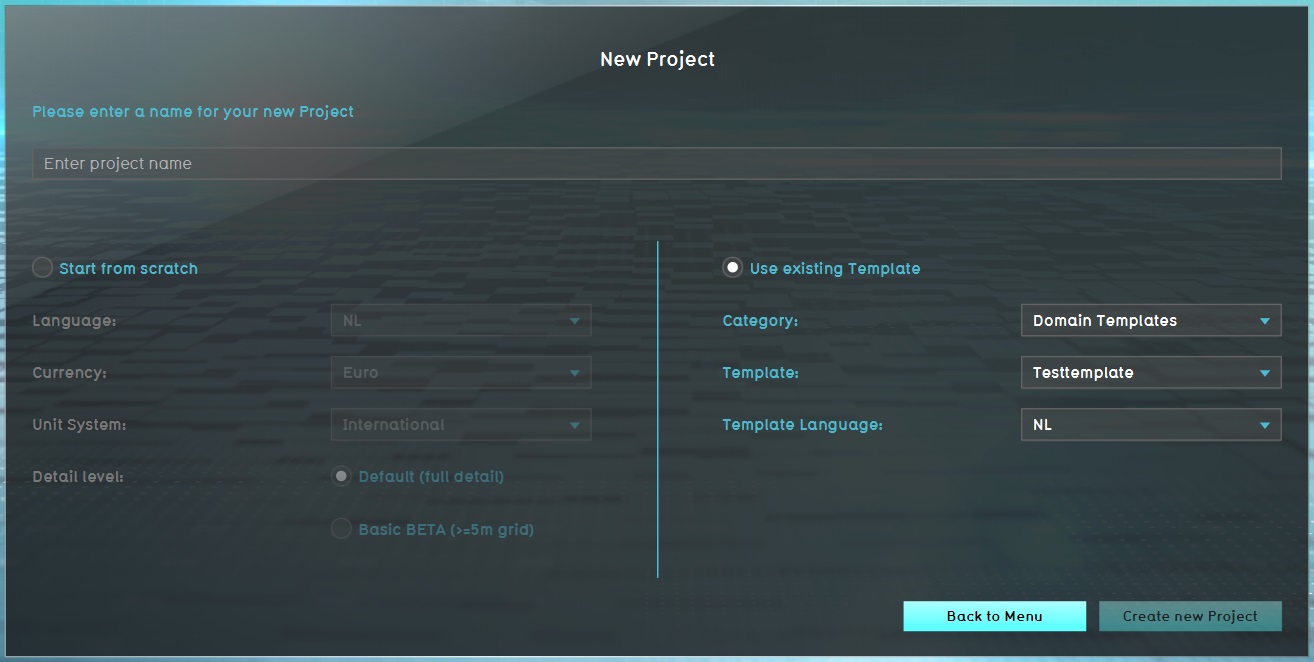
After setting a name for the Project, rather than create a new Project from scratch, it is possible to base the new Project on an existing Project Template. Any Project which is marked as a Project Template, and which can be accessed in the Editor by a user, can also be used as a Template.
Using a Project Template allows for the selection of a language, but only a language which is also available for the Project Template itself. Other properties, such as the currency, unit system, and Project Type, cannot be changed.
After selecting a Project Template to use, progressing through the New Project Wizard starts a Session of the selected Project Template, and then saves a copy under the provided name for the new Project. The copy is cleared of all geographical data. The running Session is then used to effect additional configurations.
Project Map

A new Project will require geographical properties to be set. This includes the size of the Project and its geographical location.
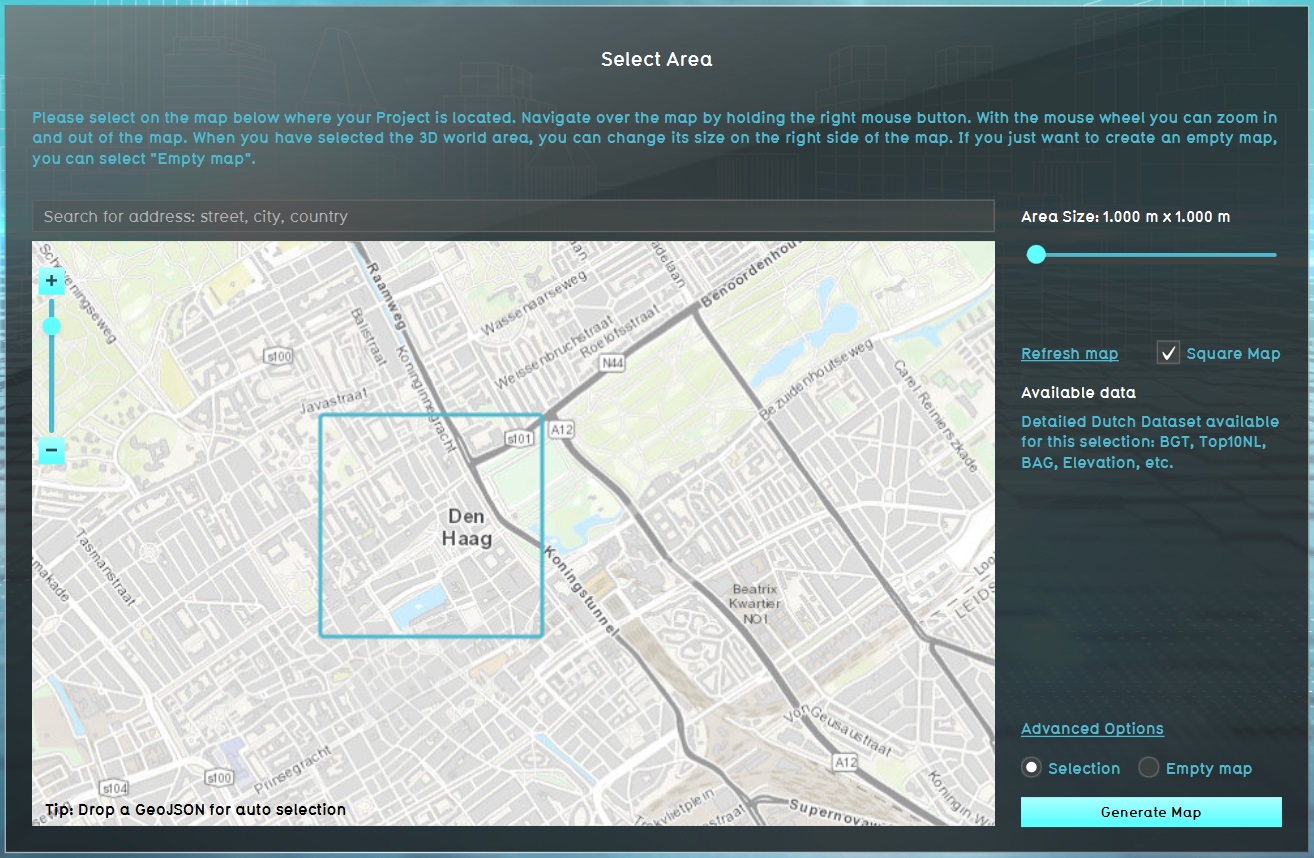
The size of the project can be set by using a slider to set the desired size. By default, a Project is square with an equal with and height. However, it is also possible to opt for a rectangular Project, allowing the width and height of the Project to be set independently from one another. However, the ratio between width and height can at most be 1:4. A Project is always cardinally aligned and cannot be rotated.
A location can be selected by moving the viewport with the right mouse button, and placing the center of the extent of the Project with the left mouse button.
It is also possible to drag-and-drop a GeoJson file onto the map. Based on the polygons in the file, the center and size of the project is recalculated to precisely fit the polygons provided. After doing so, the location and size of the Project can be adjusted further.
Advanced Options
Notes
- When using the drag-and-drop function to select a location for a Project, the newly calculated extent is buffered 10 meters in each direction. This means the Project will be slightly larger than the provided polygons.
- When using the drag-and-drop function to select a location for a Project, the sliders for the Project size are automatically updated to reflect the new extent's size, but will display a value which is rounded to the nearest valid step in size.
How-to's
Videos
