Zone
What is Zoning?
Zoning is a technique of land-use planning as a tool of urban planning used by local governments in most developed countries. The word is derived from the practice of designating mapped zones which regulate the use, form, design and compatibility of development. Legally, a zoning plan is usually enacted as a bye-law.
There is a great variety of zoning types, some of which focus on regulating building form and the relation of constructions to the street with mixed-uses, known as form-based, and others with separating land uses, known as use-based.
Zoning in relation to the Tygron Engine
In the Tygron Engine, zoning is an important element that can be used to guide the decision making process of the stakeholders. The stakeholder municipality has the responsibility to ensure the zoning plan is adhered to; each time a construction is planned by any of the stakeholders, the municipality has to verify if the plan complies with the zoning plan, prior to approval of the planned construction. To facilitate negotiations and bottom up participation, the municipality also has the power to change zoning plans. With this power, the municipality can offer other stakeholders approval for permits as trade off for complying with non zoning related objectives, such as less urban heat stress or more water storage in an area.
When a function has been added to a zone in the Tygron Engine, they are added to the so called 'Zoning Plan'. This means stakeholders are allowed to create this construction inside this zone. They will still need permission from the Municipality to create this construction! When a function has not been added to the 'Zoning Plan' this means stakeholders are not allowed to create this type of constructions inside this zone. The municipality can still make an exception when the permission has been requested.
Editing zones
Adding and removing zones
When a new project is created using the wizard, a zoning plan is automatically imported from available data. However, for empty projects, no zoning plan will exist by default, and zones will need to be added to make use of the zoning plan functionality.

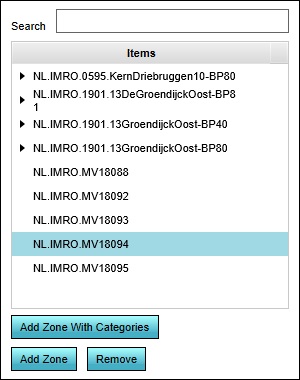
New zones can be added to the project by opening the Zoning panel in the editor. In the left panel, one or more new zones can then be added. To add a zone which does not restrict the categories of constructions allowed within it, select "Add Zone". To add a zone which does restrict the categories of constructions allowed, select "Add Zone With Categories". A new zone will appear in the list of zones.
Note that when a new zone is added, it is not yet present in the 3D world. Its contour must still be drawn in the 3D world for it to apply.
Existing zones can be removed by selecting them, and then selecting "Remove". When a zone is removed with child zones (displayed in the left panel as being one or more subitems of the zone), the child zones remain.
- Open the Zoning panel
- Select "Add Zone".
- Open the Zoning panel
- Select "Add Zone".
- Select "Add Zone With Categories".
- Open the Zoning panel
- Select the zone you wish to remove.
- Select "Remove"
Changing zones


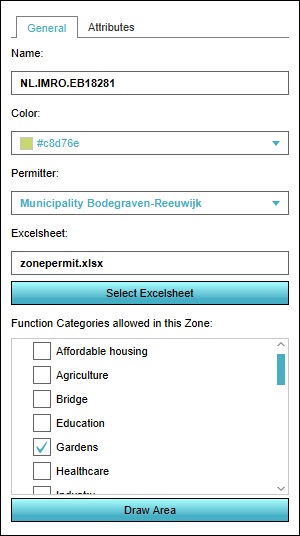
Selecting a zone in the left panel makes its properties adjustable in the right panel. Multiple kinds of properties exist for zones. It's possible to switch between the various types of properties by selecting the desired tab at the top of the right panel.
General
Zones have a number of general properties.
Name

The "Name" field is where the name of a zone can be changed. The name of a zone can be seen in the zoning plan adjustment panel of the Zoning overlay. By entering a new name in the "Name" field, the zone can be given a more identifying name.
Color

The color selector allows the zone color to be edited. The zone color can be seen in the zoning overlay. The zone color is used for assigning different colors to different zones, to help users to distinguish the defined zones. By selecting the "Color" field, a new panel opens, in which a new identification color for the highlighted zone can be selected.
Permitter

The permitter dropdown menu allows the granting or denial of permissions to be the responsibility of a specific stakeholder. When an action is taken in the zone, the action will be tested against the configuration of this zone, and the final decision will be made by this stakeholder. This can be changed by selecting a different stakeholder.
Excel

Each zone can be provided a calculation Excel file to determine how new constructions are to be tested. To change or update this calculation, select "Select Excelsheet" to open the Excel Manager.
Allowed zoning function types

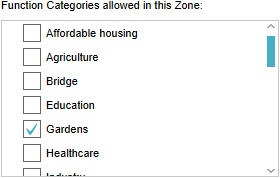
Adding an allowed function category to a zone enables stakeholders to plan constructions of that category function inside the zone. To add a function category to a zone, check the checkbox next to the desired category. To disallow a function category, make sure the checkbox next to the desired category is unchecked.
Draw Area

The "Draw Area" button is used to assign an area in the 3D world to a specific zone. The assigned area can be seen on the zoning overlay. To assign an area in the 3D world to a zone, select the "Draw Area" button. This will open the brush panel to assign an area to the selected zone.