How to import foliage height areas: Difference between revisions
Jump to navigation
Jump to search
(Created page with "{{Editor steps|title=import foliage height areas in the Heat wizard |Add a new Area to the project. This will be the breach area. |How to d...") |
No edit summary |
||
| (29 intermediate revisions by 4 users not shown) | |||
| Line 1: | Line 1: | ||
<youtube>sbwzJIK5jYg</youtube> | |||
{{Editor steps|title=import foliage height areas in the Heat wizard | {{Editor steps|title=import foliage height areas in the Heat wizard | ||
|[[ | |||
| | |Add the [[Heat_stress_(Overlay)|Heat Stress overlay]] | ||
|[[ | |Open the Configuration Wizard | ||
| | |Choose the [[Heat_DPRA_Module|DPRA model]] | ||
| | |Proceed and in step 3 choose Use foliage height areas | ||
| | |In step 3.1 choose for the option import foliage areas (start geo data wizard). | ||
| | |Click on the button Import foliage areas | ||
|Follow the steps in the [[Geo_Data_Wizard|Geo data wizard]]. In step 6, choose the attribute name that depicts the [[Foliage_height_(Heat_Overlay)|foliage height]] of your features (areas). | |||
|Finish the Geo data wizard and proceed with the Heat wizard. | |||
}} | }} | ||
<gallery mode=nolines> | <gallery mode=nolines> | ||
File:Heat_overlay.JPG | |||
File:Heat_wizard.JPG | |||
File:Wizard_dpra.JPG | |||
File:Wizard_foliage_areas.JPG | |||
File:Foliage_areas_geo.JPG | |||
File:Boomkronen_new.JPG | |||
File:Foliage_areas_key.JPG | |||
File:Foliage_areas_in_platform_new.JPG | |||
</gallery> | </gallery> | ||
= | {{article end | ||
|notes= | |||
*The areas that need to be imported are areas of the foliage crown along with an attribute containing the height of the foliage, relative to the terrain height. | |||
For the tutorial on | *If you have a file that contains tree locations as points, you can instead import them as [[Buildings]] in the [[Geo_Data_Wizard|geo data wizard]]. The imported trees will then use, if supplied, the height and [[Foliage_crown_factor_(Heat_Overlay)|foliage crown factor]] of the selected tree functions to determine the foliage area. | ||
*When you have chosen to import foliage height areas, there is also an option to do nothing. Then no foliage height is used. The third option: Select existing is only for if you already have imported these areas in the Platform. | |||
*The already present tree [[Buildings]] are ignored when choosing to import foliage height areas. | |||
|seealso= | |||
*[[Foliage areas (Heat Overlay)]] | |||
*See also the [[Foliage_height_calculation_model_(Heat_Overlay)|Foliage height calculation model]] to know more about how the foliage height is used in the [[Heat_DPRA_Module|DPRA heat module]]. | |||
* For the tutorial on configuring the [[DPRA_Heat_Module|default heat stress overlay]], see the [[Tutorial_Heat_Overlay_(Heat_Overlay)|heat stress overlay tutorial]]. | |||
}} | |||
[[Category:How-to's]] | |||
Latest revision as of 15:27, 30 January 2024
How to import foliage height areas in the Heat wizard:
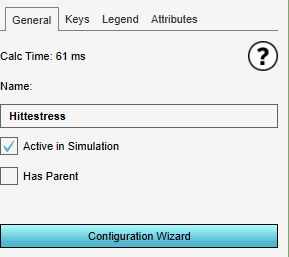
- Add the Heat Stress overlay
- Open the Configuration Wizard
- Choose the DPRA model
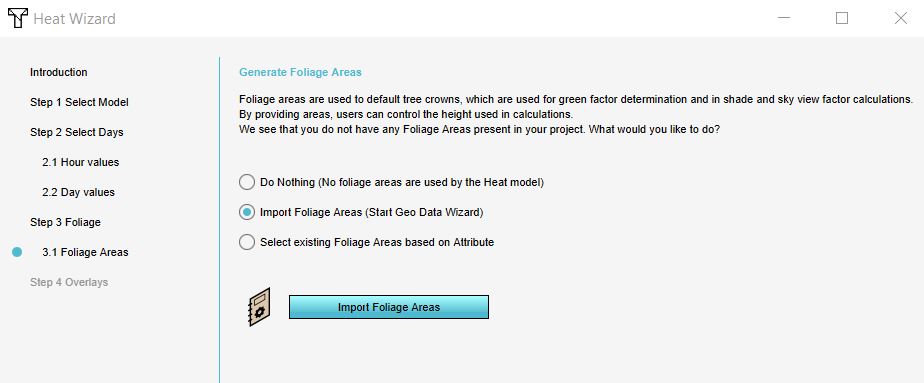
- Proceed and in step 3 choose Use foliage height areas
- In step 3.1 choose for the option import foliage areas (start geo data wizard).
- Click on the button Import foliage areas
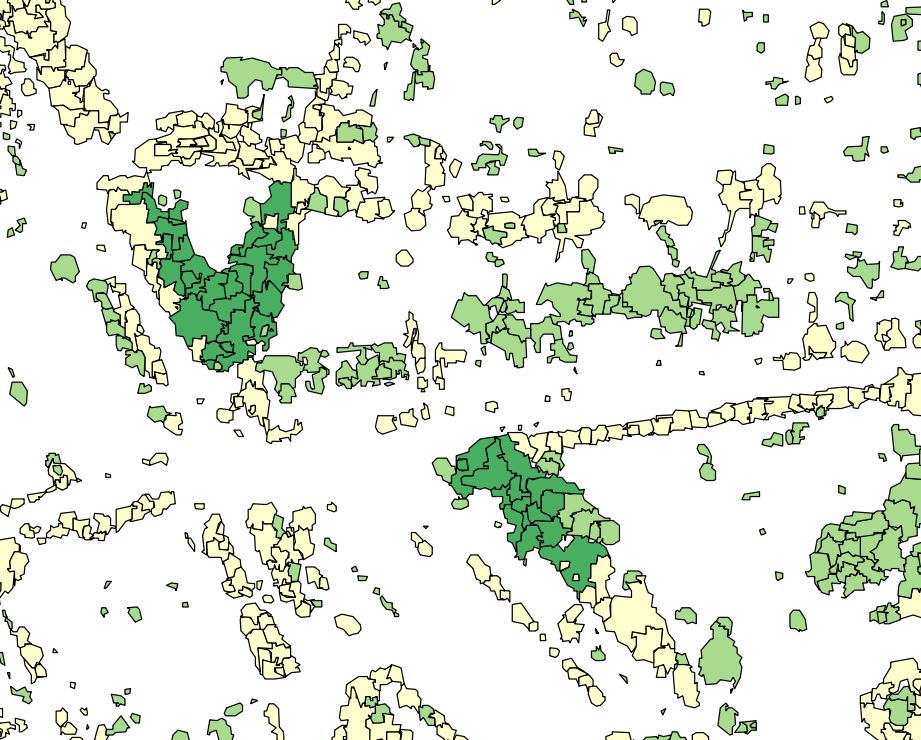
- Follow the steps in the Geo data wizard. In step 6, choose the attribute name that depicts the foliage height of your features (areas).
- Finish the Geo data wizard and proceed with the Heat wizard.
Notes
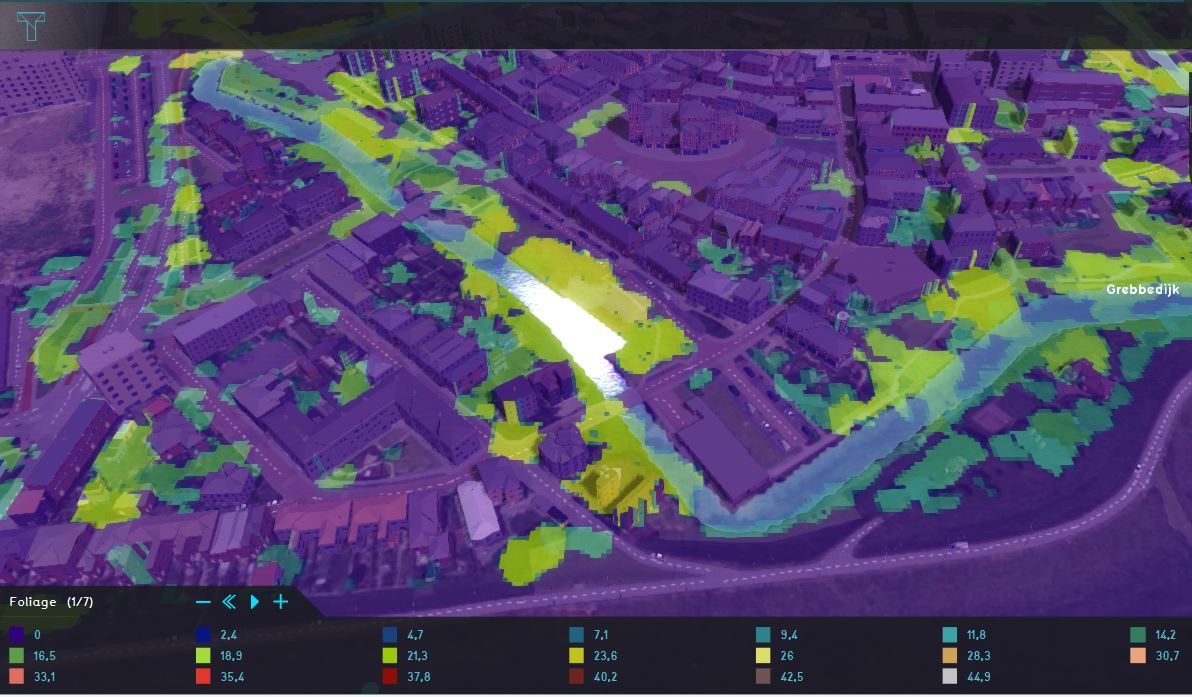
- The areas that need to be imported are areas of the foliage crown along with an attribute containing the height of the foliage, relative to the terrain height.
- If you have a file that contains tree locations as points, you can instead import them as Buildings in the geo data wizard. The imported trees will then use, if supplied, the height and foliage crown factor of the selected tree functions to determine the foliage area.
- When you have chosen to import foliage height areas, there is also an option to do nothing. Then no foliage height is used. The third option: Select existing is only for if you already have imported these areas in the Platform.
- The already present tree Buildings are ignored when choosing to import foliage height areas.
See also
- Foliage areas (Heat Overlay)
- See also the Foliage height calculation model to know more about how the foliage height is used in the DPRA heat module.
- For the tutorial on configuring the default heat stress overlay, see the heat stress overlay tutorial.


