Risk contour (Indicator)
General
What is the Safety indicator?
The Safety indicator calculates a metric for the number of houses in the safety zone. It uses information the Safety Distance Overlay. This indicator is useful for projects in which (for example):
Indicator panel
The indicator panel (see the image on the right) shows in a table per neighborhood:
- the neighborhood name
- the number of units in the safety distance zone
- the score
Calculation
Score
The score is represented in a progress bar, with a scale from 0 to 100%. Determine if you want to calculate the absolute or reative score. The more houses in the safety zone, the higher the score.
Additional configurations
For this indicator to function, two global variables need to be added to the project, namely the global variable OVERKLUIZING and the global variable GEVAARLIJK_VERVOER. Also the Safety Distance overlay has to be added to the project, see below for the steps.
Add the Global Variables
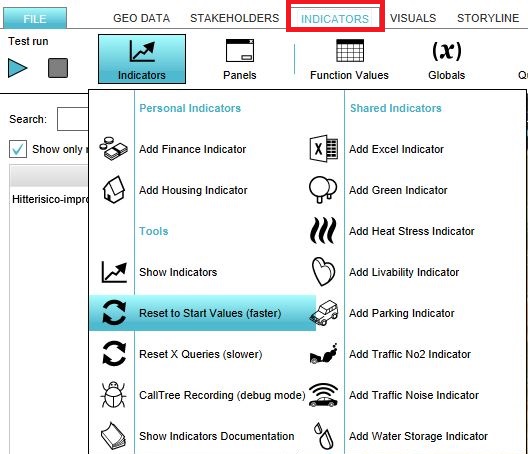
- Select in the editor 'Indicators' from the ribbon
- Select 'Globals' from the ribbon bar
- Select Add Global from the drop down menu
- Write the name OVERKLUIZING in the Name field on the right panel
- Write the value 2 in the Start Value field on the right panel
- Notice that a new global variable with the name OVERKLUIZING is added to the list of global variabels on the left panel.
- Select in the editor 'Indicators' from the ribbon
- Select 'Globals' from the ribbon bar
- Select Add Global from the drop down menu
- Write the name GEVAARLIJK_VERVOER in the Name field on the right panel
- Write the value 2 in the Start Value field on the right panel
- Notice that a new global variable with the name GEVAARLIJK_VERVOER is added to the list of global variabels on the left panel.
Add the Distance Zone Overlay
When the indicator is added to the project, an error message can be given. This is due to the missing Safety Distance Overlay in the project. Read below on how to add this overlay to the project.
- Select in the editor 'Geo Data' from the ribbon
- Select 'Overlays' from the ribbon bar
- Select the Safety Distance Overlay from the drop down menu
- Click on the tab Indicators and the button Indicators and choose for Reset to Start values (faster) to update your project.
- .JPG
