How to Georeference a 3D model
Jump to navigation
Jump to search
This how-to described how to geo-reference a 3D model such that it will be located in the project area. If 3D models are created in a software program without a CRS (Coordinate Reference System),they will not be placed on the right location or with the right scale in a GIS or in the Tygron Platform.
Below the steps in ArcGIS Pro on how to move the model to the right location and with the right scale on the map.
Note that imported DWG 3D models are georeferenced in a different way than other 3D data formats like obj or other 3D formats. Therefore there are 2 ways to georeference your models depending on the file format.
How to Georeference 3D DWG models:
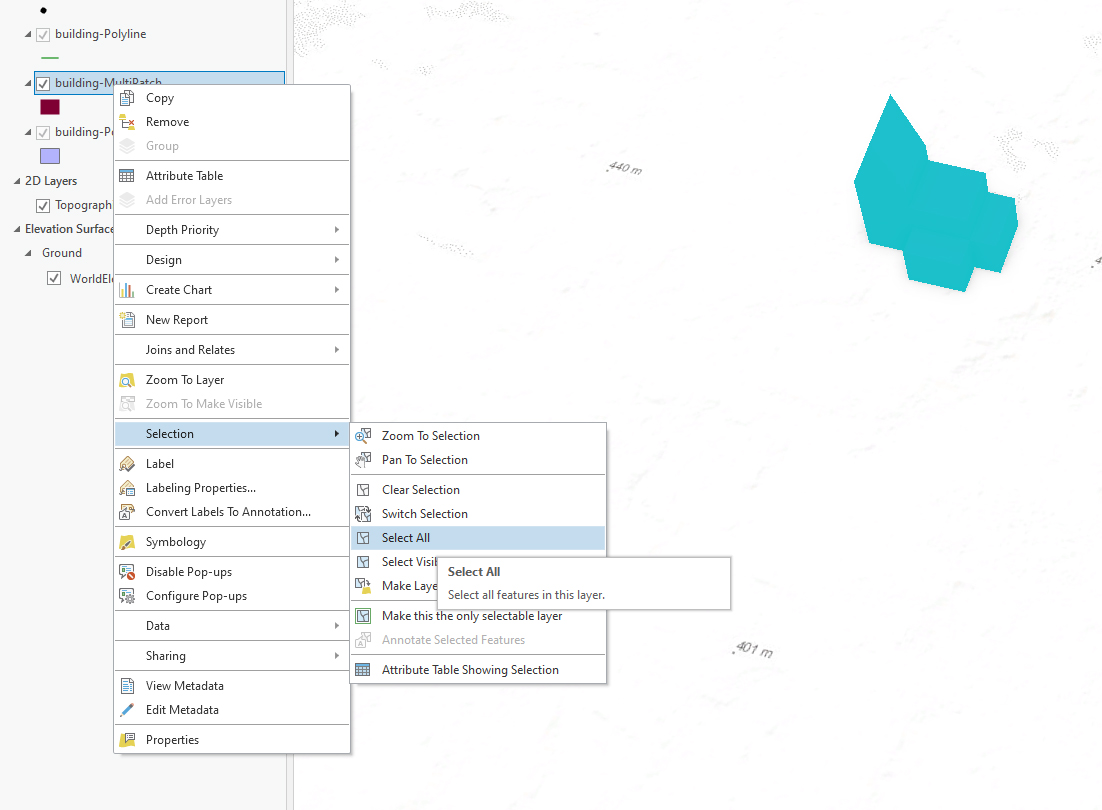
- In ArcGIS Pro, select your 3D object (multipatch layer) from the Contents pane by right-clicking on the imported multipatch feature, choosing "selection" and clicking on "select all". (If model is not visible in the Viewport choose "zoom to selection" from the same selection menu)
- Go to the "CAD Layer" Manage tab (this tab will only appear if the imported model is a DWG file).
- Click on the "Define Projection" tool and select a coordinate system from the library (click on the globe next to the field)or choose the default one. (This can be done from the right tools pane)
- Click on "Run" in the lower right of the pane.
- Select the "Georeference" tool.
- Choose the "move", "scale" or "rotate" tool and drag, rotate and scale the 3D model along one or all of the axes to move it on the map to the desired location.
- Use the "Elevate To Ground" tool so that the model snaps to the ground (Provided that the pivot point or center of the model is at the desired groundlevel base of the model.
- Finally click on "Save To Workspace" (Next to the move, scale and rotate tools) so that the location is saved and close the Georeference toolset. Your model is georeferenced
-
 Select Building
 -
 CAD Layer tab
 -
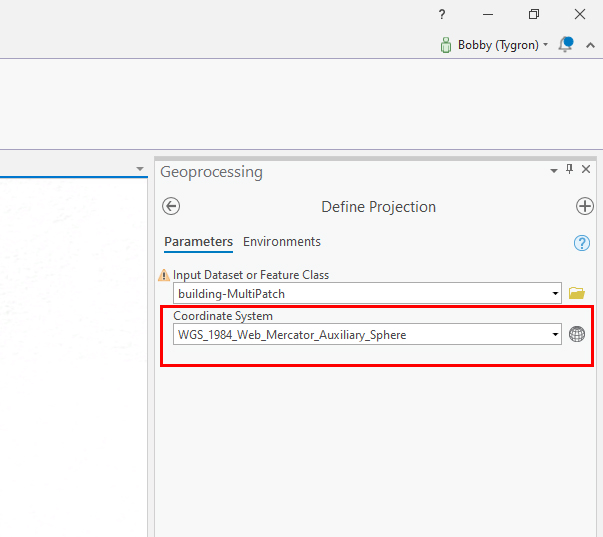 Choose coordinate system
 -
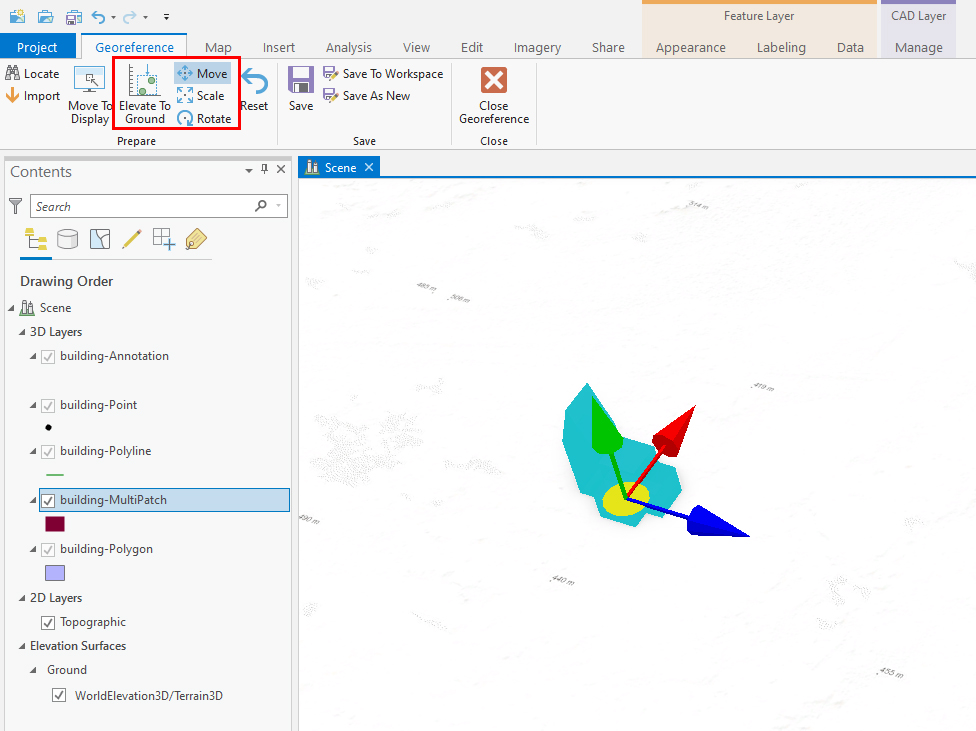 Positioning tools.


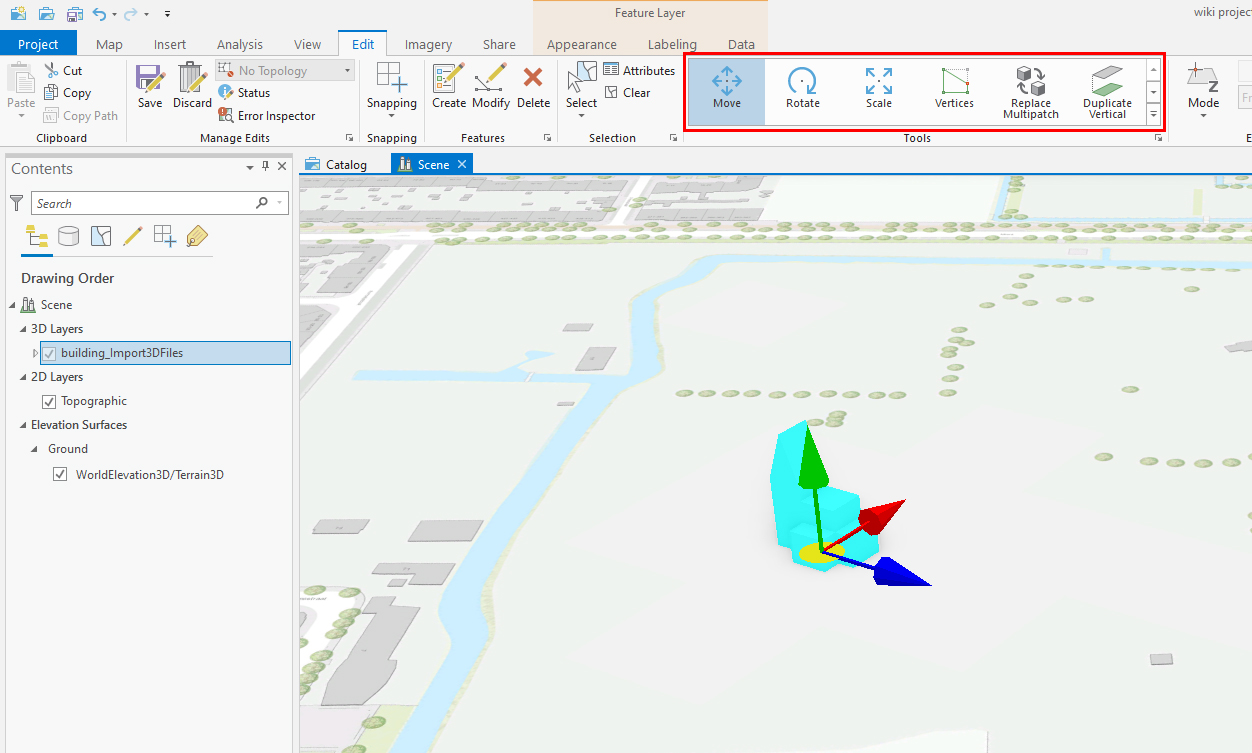
How to Georeference other 3D models:
- In ArcGIS Pro, select your 3D object (multipatch layer) from the Contents pane or the Viewport. Make sure all the layers are selected when having multiple layers for one 3D model.
- Go to the "Edit" tab. The tools section will appear
- Select the "Move" tool and drag the 3D model along one of the axes to move it on the map to the desired location.
- If desired, the model can be rotated and/or scaled with the "Rotate" and "Scale" tools
- Make sure that the model is at the proper height relative to the ground. If this is not yet the case, choose the multipatch layer and right click to choose properties. Select the Elevation tab and select On the ground and then Ok to place the model on the surface terrain.
-
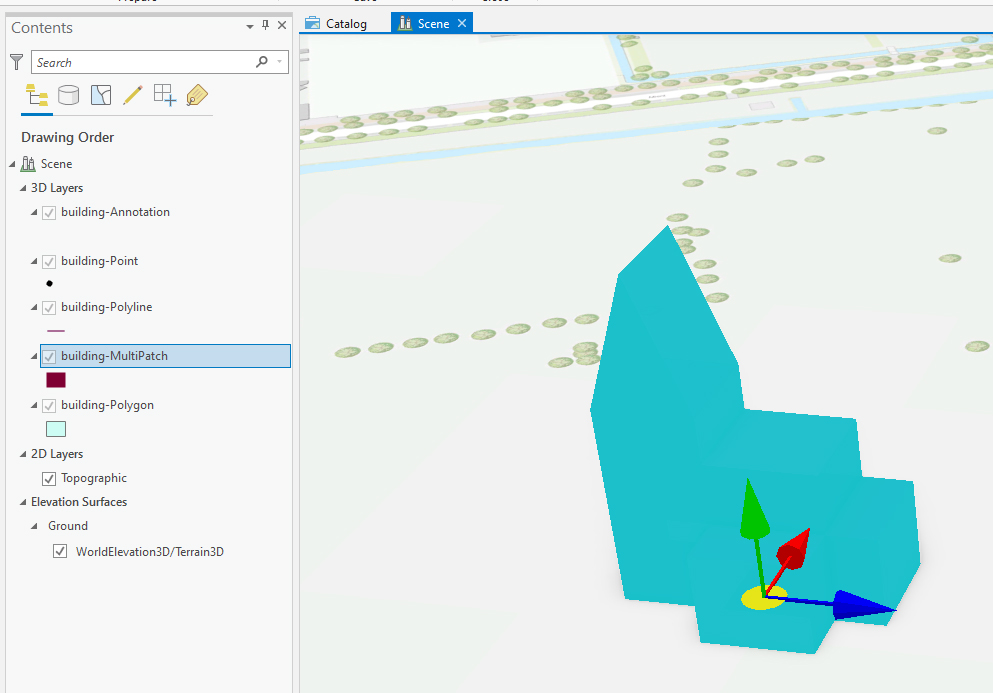 Select Multipatch
 -
 Georeference 3d model


| <<Back to SLPK manual |