How to take a Screenshot
Jump to navigation
Jump to search
This how-to described how you can make a screenshot of the 3D visualization without a visual interface.
How to take a Screenshot:
- Select in the editor 'Tools' from the ribbon
- Click on the 'Screenshot' button in the ribbon bar.
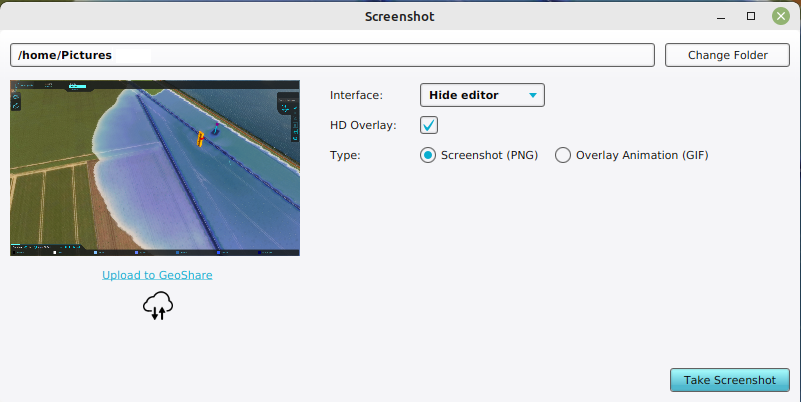
- In the newly opened panel, make sure Screenshot (png) is selected.
- Optionally change the destination folder for newly taken screenshots.
- Select whether you want to include the interface.
- Select HD Overlay when taking a screenshot of an overlay and you want a higher resolution (less gritty) version.
- Click on take screenshot to create an image. It will be shown in the left side of the panel.
-
Select the Tools header in the Editor
-
Select the Screenshot ribbon bar
-
Click on the 'Take Screenshot' button to take the screenshot.
