Demo Training Data Project: Difference between revisions
| Line 34: | Line 34: | ||
===Export | ===Export Considerations=== | ||
There are several considerations when exporting AI Training Data: | There are several considerations when exporting AI Training Data: | ||
* The exported features ([[Building]]s, [[Area]]s, etc) should match the overlay that these are exported with. | * The exported features ([[Building]]s, [[Area]]s, etc) should match the overlay that these are exported with. | ||
Revision as of 13:58, 28 January 2025

The Demo Train Dataset project is available for all users and can be found in the main menu under Edit projects. This project does not count towards your license.
This project is intended for people who are working in fields such as AI, remote sensing, data analysis, and urban planning.
This project showcases a method in the Tygron Platform to export a dataset for training a Mask R-CNN model..
The demo is a working project in which a number of areas are drawn, using a satellite overlay as underlay. These areas are marked with specific attributes, making it easy to export them as a training or test set using an export option in the Tygron Platform.
Project's content
Demo Train Dataset is a project that contains shapes of foliage, drawn as areas on top of a Satellite Overlay. These areas, in combination with satellite images, can be exported as a dataset for training a Mask R-CNN model. Such a model can then be applied to a different project location to detect foliage. A specific use-case is detecting foliage on private property, such as gardens and private yards.
-
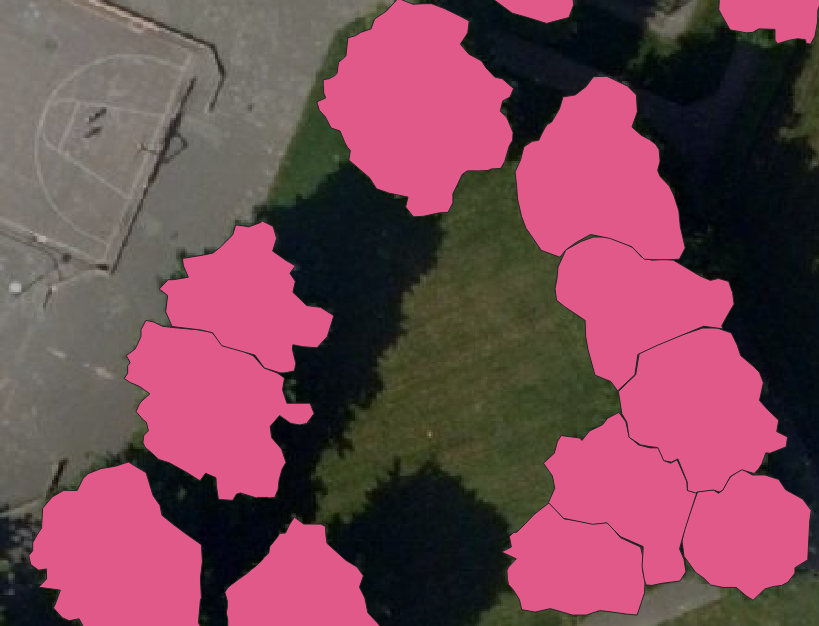 Individual foliage areas
 -
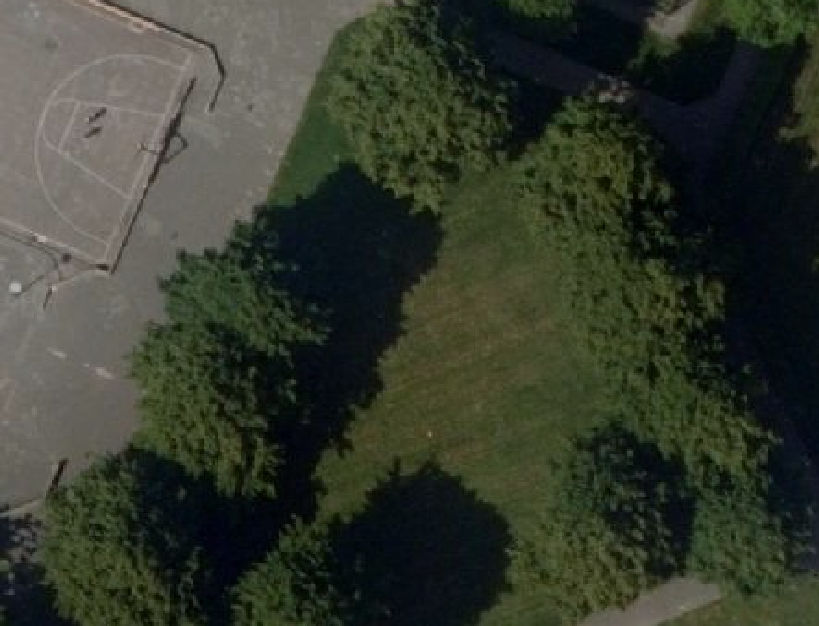 Satellite Overlay serving as input for images


AI Training Data
In order to train a Mask R-CNN model, we need to obtain two datasets, one for training and one for testing. A dataset consists of a list of numbered files, with the number representing the data entry number. Each data entry consists of the following files:
- An input image, as a PNG
- A mask image, as a PNG, containing gray values, where each gray value represents a unique identifiable feature.
- A label text file containing the classes of the identifiable features, where each class is identified with an integer number (larger than 0).
- Optional: A text file containing the bounding-box pixel numbers; min x, min y, max x, max y, for each identifiable feature in the input image.
-
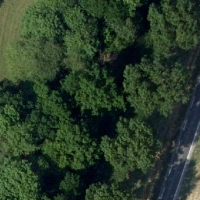 Input image, in this case an image exported using the Satellite Overlay
 -
 Mask image with each unique feature identified by a gray value.
 -
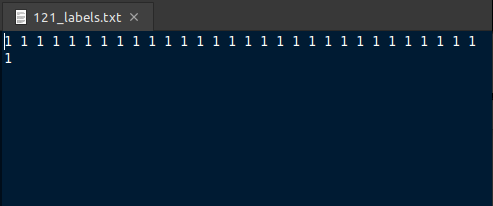 Class labels
 -
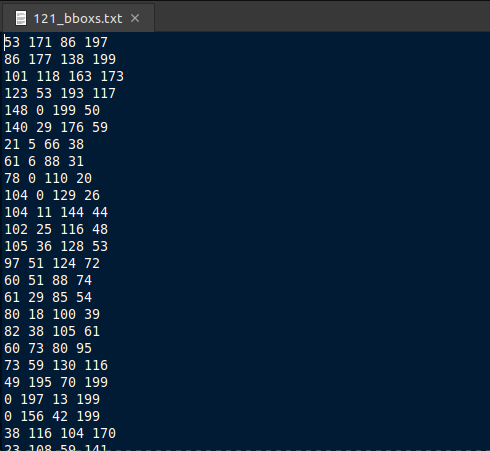 Bounding box coordinates


The Tygron Platform allows users to export datasets. The Demo Train Dataset Project is set up to contain two separate sets of Areas to export; One set of Areas with the attribute TRAIN_FOLIAGE and one with the attribute TEST_FOLIAGE. Each set can be exported with an Overlay. Since both sets are drawn based on a Satellite Overlay named Original Satellite, we will use that Overlay.
Export a dataset
This how-to explains how to generate an AI Training Data using the Tygron Platform. This data can be used to train your own AI model.
- Open a project in editor mode using the Tygron Client Application
- Optionally add a Satellite Overlay. This overlay will be used to export train images for the dataset.
- Determine what [item] type will be used to export a dataset for. For example Foliage areas drawn on top of the satellite overlay.
- Select the Export Geo Data option in the Ribbon bar popup of the selected item type. For example: Hover over Areas and select Export Geo Data
- Under Format, select the option AI Training Data PNG
- Filter items with an attribute, such as FOLIAGE
- Optionally select a prepared Intersection Area, for example a TRAIN_LIMIT_AREA.
- For the Overlay, select the preferred Overlay, for example the Satellite Overlay.
- The image size can increased, as long as the amount of expected features within the image does not exceed the maximum amount of 250.
- The stride can be kept at 50%
- Click on the Export Files button
- Select a suitable folder for the generated dataset.
- Wait until the dataset is fully generated.
-
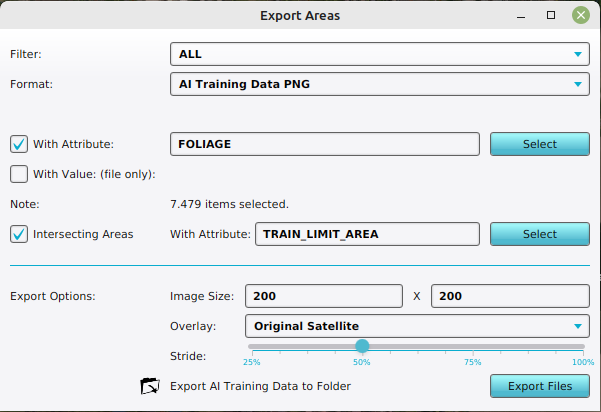 Configuration of the Export AI Training Data as PNG's for Foliage Areas on a Satellite Overlay, with an intersecting area.

Notes
- In case the export folder is not empty, a confirmation popup will appear on overriding the existing image, label, mask and bounding box files.
- In case a region intersects the limit area, but does not contain any features, it is still exported as a dataset-entry (image-, label-, mask- and bbox-file) but without labels, mask pixels or bounding box entries.
- In case the feature density is low, the image size can be increased.
- In case the feature sizes are small compared to the image size, the stride can be increased.
- A dataset can also be generated as AI Training Data CSV, which allows users to directly train on float matrices instead of color images.
- When the intended background image is not the satellite image provided by default but some other image or set of data, it is also possible to select a WMS Overlay referencing an external map service, or a Combo Overlay, the
COLORfunction of which can be used to compute a custom image with.
How-to's
See also
Export Considerations
There are several considerations when exporting AI Training Data:
- The exported features (Buildings, Areas, etc) should match the overlay that these are exported with.
- Larger image size leads to a faster Inference Model calculation. However, the maximum amount of identifiable features within images of the train dataset may not exceed 250.
- The stride fraction can be configured to create more images and ensures features are fully included.
Train your own model
A Tygron AI Suite[1] is available at github. This repository contains the necessary files to configure a Conda environment to train a new Mask R-CNN AI model.
Conda-forge's Miniforge[2] will be used to manage a Conda environments and run Jupyter Notebooks with python.
Example notebooks[3] provided in the repository can be used as a basis to train your own model.
TygronAI yml-file[4] provided in the repository can be used initialize a Conda Environment. It includes Pytorch and Jupyter Notebook.
- If you are not familiar with github, you can download the zip containing all the files that you need. Otherwise, clone the git repository
- Optionally unzip and open the folder containing the downloaded files; the local repository. Copy the path to this directory.
- Download[2] and install Miniforge.
- Open the Miniforge Prompt application.
- Change the directory to the path of the local repository. For example
cd user/git/tygronai/
This directory should contain the tygronai.yml file. - Create and initialize a new conda envirmonment with the tygronai.yml file using:
conda env create -n tygronai -f tygronai.yml
and press enter to confirm. - Wait for the downloads and unpacking to complete.
- Activate the create tygronai environment using:
conda activate tygronai
The name (tygronai) should now have appeared in place of (base) in front of the prompt. - Start the Jupyter Notebook application by typing:
jupyter notebook
- A browser will open with the Jupyter Notebook application.
- The application should open in the tygron ai repository folder. If not, browse to the folder of the tygron-ai-suite repository.
- Once in the correct folder, select the "example_config.ipynb".
- Adjust the following parameters:
trainDirectory = "PATH TO TRAIN FILES"
testDirectory = "PATH TO TEST FILES"
to the folders containing the exported datasets. See how to export AI datasets for more information. - Press the double arrow button named Restart kernel and execute all cells to run the Jupyter Notebook. See the images below of what to expect.
- Eventually an ONNX file will be created.


- ↑ Cite error: Invalid
<ref>tag; no text was provided for refs namedref-aisuite - ↑ 2.0 2.1 Cite error: Invalid
<ref>tag; no text was provided for refs namedref-Miniforge - ↑ Cite error: Invalid
<ref>tag; no text was provided for refs namedref-NotebookExample - ↑ Cite error: Invalid
<ref>tag; no text was provided for refs namedref-ymlfile