Demo Create Culverts Project: Difference between revisions
| Line 33: | Line 33: | ||
<gallery mode=nolines> | <gallery mode=nolines> | ||
File:Min_max_length.PNG|Step 1. Select the Rainfall overlay | File:Min_max_length.PNG|Step 1. Select the Rainfall overlay | ||
File:Open_water_connection_generator.PNG|Step 2. Open the Generate Water | File:Open_water_connection_generator.PNG|Step 2. Open the Generate Water Connections Panel | ||
File:Default_settings_wcg.PNG|Step 3. Set the neighborhood | File:Default_settings_wcg.PNG|Step 3. Set the neighborhood | ||
File:Measure_length.PNG|Step 4. Measure the distance | File:Measure_length.PNG|Step 4. Measure the distance | ||
| Line 44: | Line 44: | ||
# Read this [[Water_Connection_Generator#Large_road_straight|section]]. Usually there are no culverts between waterways parallel to each other, but between waterways that are perpendicular to each other. | # Read this [[Water_Connection_Generator#Large_road_straight|section]]. Usually there are no culverts between waterways parallel to each other, but between waterways that are perpendicular to each other. | ||
# To generate only a culvert to the waterway perpendicular to the left waterway, open the Water Connections generator panel and first remove the culverts from the ''Large road straight'' neighborhood. To do this, select the correct neighborhood and click on the Remove generated text. | # To generate only a culvert to the waterway perpendicular to the left waterway, open the Water Connections generator panel and first remove the culverts from the ''Large road straight'' neighborhood. To do this, select the correct neighborhood and click on the Remove generated text. | ||
# Then set the Large road Straight (m) parameter on 20m and generate the culverts. Notice now | # Then set the Large road Straight (m) parameter on 20m and generate the culverts. Notice hat now only one culvert is generated. The {{software}} checks if, when the generated culvert would be moved 20m, the culvert would still be in a waterway. If not, no culvert is generated. | ||
<gallery mode=nolines> | <gallery mode=nolines> | ||
File:Large_road_straight.PNG|Step 1. Zoom to the neighborhood | File:Large_road_straight.PNG|Step 1. Zoom to the neighborhood | ||
File:Large_road_straight_settings.PNG|Step 2. Open the Generate Water | File:Large_road_straight_settings.PNG|Step 2. Open the Generate Water Connections Panel and generate culverts | ||
File:Remove_culverts_large_road.PNG|Step 4. Remove the culverts | File:Remove_culverts_large_road.PNG|Step 4. Remove the culverts | ||
File:Large_road_result.PNG|Step 5. End result | File:Large_road_result.PNG|Step 5. End result | ||
Revision as of 15:20, 19 October 2020
| Next page>> |

The Demo Create Culverts project is available for all users with Preview access and can be found in the main menu under Edit projects. This project does not count towards your license.
This project is intended for hydrologists and other water experts.
This project showcases the Water Connection Generator.
The Demo Create Culverts project demonstrates the use of the Water Connection Generator for creating culverts in a testbed setting. It can serve as a working demo to further explore the configurable parameters.
Exploring the project
- Zoom out a bit with the scroll wheel of the mouse button and notice that the projects exists of different sections.
- Click on the Neighborhoods Overlay to see the different sections (neighborhoods). The names of the neighborhoods correspond with the parameters in the Water Connection Generator
- Click on the Rainfall Stress Overlay and notice that there are not yet any culverts generated. In the following steps we will generate the culverts to connect the different water bodies.
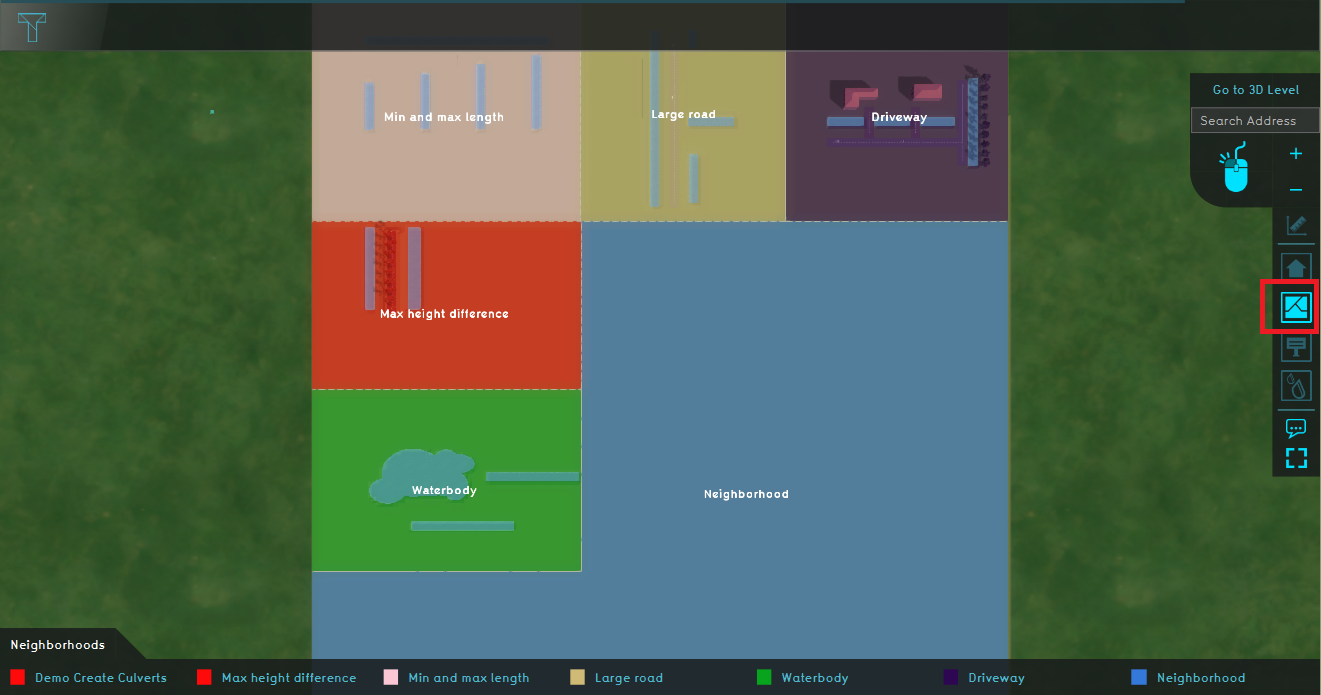
Step 2. Click on the Neighborhoods overlay in the Overlay bar and notice the different neighborhoods
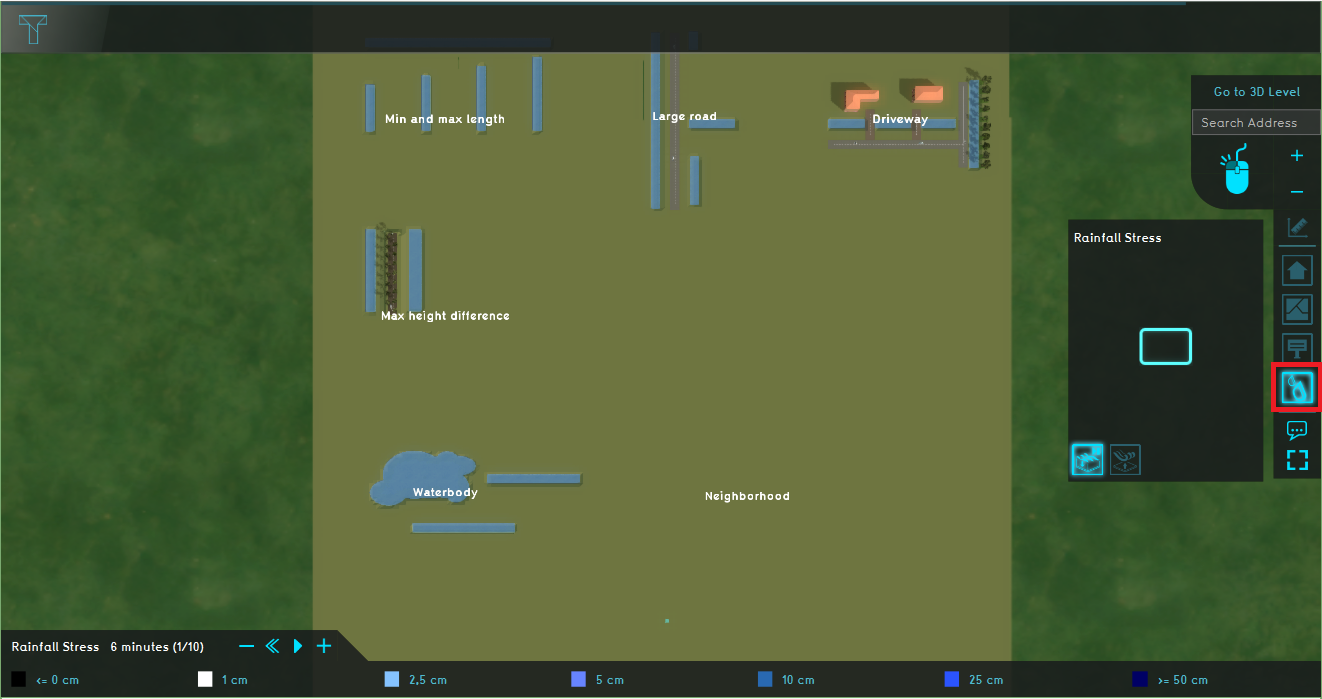
Step 3. Click on the Rainfall Stress overlay


Generating culverts
Minimum and maximum length
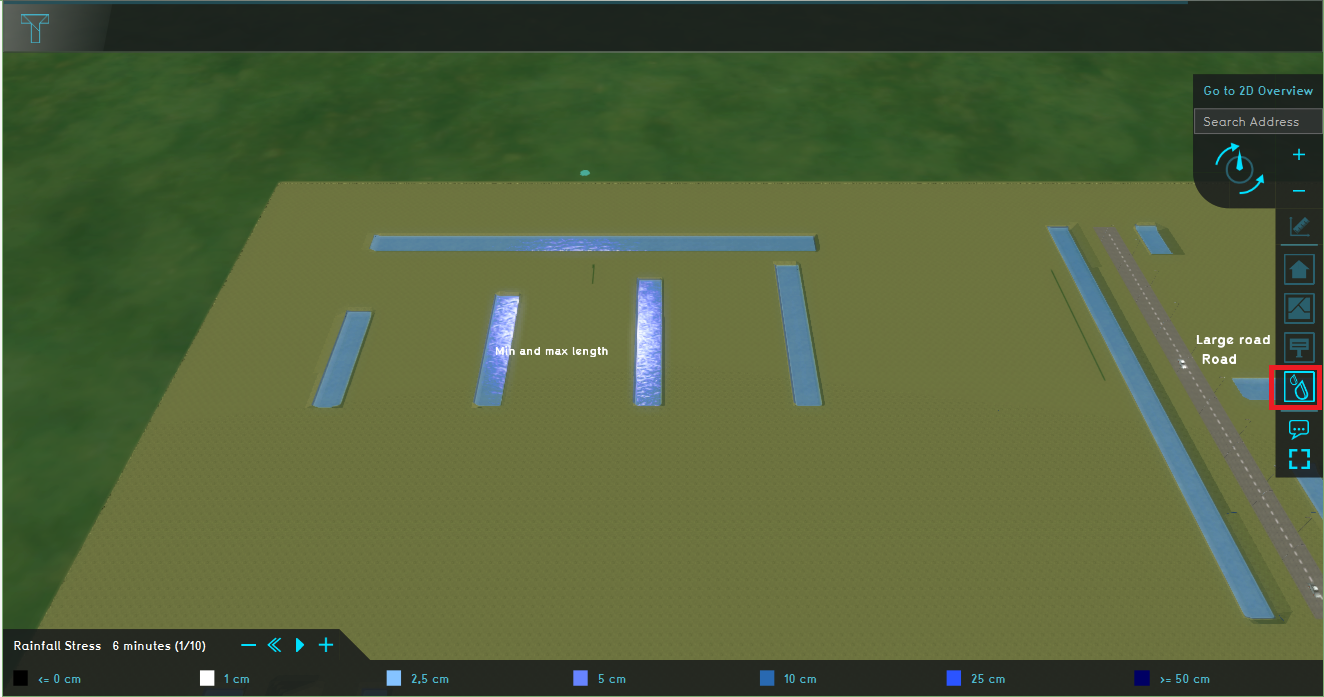
- Zoom to the Min and Max length neighborhood. Make sure the Rainfall Stress Overlay is selected in the Overlay bar.
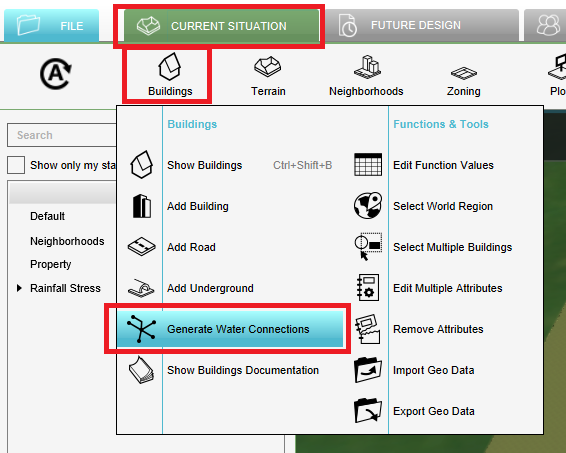
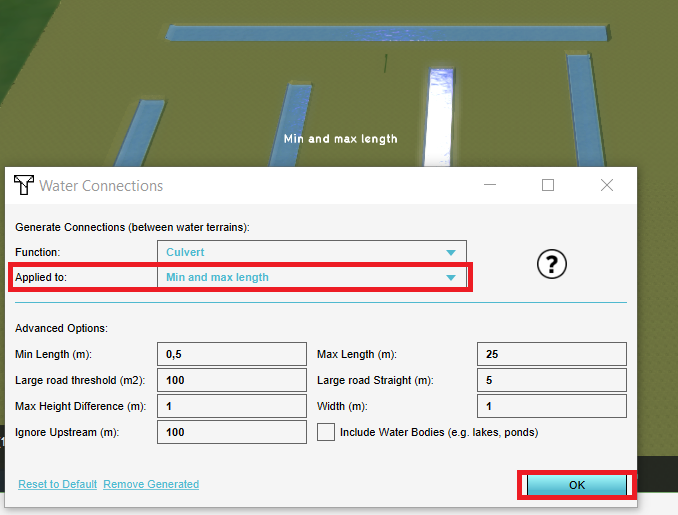
- In the Current Situation tab, hover over the button Buildings and choose Generate Water Connections. With the panel that pops up, the water connections (for example culverts can be generated).
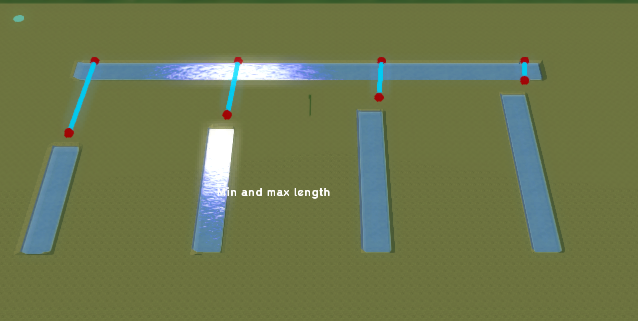
- In the panel, choose the Min and Max length neighborhood in the applied to field. Then click on OK. Notice that two blue lines with red ends are generated, which are a schematic representation of culverts. Read on the Wiki what the min and max length parameters are for.
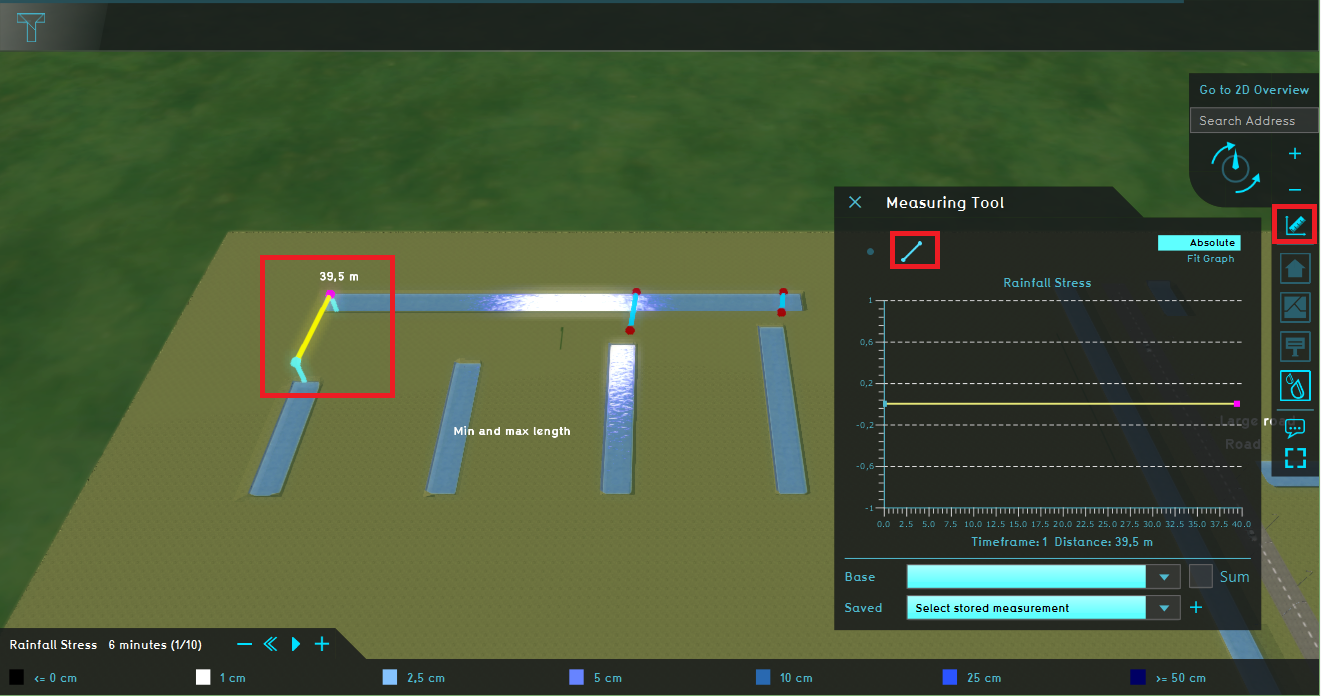
- Use the measuring line tool to measure the distance between the vertical waterway that is the furthest away from the horizontal waterway.
- Open again from the Buildings menu the Water Connections generator panel and set the Max length (m) on 40m. Don't forget to choose the correct neighborhood in the Applied to field. Click then on Ok and notice that four culverts are generated.
- Do you know why there are no culverts generated between the vertical waterways? Tip: use the measuring line tool to measure the distance.
Step 1. Select the Rainfall overlay
Step 2. Open the Generate Water Connections Panel
Step 3. Set the neighborhood
Step 4. Measure the distance
End result


Large road straight
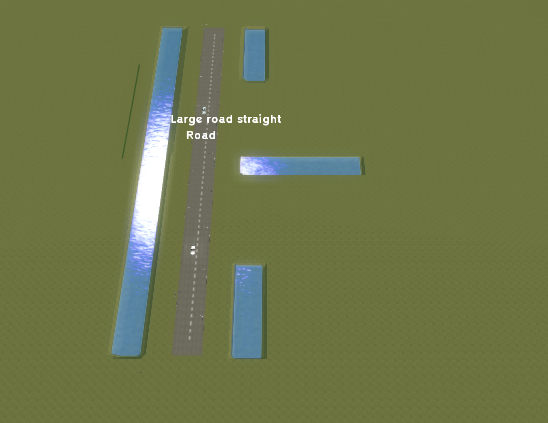
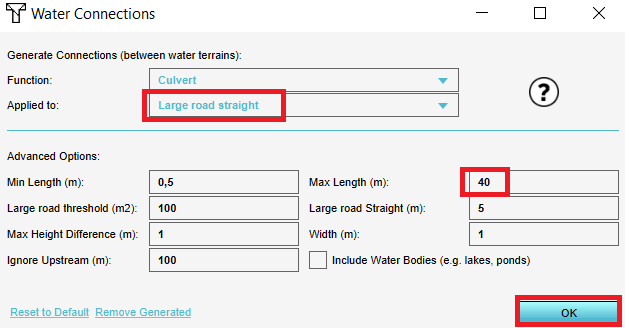
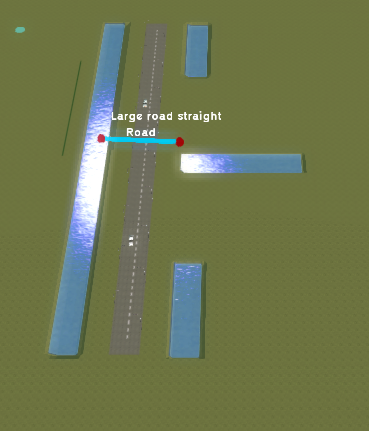
- Zoom to the Large road straight neighborhood and open the Water Connections generator panel.
- In the panel, choose the correct neighborhood to generate the culverts (you can keep the Max length (m) parameter on 40m). Notice 3 culverts are generated.
- Read this section. Usually there are no culverts between waterways parallel to each other, but between waterways that are perpendicular to each other.
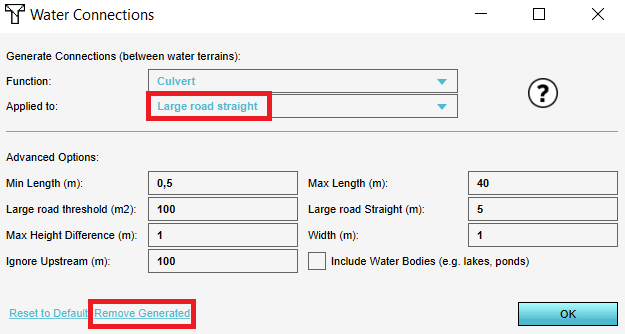
- To generate only a culvert to the waterway perpendicular to the left waterway, open the Water Connections generator panel and first remove the culverts from the Large road straight neighborhood. To do this, select the correct neighborhood and click on the Remove generated text.
- Then set the Large road Straight (m) parameter on 20m and generate the culverts. Notice hat now only one culvert is generated. The Tygron Platform checks if, when the generated culvert would be moved 20m, the culvert would still be in a waterway. If not, no culvert is generated.
Step 1. Zoom to the neighborhood
Step 2. Open the Generate Water Connections Panel and generate culverts
Step 4. Remove the culverts
Step 5. End result


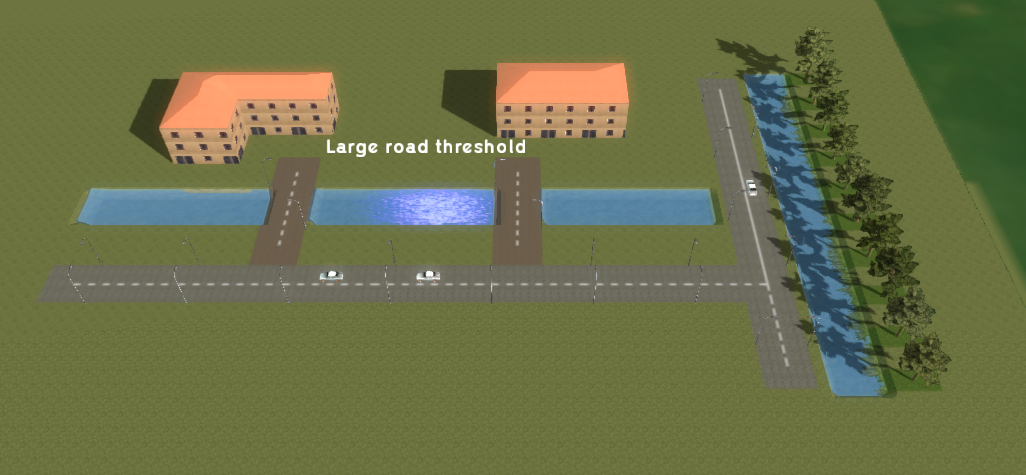
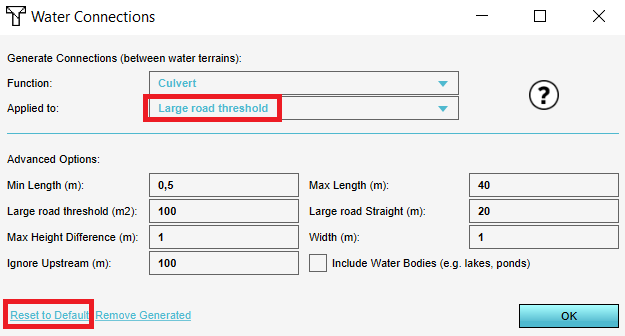
Large road threshold
- Zoom to the Large road threshold neighborhood and open the Water Connections generator panel.
- In the panel, reset the settings to default and choose the correct neighborhood to generate the culverts. Notice 3 culverts are generated.
- Read step 4 from this blog.
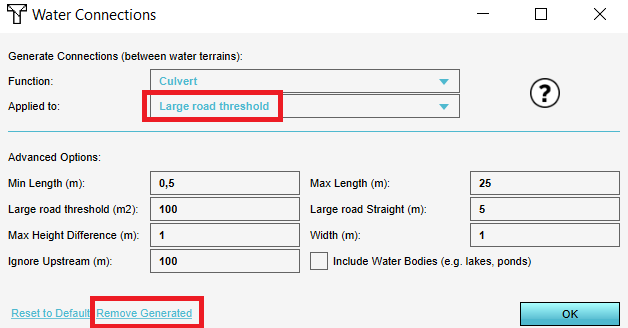
- To generate only culverts for the driveways and not for the main road, open the Water Connections generator panel and first remove the culverts from the Large road threshold neighborhood.
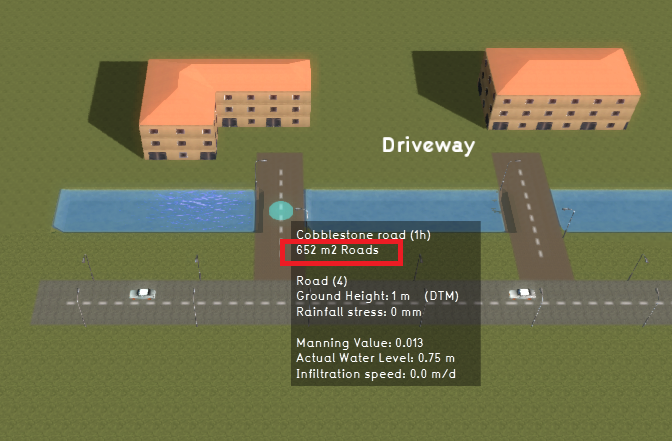
- Then click on the driveway in the 3D world to see the area in m2. In the Water Connections generator panel, fill in for Large road threshold m2 700m and for Large road Straight m 50m. Notice that now only 2 culverts are generated under the driveways, since they are not considered a large road (< 700 m2).
Step 1. Zoom to the neighborhood
Step 2. Reset the settings to default
Step 4. Remove the culverts
Step 5. Hover panel information
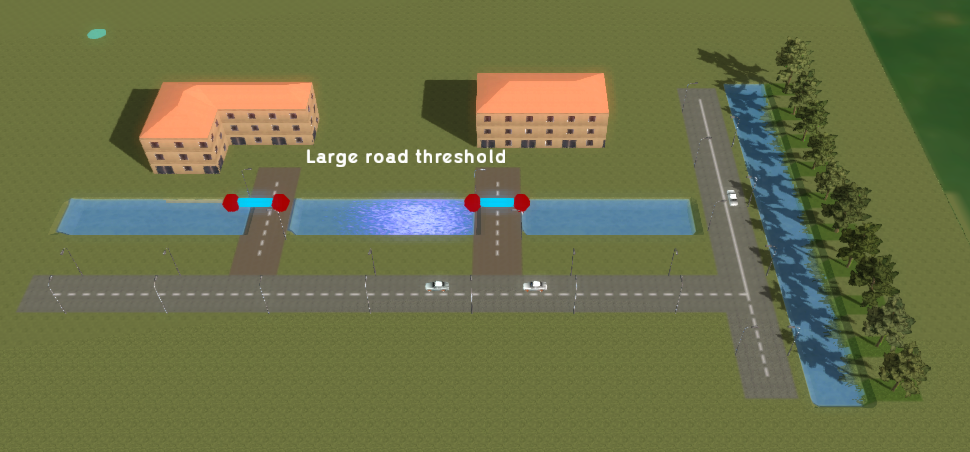
End result


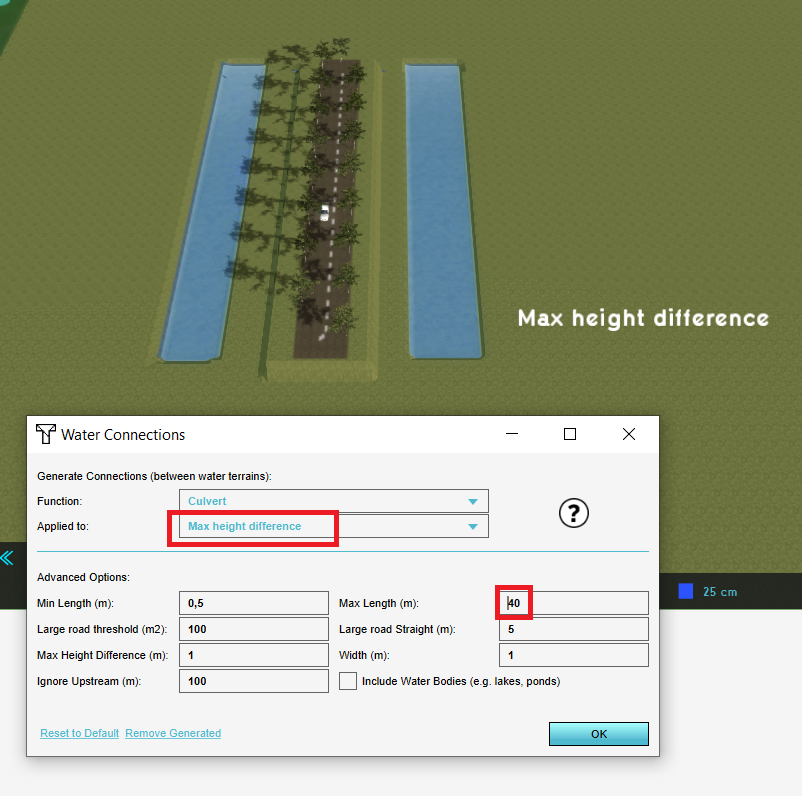
Maximum height difference
- Zoom to the Max height difference neighborhood and open the Water Connections generator panel.
- Measure the distance between the waterways and set the Max length on 40 m. Choose the correct neighborhood and generate the culverts. Notice 0 culverts are generated.
- Read on the Wiki where the maximum height difference parameter is used for.
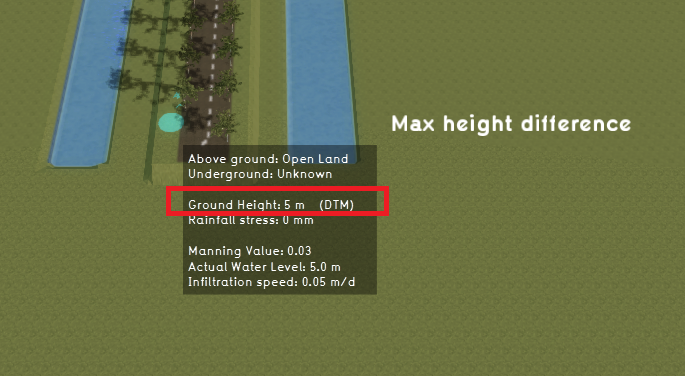
- Click on the levee to see the terrain height in the hover panel. Open the Water Connections generator panel and fill in a maximum height difference of 6m and the correct neighborhood. Notice that now one cuvert is generated.
Step 2. Zoom to the neighborhood and generate culverts
Step 4. See the terrain height in the hover panel
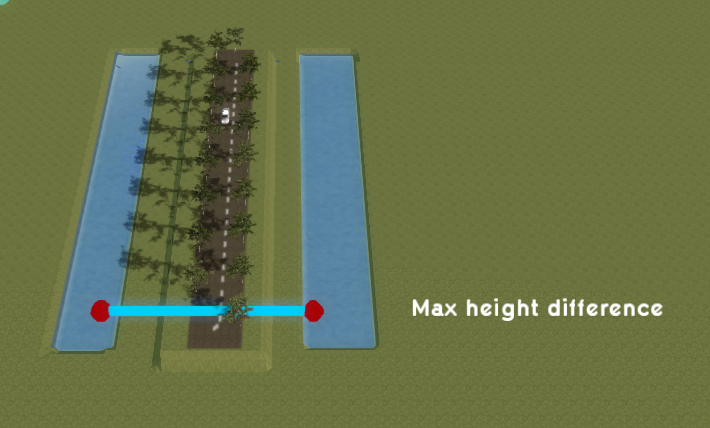
End result


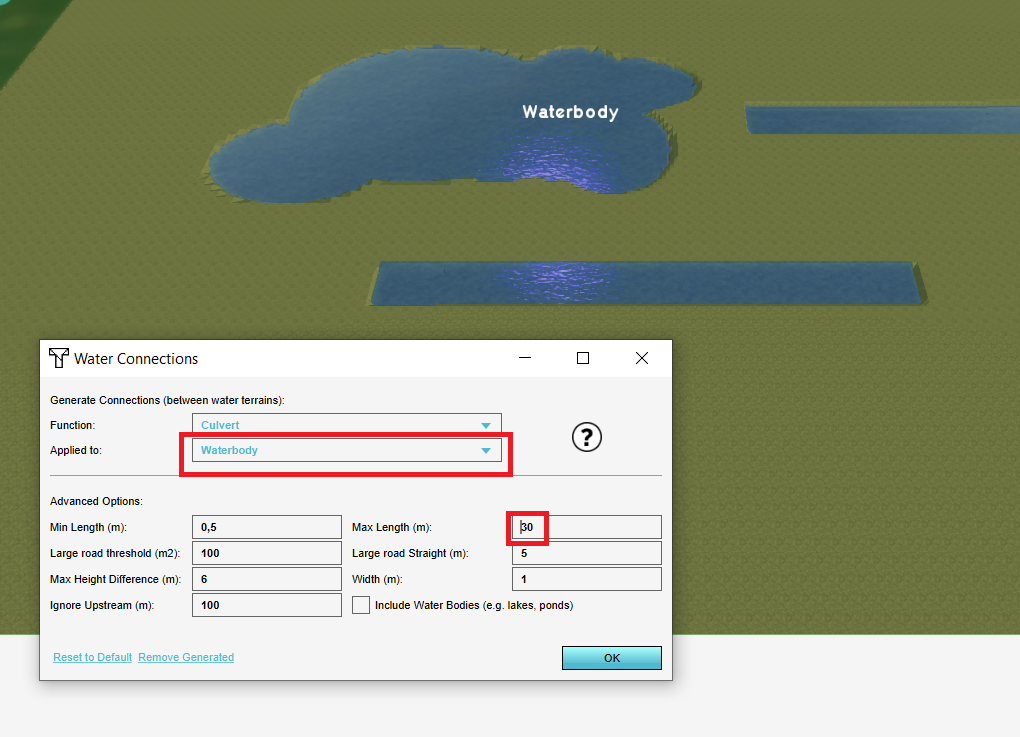
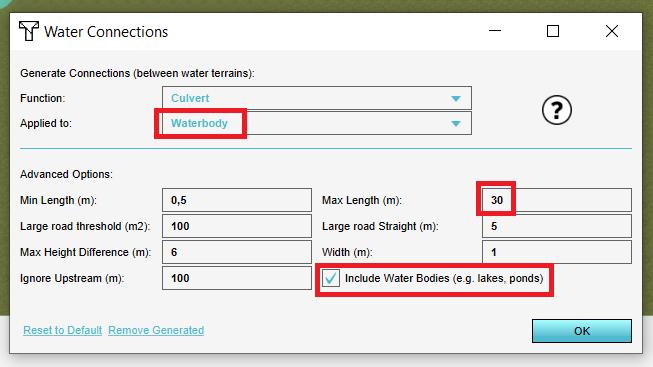
Include water bodies
- Zoom to the Waterbody neighborhood and open the Water Connections generator panel.
- Measure the distance between the waterways and the waterbody and set the Max length on 30m. Choose the correct neighborhood and generate the culverts. Notice 0 culverts are generated.
- Read the section: include water bodies.
- Open the Water Connections generator panel and check the include water bodies option. Notice that now culverts are generated between the water ways and waterbody.
Step 1. Zoom to the neighborhood and generate culverts
Step 4. Choose the neighborhood and check the include water bodies option.
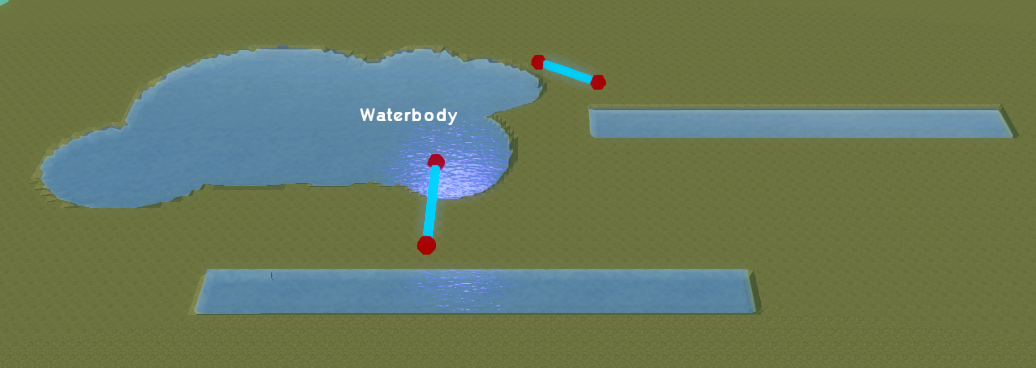
End result

