Demo Watershed Project Future Design
Jump to navigation
Jump to search
| <<Previous page |
Future design
In the following steps the project will be extended with a few building blocks, terrain height adjustment and a waterbody to see how this effects the Watershed areas.
- Click on the Future design tab and click on the house icon in the Action bar.
- Click on the Apply button to build the plan. A plan is called a measure. With measures, scenarios can be created. Notice a few houses and a waterbody are being constructed and the overlays are recalculated.
- Notice how the Watershed overlay is changed. Since the waterbody is not connected to other water terrains, water that falls on land and would flow to this waterbody is not assigned to a watershed area. Play the Surface avg direction result result type to see the direction of the rainfall surrounding this plan. You can switch between the original and planned mode to see the current (without the plan) and future design results.
- Select the Surface elevation result type and notice the terrain is raised under the houses. Click on the measurement icon, then draw a line to see a graph of the terrain height. The measuring tool can also be used with other overlays to see the results in a graph.
- Open the Watershed indicator and notice the different calculated surface areas.
-
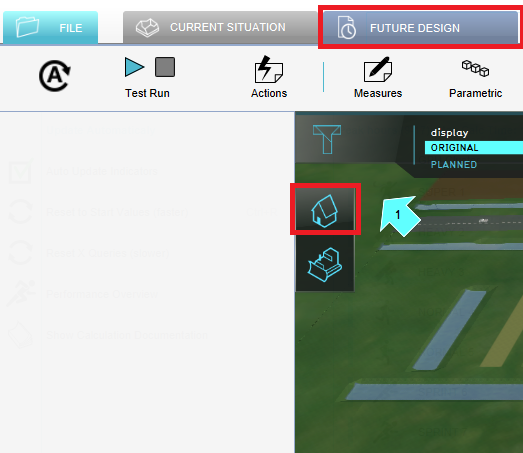 Step 1. Click on the Future design tab and the house icon.
 -
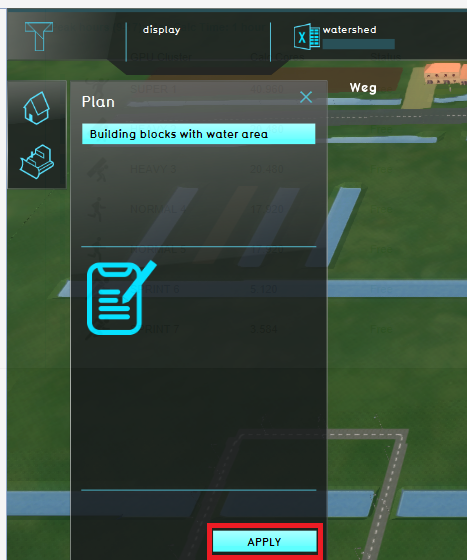 Step 2. Apply the measure.
 -
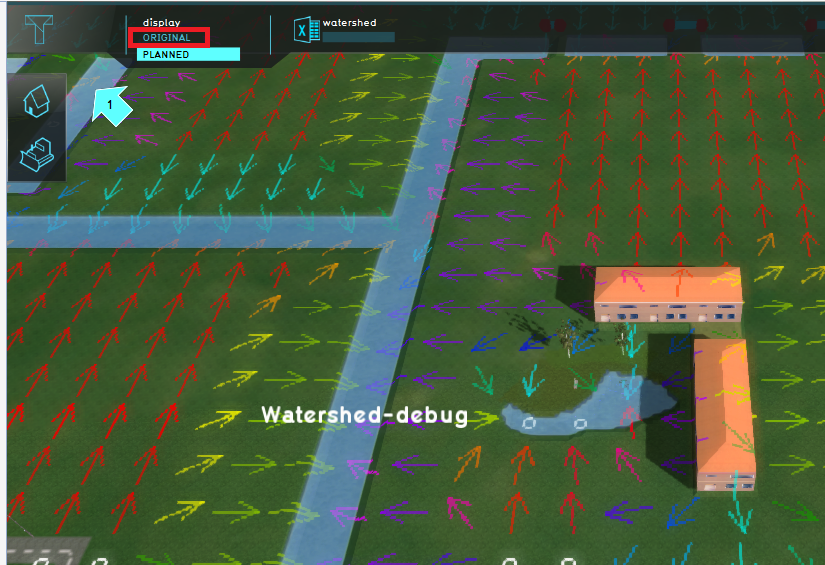 Step 3. Switch between the original and planned mode to see the difference between current and future design.
 -
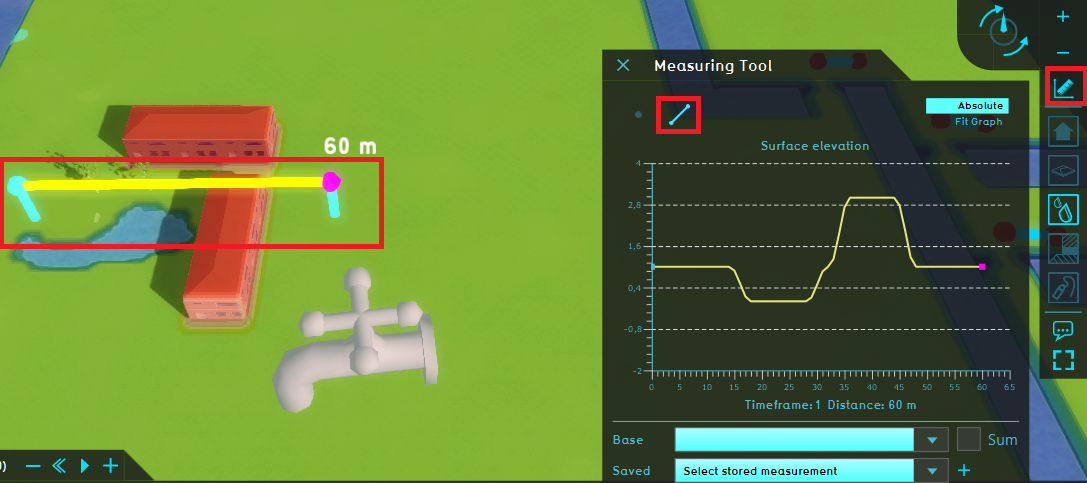 Step 4. Use the measurement tool to draw a line and see a graph of the terrain height.


