How to correct a building at the edge of the project area: Difference between revisions
Jump to navigation
Jump to search
No edit summary |
No edit summary |
||
| (2 intermediate revisions by the same user not shown) | |||
| Line 5: | Line 5: | ||
Buildings at the edge of the model may either be important or unimportant for your calculations. For example, a [[Culvert (Water Overlay)|Culvert]] connecting the waterway to one outside the project area is not important, as no water would be able to flow to there anyway. A [[Pump (Water Overlay)|Pump]] or [[Inlet (Water Overlay)|Inlet]] would be important, as those would force water in that location to flow in or out. | Buildings at the edge of the model may either be important or unimportant for your calculations. For example, a [[Culvert (Water Overlay)|Culvert]] connecting the waterway to one outside the project area is not important, as no water would be able to flow to there anyway. A [[Pump (Water Overlay)|Pump]] or [[Inlet (Water Overlay)|Inlet]] would be important, as those would force water in that location to flow in or out. | ||
* If a | * If a hydraulic structure isn't important, it can either be disregarded (its presence will not affect the calculation if it is deemed invalid), or removed from the model. | ||
* If a | * If a hydraulic structure, consider [[How to correct inlets on land|moving it]] so that it is entirely located within the area where calculations take place. | ||
{{editor location|building|The structure to move}} | {{editor location|building|The structure to move}} | ||
{{howto|title=move a | {{howto|title=move a hydraulic structure into the calculation area | ||
| Select the Building in the Editor. | | Select the Building in the Editor. | ||
| At the bottom of the [[right panel]], select "Draw area". | | At the bottom of the [[right panel]], select "Draw area". | ||
| Line 18: | Line 18: | ||
| Select "Draw area" again. | | Select "Draw area" again. | ||
| Set the brush to "Add" mode. | | Set the brush to "Add" mode. | ||
| Draw a polygon in the 3D | | Draw a polygon in the [[3D Visualization]] in the location where the Building should be. Ensure the centre and/or endpoints of the polygon are well into the calculated area. | ||
| Select "Apply selection". The Building is now moved to a valid location. | | Select "Apply selection". The Building is now moved to a valid location. | ||
}} | }} | ||
[[Category:How-to's]] | |||
Latest revision as of 13:42, 30 January 2024
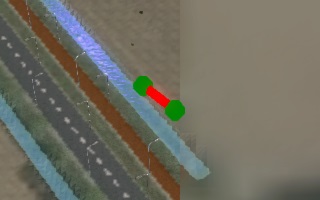
When using the Water Overlay, hydraulic structures may not function when their centerpoint or either of their endpoints are on cells where no calculation takes place. This may be due to the cell falling outside of the calculation area, or being too close to the edge of the project area.
Buildings at the edge of the model may either be important or unimportant for your calculations. For example, a Culvert connecting the waterway to one outside the project area is not important, as no water would be able to flow to there anyway. A Pump or Inlet would be important, as those would force water in that location to flow in or out.
- If a hydraulic structure isn't important, it can either be disregarded (its presence will not affect the calculation if it is deemed invalid), or removed from the model.
- If a hydraulic structure, consider moving it so that it is entirely located within the area where calculations take place.
Editor → Current Situation (Ribbon tab) → Buildings (Ribbon bar) → The structure to move (Left panel)
How to move a hydraulic structure into the calculation area:
- Select the Building in the Editor.
- At the bottom of the right panel, select "Draw area".
- Set the brush to "Remove" mode.
- Draw a selection overlapping with the Building's current polygon
- Select "Apply selection" in the bottom panel. The polygon of the Building is now removed.
- Select "Draw area" again.
- Set the brush to "Add" mode.
- Draw a polygon in the 3D Visualization in the location where the Building should be. Ensure the centre and/or endpoints of the polygon are well into the calculated area.
- Select "Apply selection". The Building is now moved to a valid location.

