Converting a Sketchup model to CityGML format
Jump to navigation
Jump to search

- UPDATE: We recommend to add texture or color to your model for better visibility, and to use SRID 28992 (Amersfoort - RD) as projection in the Netherlands for proper scaling at import in Tygron Platform.
- Please note that SketchUp Pro and its extension CityEditor both require paid licenses. Both do offer a free evaluation period of one month. This article is a quick description of a specific use case, and not in depth documentation for SketchUp Pro or CityEditor.
- This article describes a use case as a proof-of-concept and we do invite you to experiment further.
It is possible to import models into the Tygron Platform as a CityGML (.gml) file. In order to export a SketchUp model as such a .gml file, we use a third party plugin (CityEditor) found in the Extensions Warehouse in the SketchUp PRO version, which is required to be able to use extensions. This extension converts the SketchUp model into a proper CityGML file. There are also other plugins available, such as GEORES etc., but these have not been tested (yet).
Setting up the Extension

1. Visit https://www.3dis.de and download the CityEditor extension.
2. Install the extension through the Extension Manager in Sketchup.
3. The newly installed extention should now be available under the Extentions Menu on the top bar of SketchUp.
Preparing a model in SketchUp
- Have a model loaded in SketchUp.
- Ensure that all faces of the model are at least grouped.
- Give the group a texture or color for better visibility, the model may turn black otherwise, when importing in Tygron Platform.
- Take note of where the model will be placed in the real world (Google Maps coordinates).
- Select Window > Model Info > Geo Location.
- Select Window > Model Info > Units, and ensure all units are in meters (other units can cause scaling issues).
- Select 'Set Manual Location...'.
- Fill in the coordinates from Google Maps and the Country and Location names.
- Confirm the selections and save the SketchUp project.
Preparing the model in City Editor
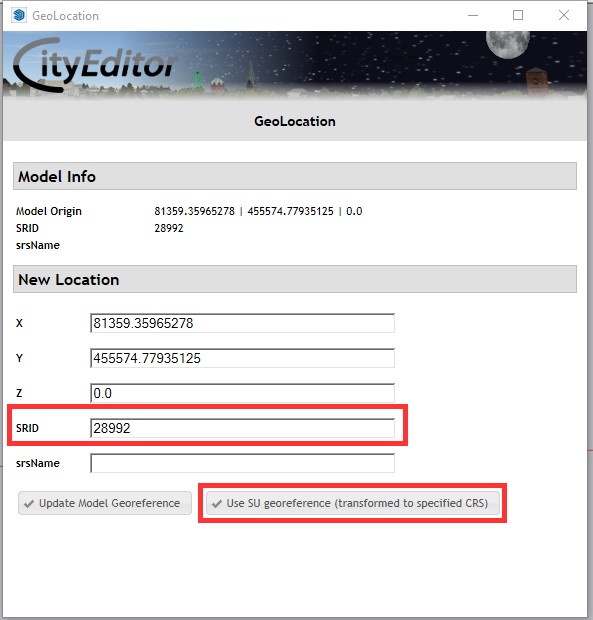
- Select Extensions > CityEditor > Model Info > Update Model Georeference.
- Enter the proper origin coordinates for X and y and the desired elevation Z.
- Enter the required SRID 28992 and select Use SU georeference (transformed to specified CRS).
- Now the X and Y coordinates will be transposed and all geo data is now visible under Model Info.
-
 Select Extensions > CityEditor > Model Info > Update Model Georeference.
 -
 Enter the required SRID 28992 and select Use SU georeference (transformed to specified CRS).


Exporting the model from SketchUp with City Editor
- Select Extensions > CityEditor > Export > CityGML...
- Name your file as desired and add .gml as extension, to force the format to .gml (and not the default .xml).
- On the next panel, on the General tab, you can optionally fill in a name and description for the model.
- On the CityGML Options tab, set version to 2.0, LoD to lod2 and Generate only absolutely nexessary IDs.
- On the Coord. System tab, have Orientation on Easting-Northing and Coordinate System on Load from Model (Check box).
- On the Textures Tab, set up a proper path for any texture files, if needed.
- Start Export.