How to import a SketchUp model in ArcGIS Pro
Jump to navigation
Jump to search
Below the steps on how to import a SketchUp model from the 3D warehouse from SketchUp in ArcGIS Pro.
How to import a SketchUp model from the 3D warehouse in ArcGIS Pro:
- Download a SketchUp model from for example the 3D warehouse as a KMZ file.
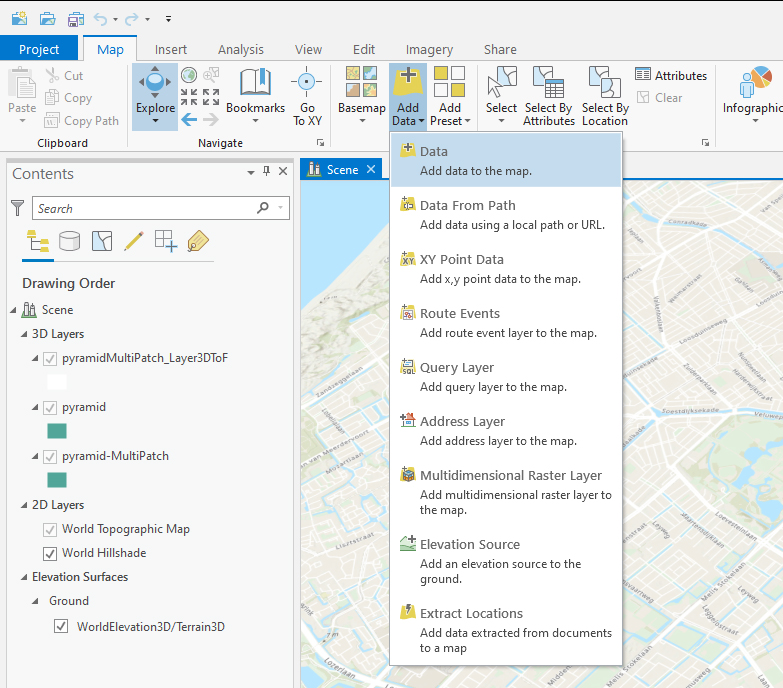
- In ArcGIS Pro click in the Map tab on Add Data and select the KMZ file.
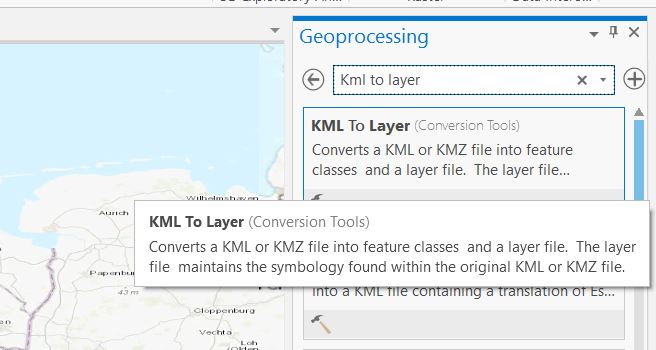
- Click in the Analysis tab on Tools and search for the tool: KML to layer.
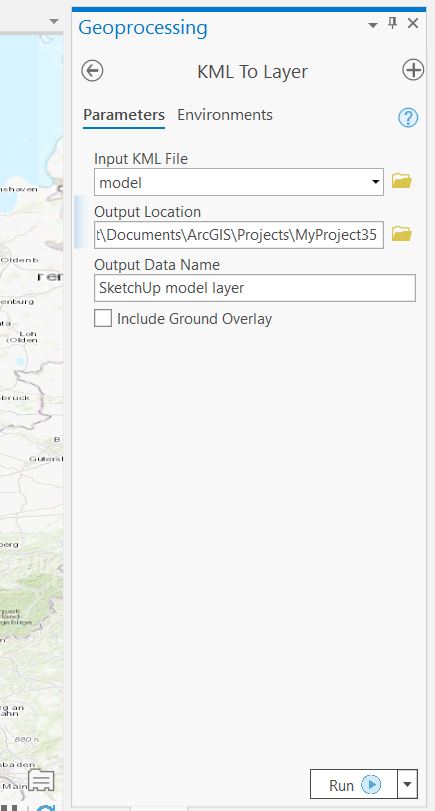
- Choose the KML layer as input file and choose an output location and name. Run the tool.
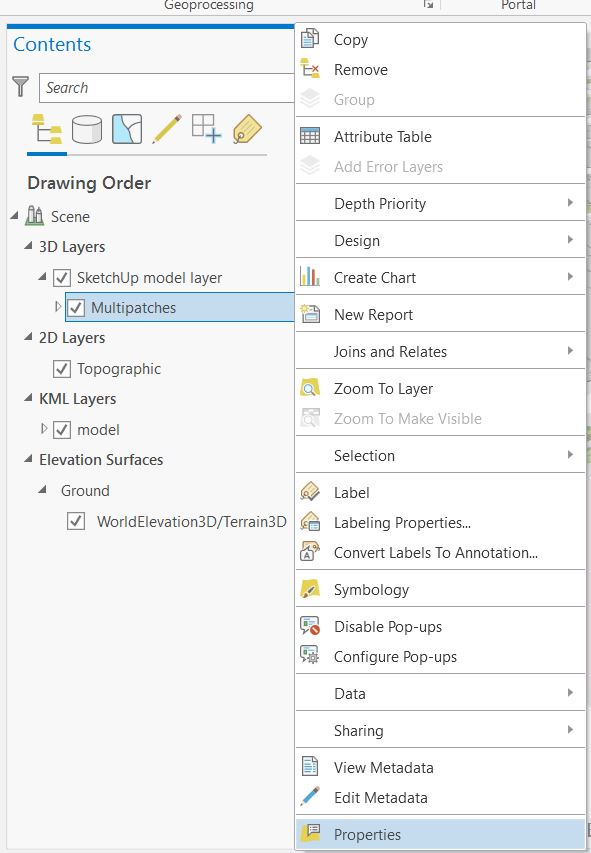
- A new layer file is added to the project. Choose the multipatch layer and right click on the Multipatches layer and choose properties.
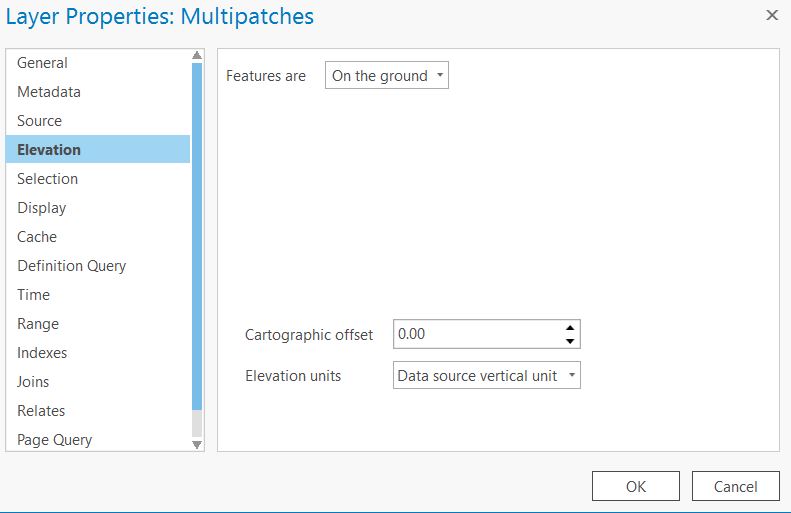
- Select the Elevation tab and select On the ground and then Ok to place the model on the surface terrain.
-
Add the KMZ data
-
Search for the KML to Layer tool
-
Fill in the fields of the KML to Layer tool and click on Run
-
Select the properties of the Multipatches layer
-
Choose Elevation; on the ground and click Ok
Below the steps on how to correctly export a SketchUp model for creating a SLPK file.
How to export a SketchUp model:
- Save the SketchUp model as a SketchUp 2015 SKP file.
- If you would like to have the objects as separate geometries in the Platform, then explode the model.
- Then export the 3D model as a AutoCAD 2004 or release 14 file and make sure to check the Faces for exporting.
- After the file is exported, import the DWG file in ArcGIS Pro.
| <<Back to SLPK manual |
