Levee Type: Difference between revisions
(→End) |
|||
| Line 62: | Line 62: | ||
|howtos= | |howtos= | ||
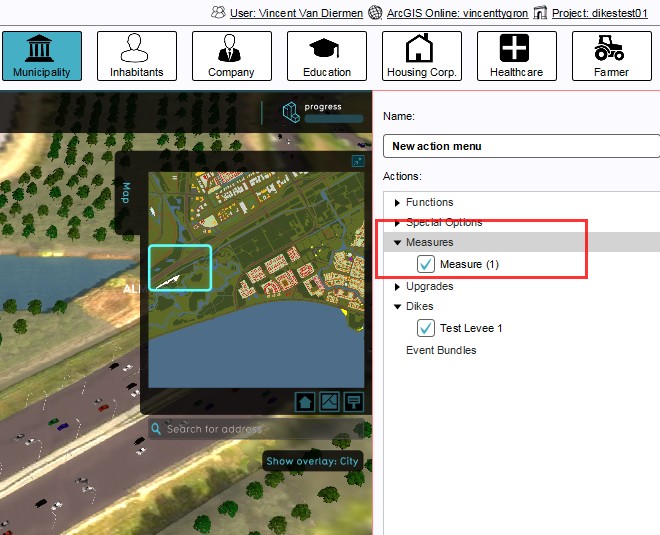
* [[How to add a Levee Type to an Action Menu]] | * [[How to add a Levee Type to an Action Menu]] | ||
* [[How to edit properties of a Levee Type]] | |||
}} | }} | ||
{{Template:Editor_future_design_nav}} | {{Template:Editor_future_design_nav}} | ||
Revision as of 09:56, 21 February 2023
In spatial planning Levee refers to a natural or artificial slope or wall to regulate water levels, called levee in US English.
In the Tygron Platform these levees play a special part. As dedicated Buildings they can affect safe zones and floods. By constructing a levee as an independent action or as part of a measure, the safe zone terrain will be expanded, protecting more houses and industry when a flood occurs. This can all be visualized in the Tygron Platform and a dedicated indicator can be set up to have the implementation of levees score on the stakeholder progression.

High water in Lower Manhattan, before flood protection
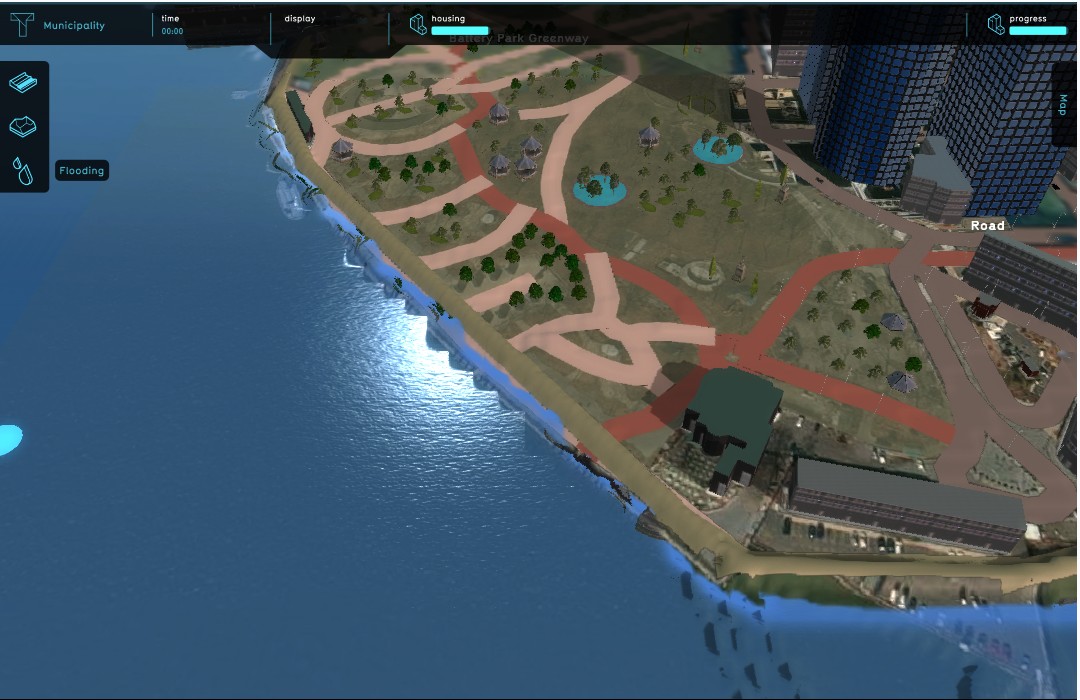
High water in Lower Manhattan, after flood protection
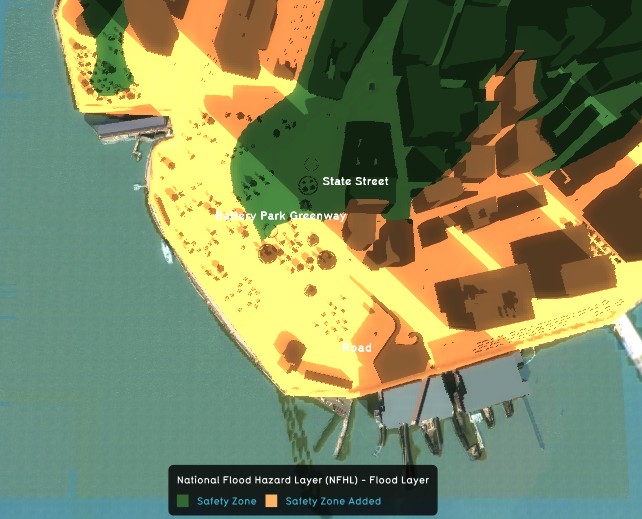
Expanded safe zone in Lower Manhattan, after flood protection
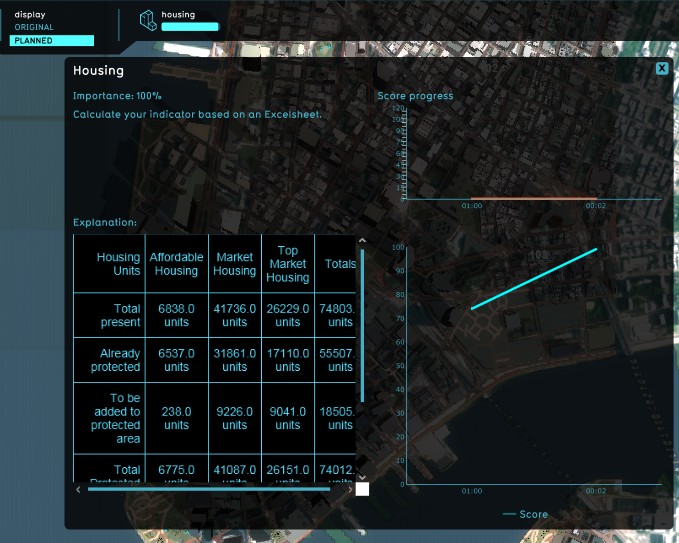
Lower Manhattan Housing units protected (Excel) indicator


Different ways of deploying levees in the Tygron Platform
In the Tygron Platform are two ways present to implement levees in a project; drawn in manually during the session as action, or deployed as part of a (predefined) measure.
Implementation as action allows for trying out new plans and ideas. This can for instance be convenient when the project is part of an outreach to non-planners, for example residents or business owners, to let them try their own plans and ideas without an engineer pre-planning the flood protection for them. This can give session participants a stronger sentiment of involvement with the project.
On the other hand, deploying the levees as part of a predefined measure enables a project to quickly switch between different pre-planned alignments, in order to visualize the impact of each alignment on the indicators.
Deployed as part of a (predefined) Measure
- Note: it is currently only possible to assign functions to the top and side of a levee when deployed as an Action.
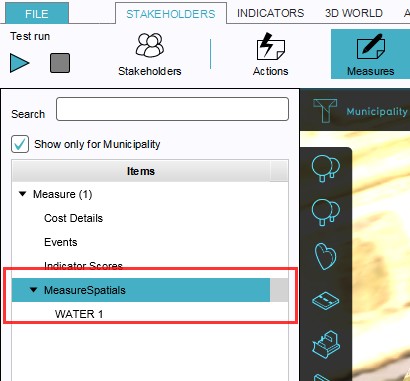
- Select Stakeholders → Measures → Add Spatial Measure
- Open the MeasureSpatials entry
- Select the WATER 1 (default) entry
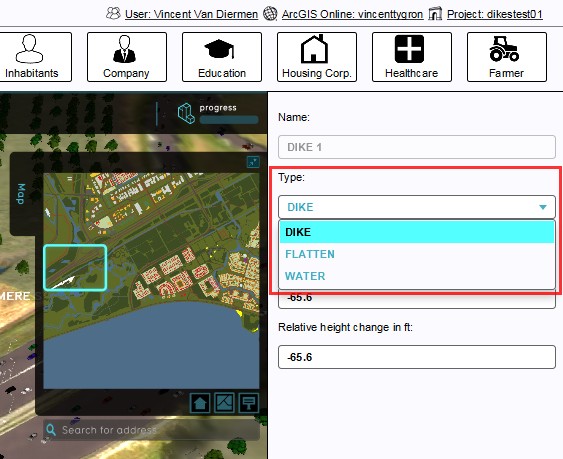
- On the right panel, select LEVEE as type from the drop down menu on the right panel
- Set relative and absolute height on the right panel
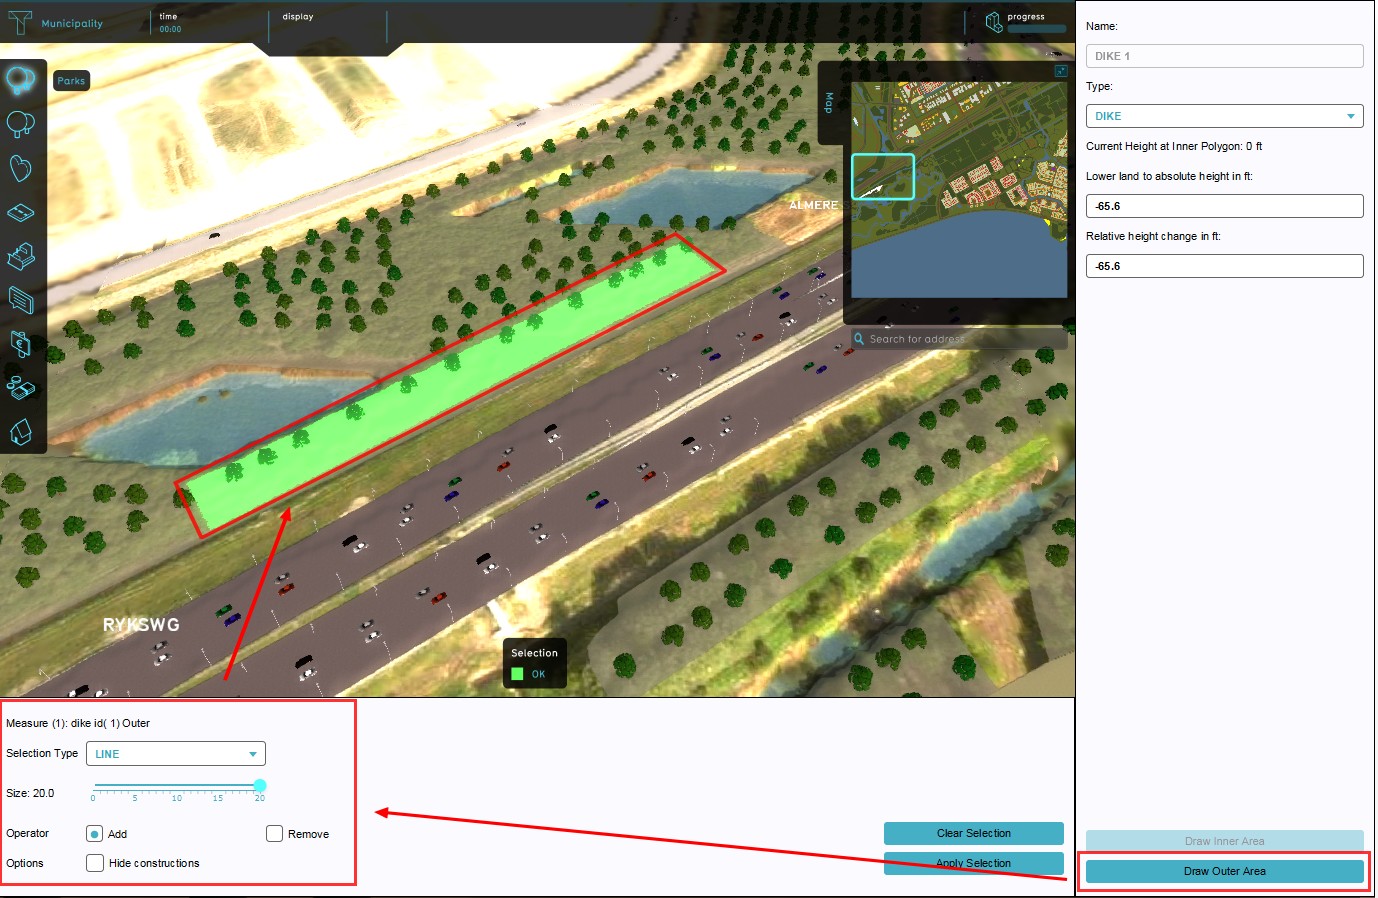
- Use brush panel to draw Outer Area, and apply
- Use brush panel to draw Inner Area, and apply
- Select Stakeholders → Actions
- Add new action (if desired)
- Select Assigned Actions
- Add new Measure to Assigned Actions on the right panel
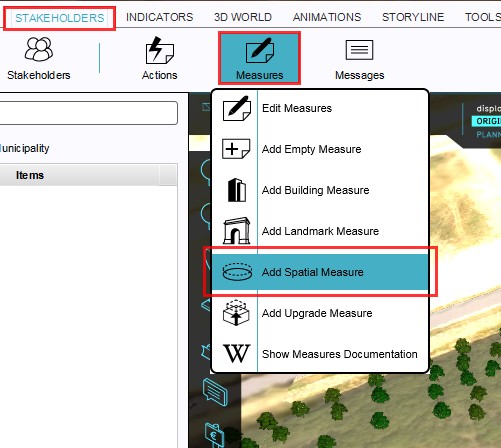
1. Select Add Spatial Measure
2. Open the MeasureSpatials entry
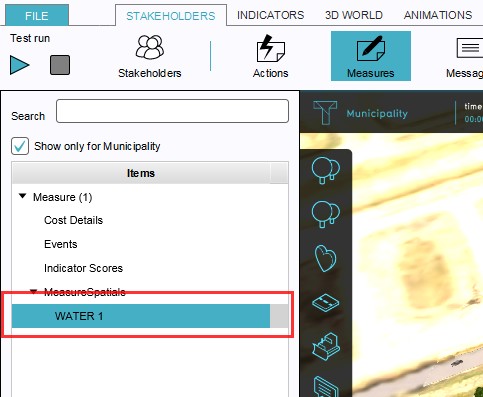
3. Highlight the WATER 1 (default) entry
4. Select LEVEE from the drop down menu

5. Set relative and absolute height
6. Draw Outer Area
7. Draw Inner Area
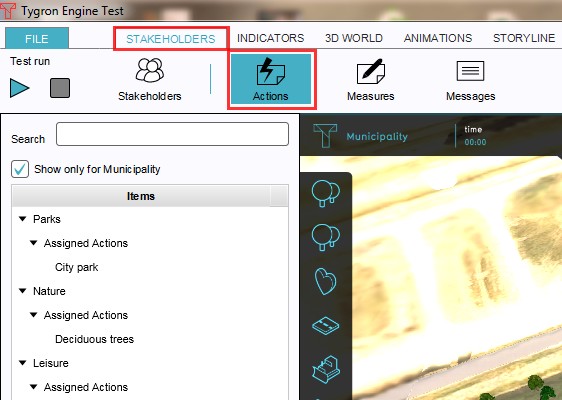
7. Select Stakeholders → Actions
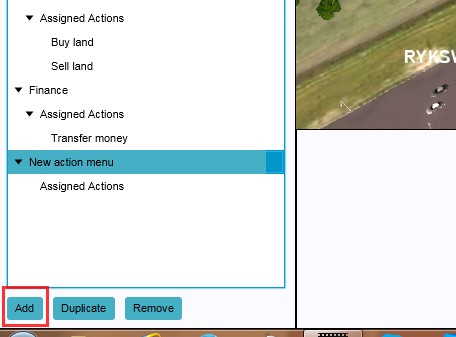
8. Add new Action (if desired)
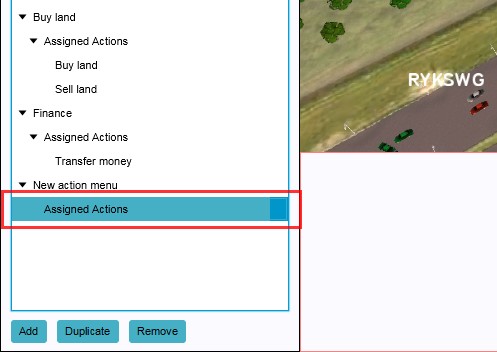
10. Select Assigned Actions
11. Add new Measure to Assigned Actions


Editing properties of a levee as (predefined) Measure

The following properties can be edited of a new or already existing levee that can be deployed as part of a predefined measure:
Type

- When creating a Spatial Measure, a dedicated type needs to be assigned. From the available options WATER, FLATTEN and LEVEE in the drop down menu on the right panel, the last option (LEVEE) needs to be selected for levees deployed as measures.
Relative and absolute height

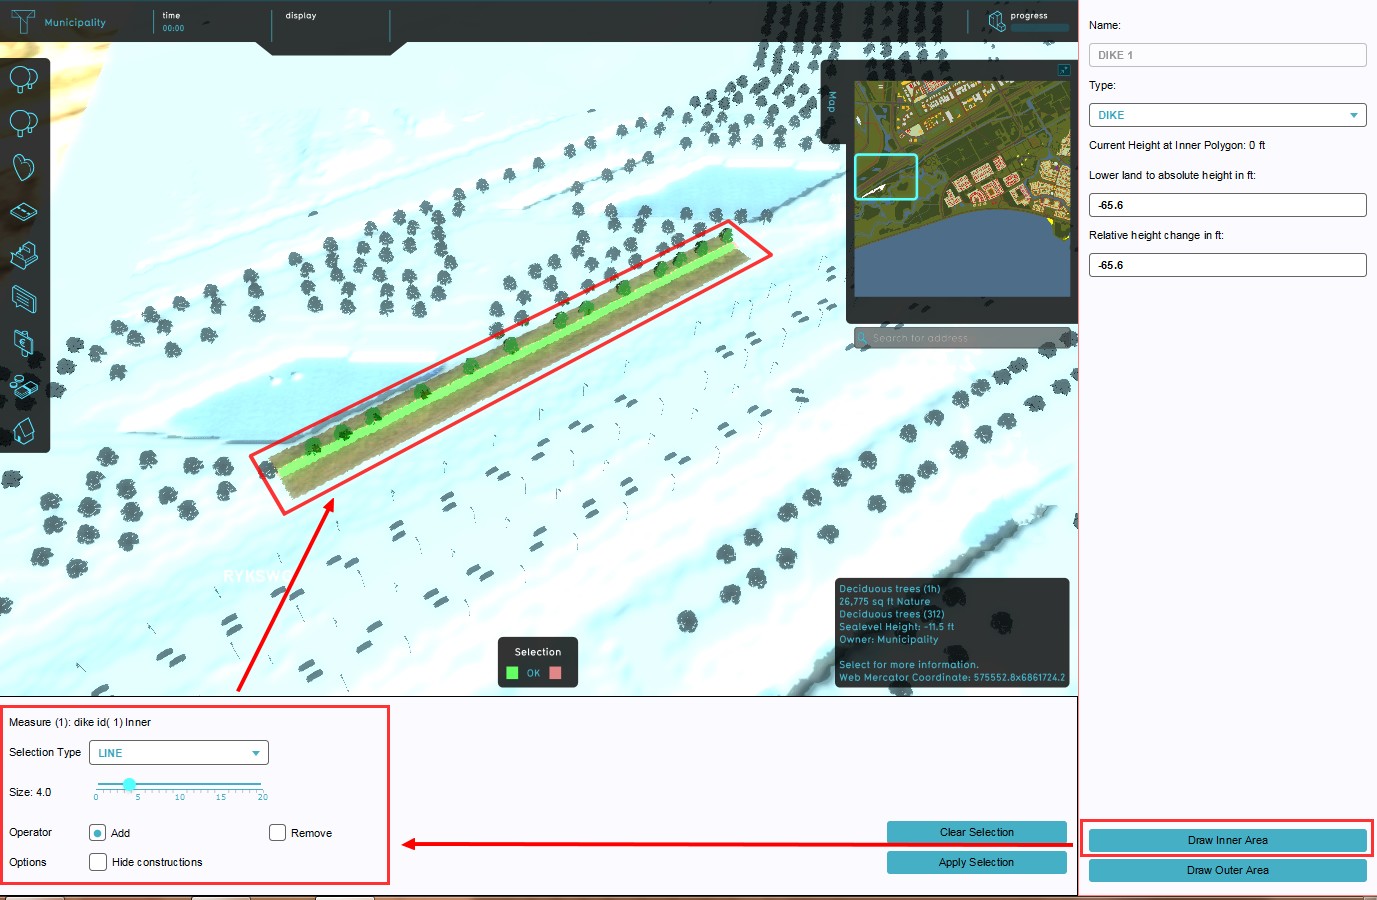
- Levees deployed as part of a measure will change height relative to an absolute height and the terrain elevation. When the terrain is 10 ft (or m) above sea level, and the absolute height of the levee is set to 17 ft (or m), the placed levee will have a relative height of 7 ft (or m). If further on in the project area the terrain height drops to 5 ft (or m), the levee relative height will increase to 12 ft (or m). In the height adjustment fields these values can be changed as desired. The value 'Current height at Inner Polygon' indicates the actual terrain elevation on the location of the mouse cursor in the 3D Visualization.
Outer area
- Drawing the Outer Area decides the surface area taken by the predefined measure. This Outer Area refers to the actual location, length and width of the levee. Selecting this option opens the brush panel on the bottom panel, under the project main view. By adjusting the brush, the desired size can be selected. The line brush would be the most suitable brush type for this building.
Inner area
- After drawing the Outer Area, an Inner Area is required to visualize the actual levee when the measure is implemented. This Inner Area decides, based on the set height of the levee, the slope of the sides of the levee. The wider the Inner Area is, the steeper the slopes will be, but also the wider the top layer will be. When the Inner and Outer Area width are equal, the slopes will be vertical. If the Inner Area is drawn offset of the center line, the side it is drawn on more will have steeper slopes. Selecting this option also opens the brush panel on the bottom panel, under the project main view. The available location will be visible as the only area in the 3D Visualization that is not masked with a grey layer.
End