TQL tutorial: Difference between revisions
m (→Statements) |
m (→Statements) |
||
| Line 155: | Line 155: | ||
The preceding spatial clauses can be summarized in the following overview: | The preceding spatial clauses can be summarized in the following overview: | ||
<gallery style='margin:auto;width:fit-content;text-align:left;'> | <gallery style='margin:auto;width:fit-content;text-align:left;'> | ||
File:Tql select landsize representation.png|thumb|left| | File:Tql select landsize representation.png|thumb|left|400px|Landsize: surface area. | ||
File:Tql select lotsize representation.png|thumb|left| | File:Tql select lotsize representation.png|thumb|left|400px|Lotsize: landsize occupied by Buildings. | ||
File:Tql select floorsize representation.png|thumb|left| | File:Tql select floorsize representation.png|thumb|left|400px|Floorsize: floorspace in buildings based on lotsize and floors. | ||
File:Tql select units representation.png|thumb|left| | File:Tql select units representation.png|thumb|left|400px|Units: housing units based on floorsize. | ||
</gallery> | </gallery> | ||
Revision as of 15:48, 6 March 2024
Prerequisites
The following prerequisites should be met before starting this tutorial:
- This tutorial relies on base knowledge about the editor interface. If you have not yet followed the tutorials related to those subjects please do so first.
- This tutorial can be followed with any project of any arbitrary location, preferable in an urban environment.
Preparations
Take the following steps as preparation for following this tutorial:
- Start your project. This can be a pre-existing project, or a newly created project.
Creating various Grid Overlays
To experiment with queries for grid calculation results, a Grid Overlay should be present in the Project. To experiment appropriately with the various statements, both a Heat Stress Overlay a Water Overlay are good Grid Overlays to add and experiment with.
First, ensure a Rainfall Overlay is present in the Project.

Next, ensure a Heat Stress Overlay is present in the Project.

In addition to a Heat Stress Overlay's default PE Temperature result, a shade result can be output as well, which will be useful in demonstrating specific query structures.
After adding the Heat Stress Overlay, it will have been selected in the Editor, and its details are opened in the right panel.
Click on "Configuration Wizard" to open the Heat Overlay Configuration Wizard.

Continue to the step regarding "Output Overlays".
Ensure that, in addition to the default PE Temperature result, the Shade result type is selected as well.

Close the Heat Overlay Configuration Wizard
Ensure the Heat Stress Overlay is recalculated as well.

Introduction to TQL
TQL is an abbreviation for Tygron Query Language. It is a custom query language created to allow for obtaining statistical data from a Project. The language consists of "queries", which can be interpreted as questions asked of the Project. Such a query is composed of a statement, which embodies the requested information, and a number of clauses, which define/filter the data taken into consideration.
TQL queries are an important tool for automated analyses of Projects, both of the Current Situation as well as any Future Designs.
TQL queries by themselves can be used to obtain bits of information. In broader contexts, such as Excel Indicators or Panels, or scripts interacting via the API, the combination of multiple queries allows for obtaining large amounts of information which together can be used for more complex analyses.
Most statements return numerical values which can be used in calculations. Some statements return some form of text.
When statements return numerical values, these values are usually presented in a unitless way. Results are always in the appropriate SI unit, e.g. meters for length or height and square meters for surface areas.
Query tool
To get started with the creation of queries, open the query tool:

The query tool is an assistive tool for the creation of queries. It helps by offering up options for which clauses can be added to statements and queries. It also allows for executing queries and seeing the results. This means that any created queries can be validated that they function as expected, but also that small bits of information can be requested on-the-fly.
When the query tool opens, a simple query is already composed.

If any clauses are listed, click on "Remove clause" for each of them until no clauses remain. Only the statement should remain.

Ensure the query type is set to "SELECT", which means to request data from the Project.
Ensure the statement is set to "LANDSIZE", which is a request for surface area.

Click on "Execute Query".

The result shown is the surface area found in the Project, unqualified. It will be the size of the Project in its entirety. Although presented without a unit, it is a surface area, and thus the appropriate SI unit is square meters.

Next, click on "Add clause". This adds a qualifier to the query; a filter or rule the data must conform to before being taken into consideration.

Set the clause to "NEIGHBORHOOD", and select a Neighborhood which is well present in the Project.

The query now has a statement to request the landsize of the Project area, but a clause that it must be land in a specific Neighborhood. In short, the query is now a request for the surface area of a specific Neighborhood.
Then, click on "Execute Query" again.
The result shown is the surface area which lies in the selected Neighborhood.

Note that the composed query is shown in the query tool in text form as well. The dropdowns allow for (and guide) the selection of the individual parts of the query, but the full query is all components strung together. The order of the clauses does not matter.

Whenever a query is used outside the context of the query tool itself, it is this text which is used and interpreted.
Also note that using the dropdown, a Neighborhood could be selected by name, but in the actual query the ID of the Neighborhood is used. If the name of the Neighborhood (or any other Item being queried) is ever changed, the ID remains unchanged and thus the query will remain functional.
Basic queries
To begin working with TQL, it is necessary to have a basic sense of the most commonly used components. With a few basics it is possible to reformulate questions and use-cases to fit into a query form.
Statements
To create queries effectively, some knowledge of which statements are available is important. These will be essential as they determine the kinds of data you can obtain from any Project area. Construct the following queries and see the results:
- SELECT_NAME
- The name of a specific Item.
Create and execute the following query:
SELECT_NAME_WHERE_NEIGHBORHOOD_IS_...
The result is the name of the Neighborhood queried.

- SELECT_LANDSIZE
- The amount of surface area matching whichever qualifiers are provided in the clauses.
Create and execute the following query:
SELECT_LANDSIZE_WHERE_
The result is the size of the entire Project area.

- SELECT_LOTSIZE
- The amount of surface area which is taken up by Buildings such as apartments, roads, parks and trees. It's effectively the footprint of all constructions.
Create and execute the following query:
SELECT_LOTSIZE_WHERE_
The result is the surface area within the Project area which is taken up by Buildings.

- SELECT_FLOORSIZE
- The footprint of constructions, multiplied by their respective floors. The amount of space which the found constructions contain for use. This includes "single floor" constructions like roads and trees, unless further qualified.
Create and execute the following query:
SELECT_FLOORSIZE_WHERE_
The result is the total floorsize of all Buildings in the Project area.

- SELECT_UNITS
- The amount of housing units present. This is calculated by dividing the floorspace of Buildings by their respective UNIT_SIZE Attributes. Buildings which are not representative of housing are ignored.
Create and execute the following query:
SELECT_UNITS_WHERE_
The result is the total amount of housing units in the Project area. Note that this may include a fractional housing unit, as it is calculated based on the known/computable floor sizes.

The preceding spatial clauses can be summarized in the following overview:
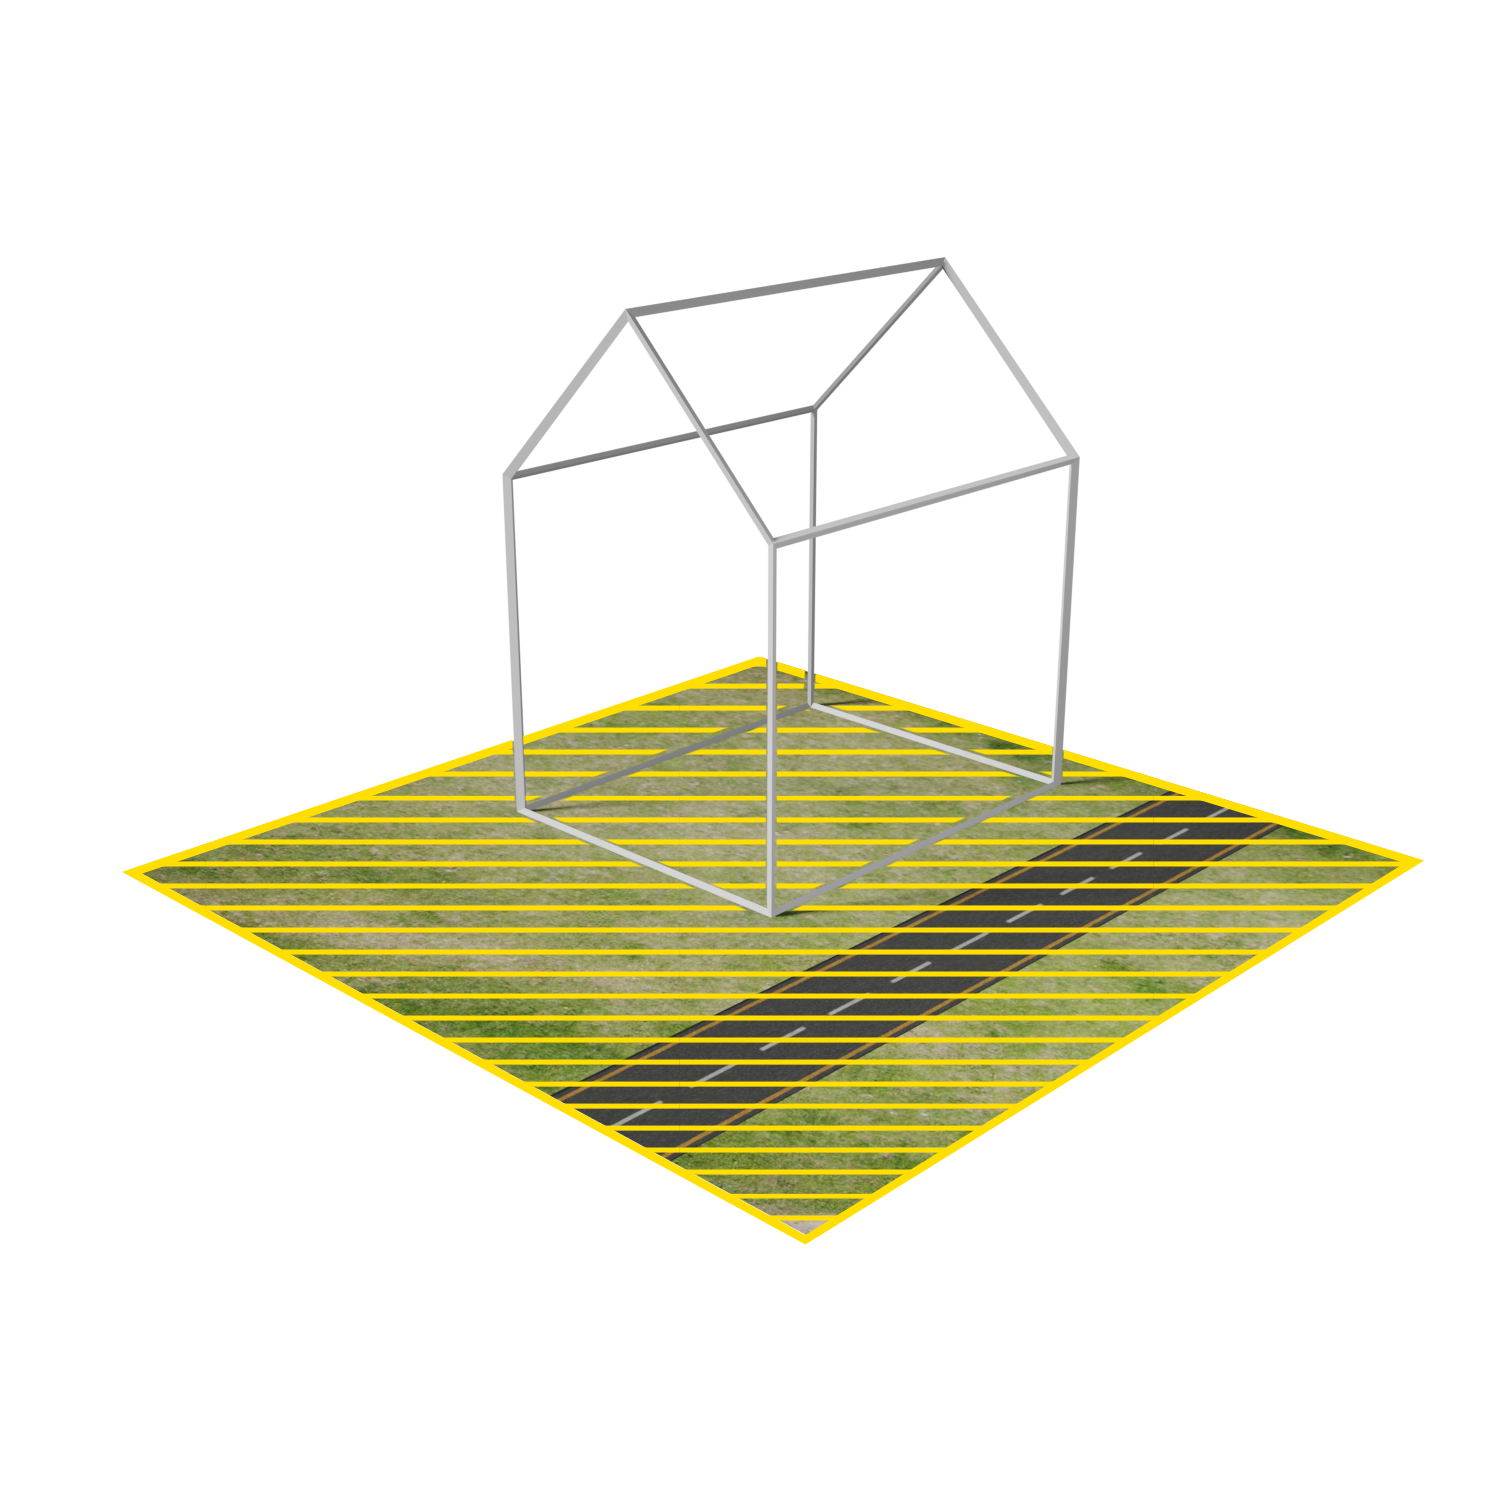
Landsize: surface area.
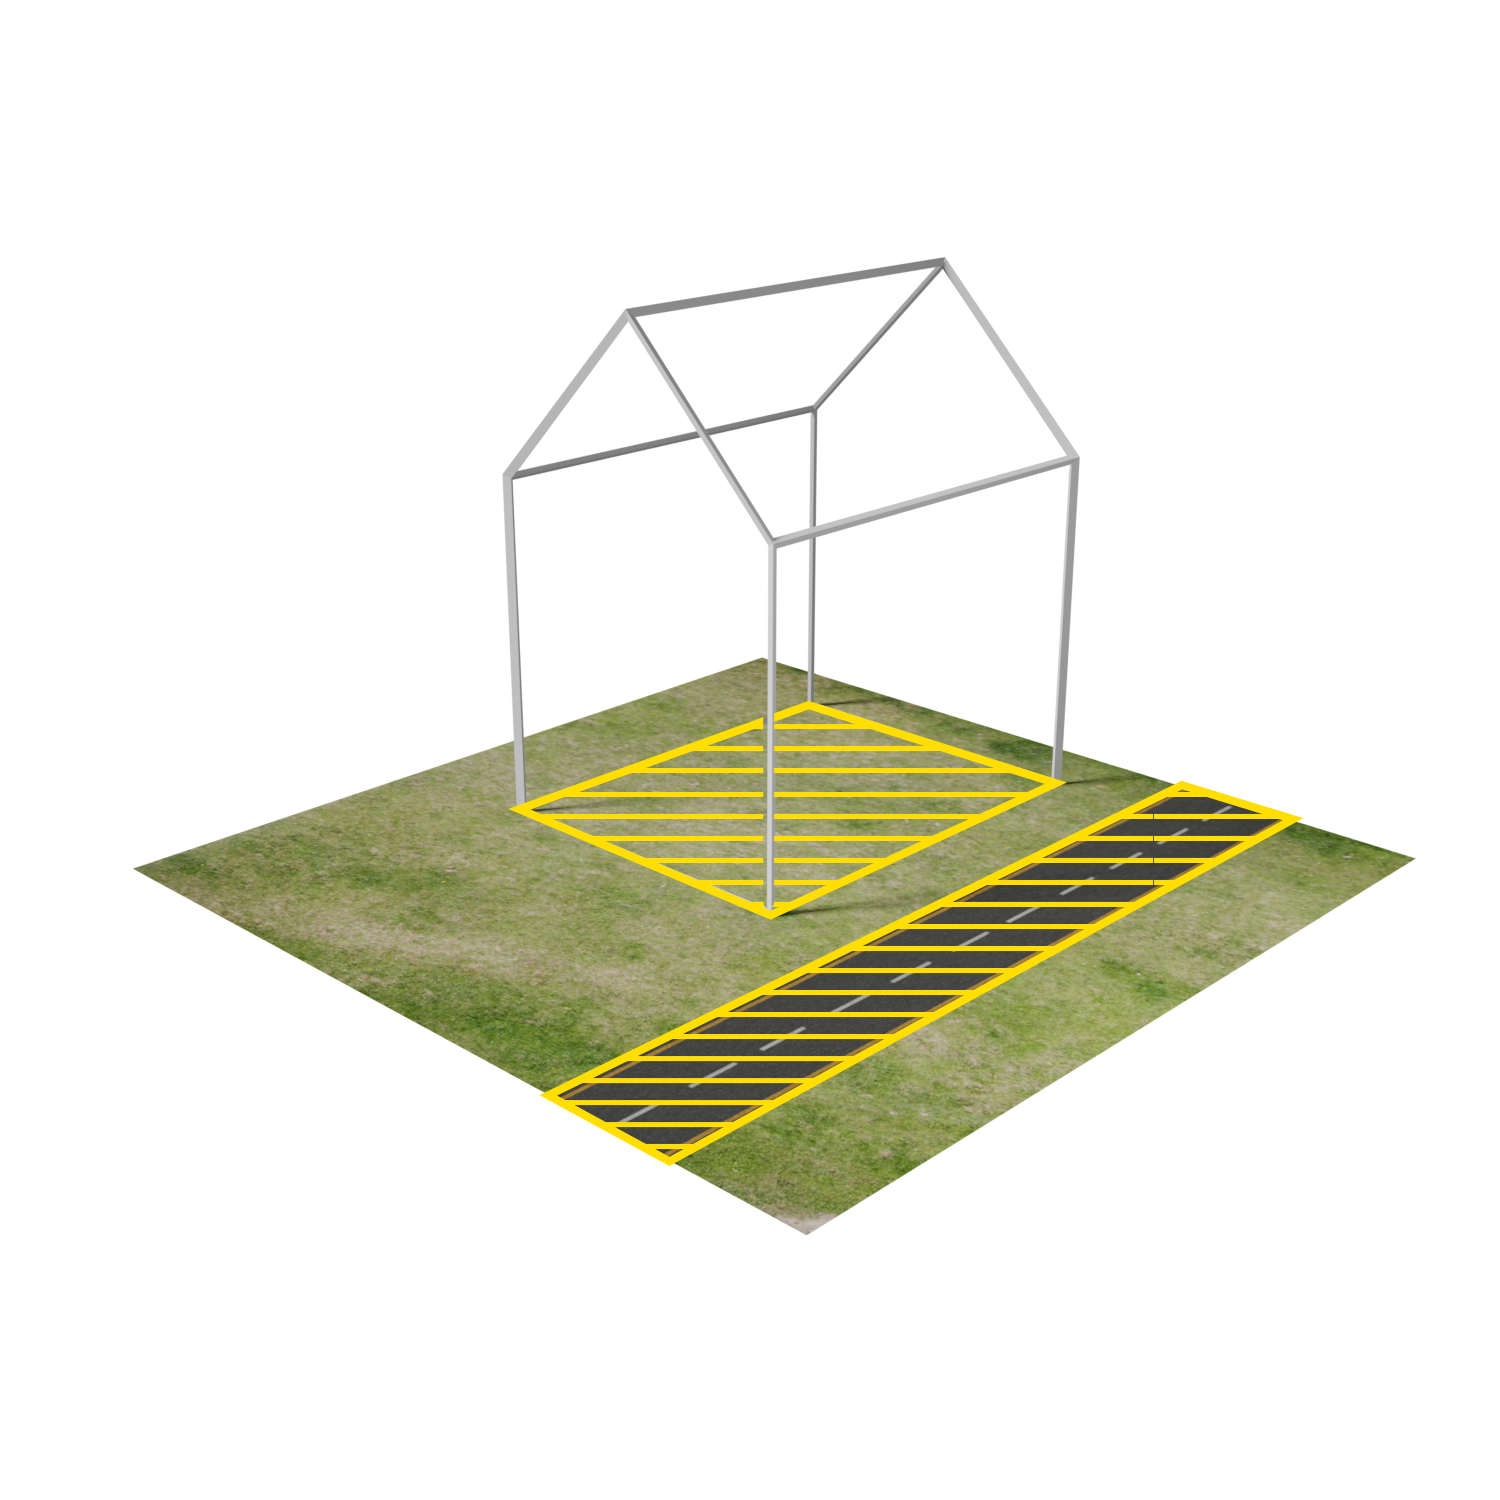
Lotsize: landsize occupied by Buildings.
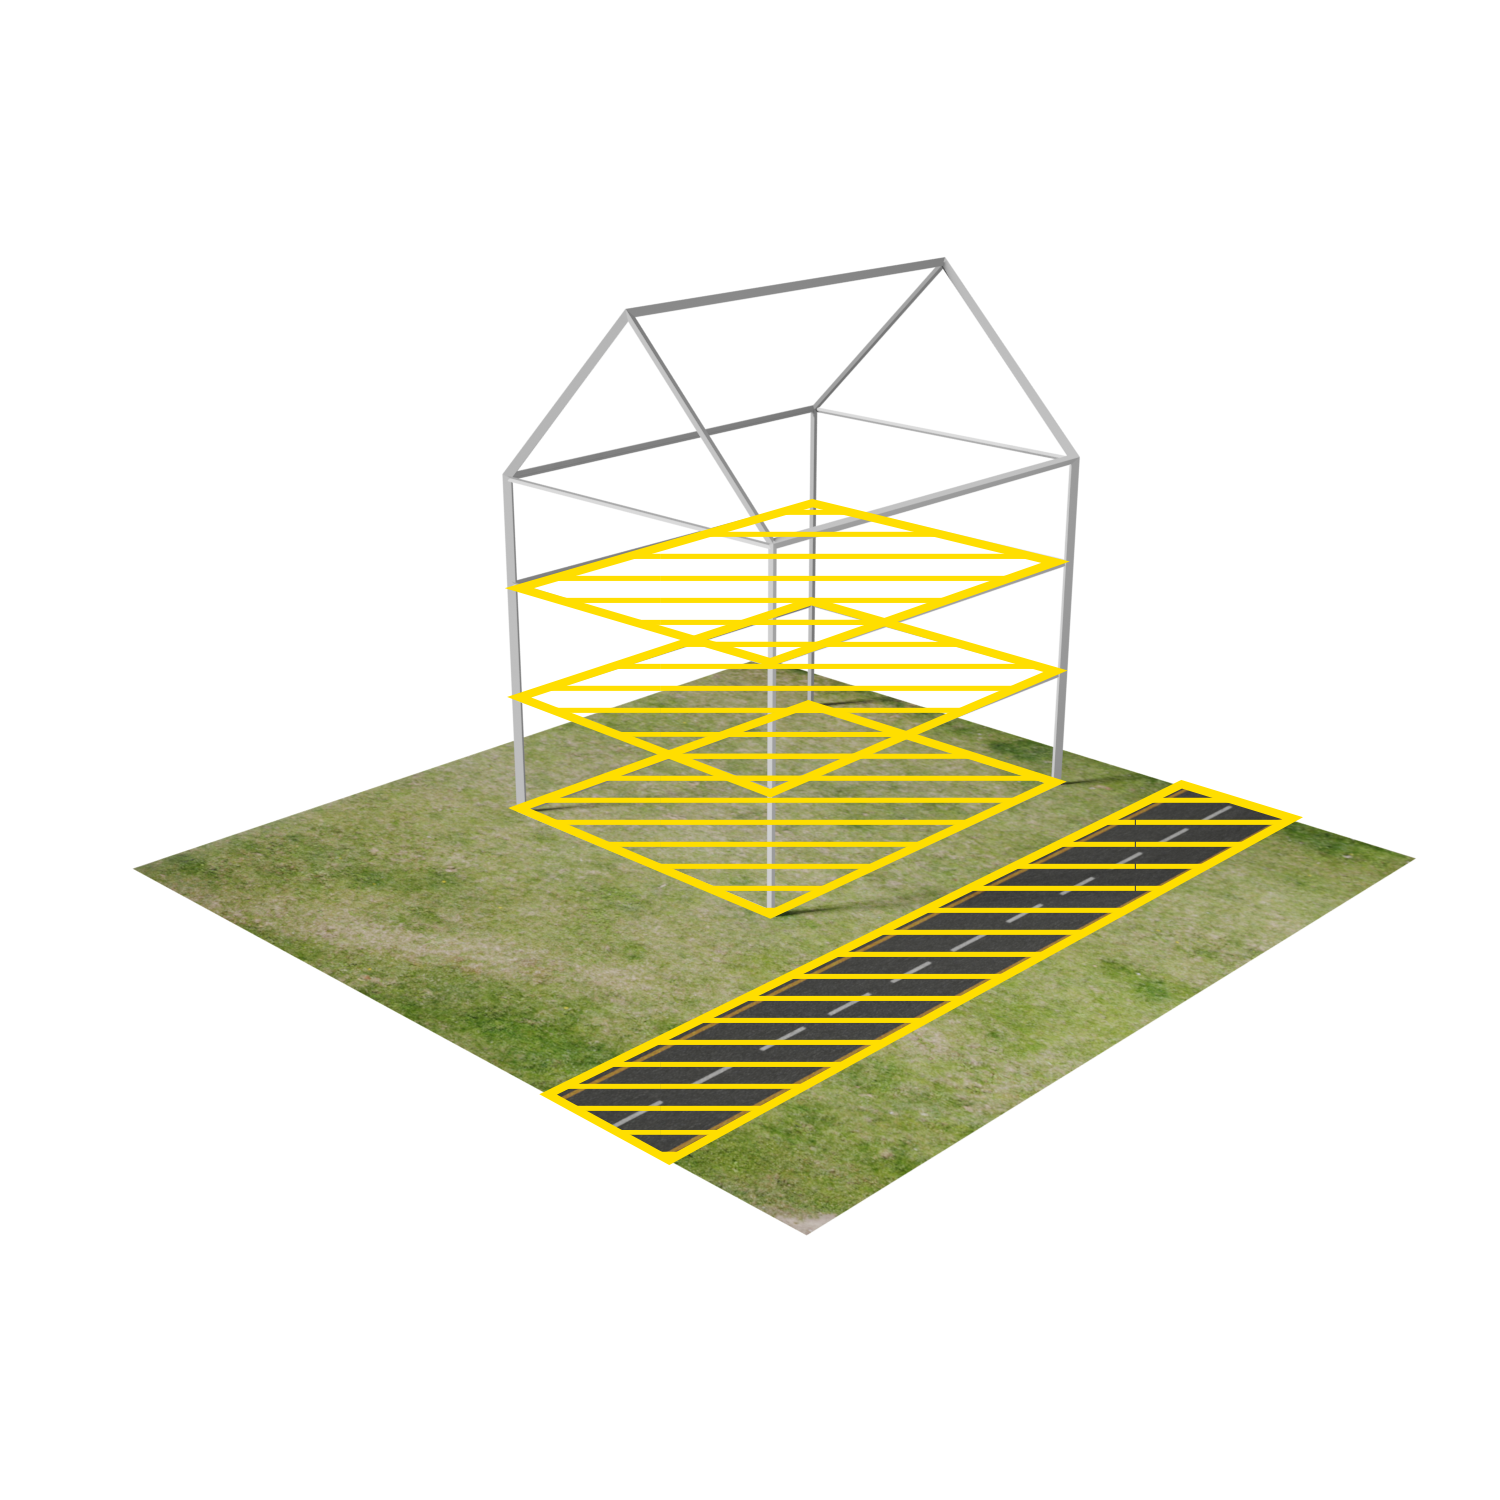
Floorsize: floorspace in buildings based on lotsize and floors.
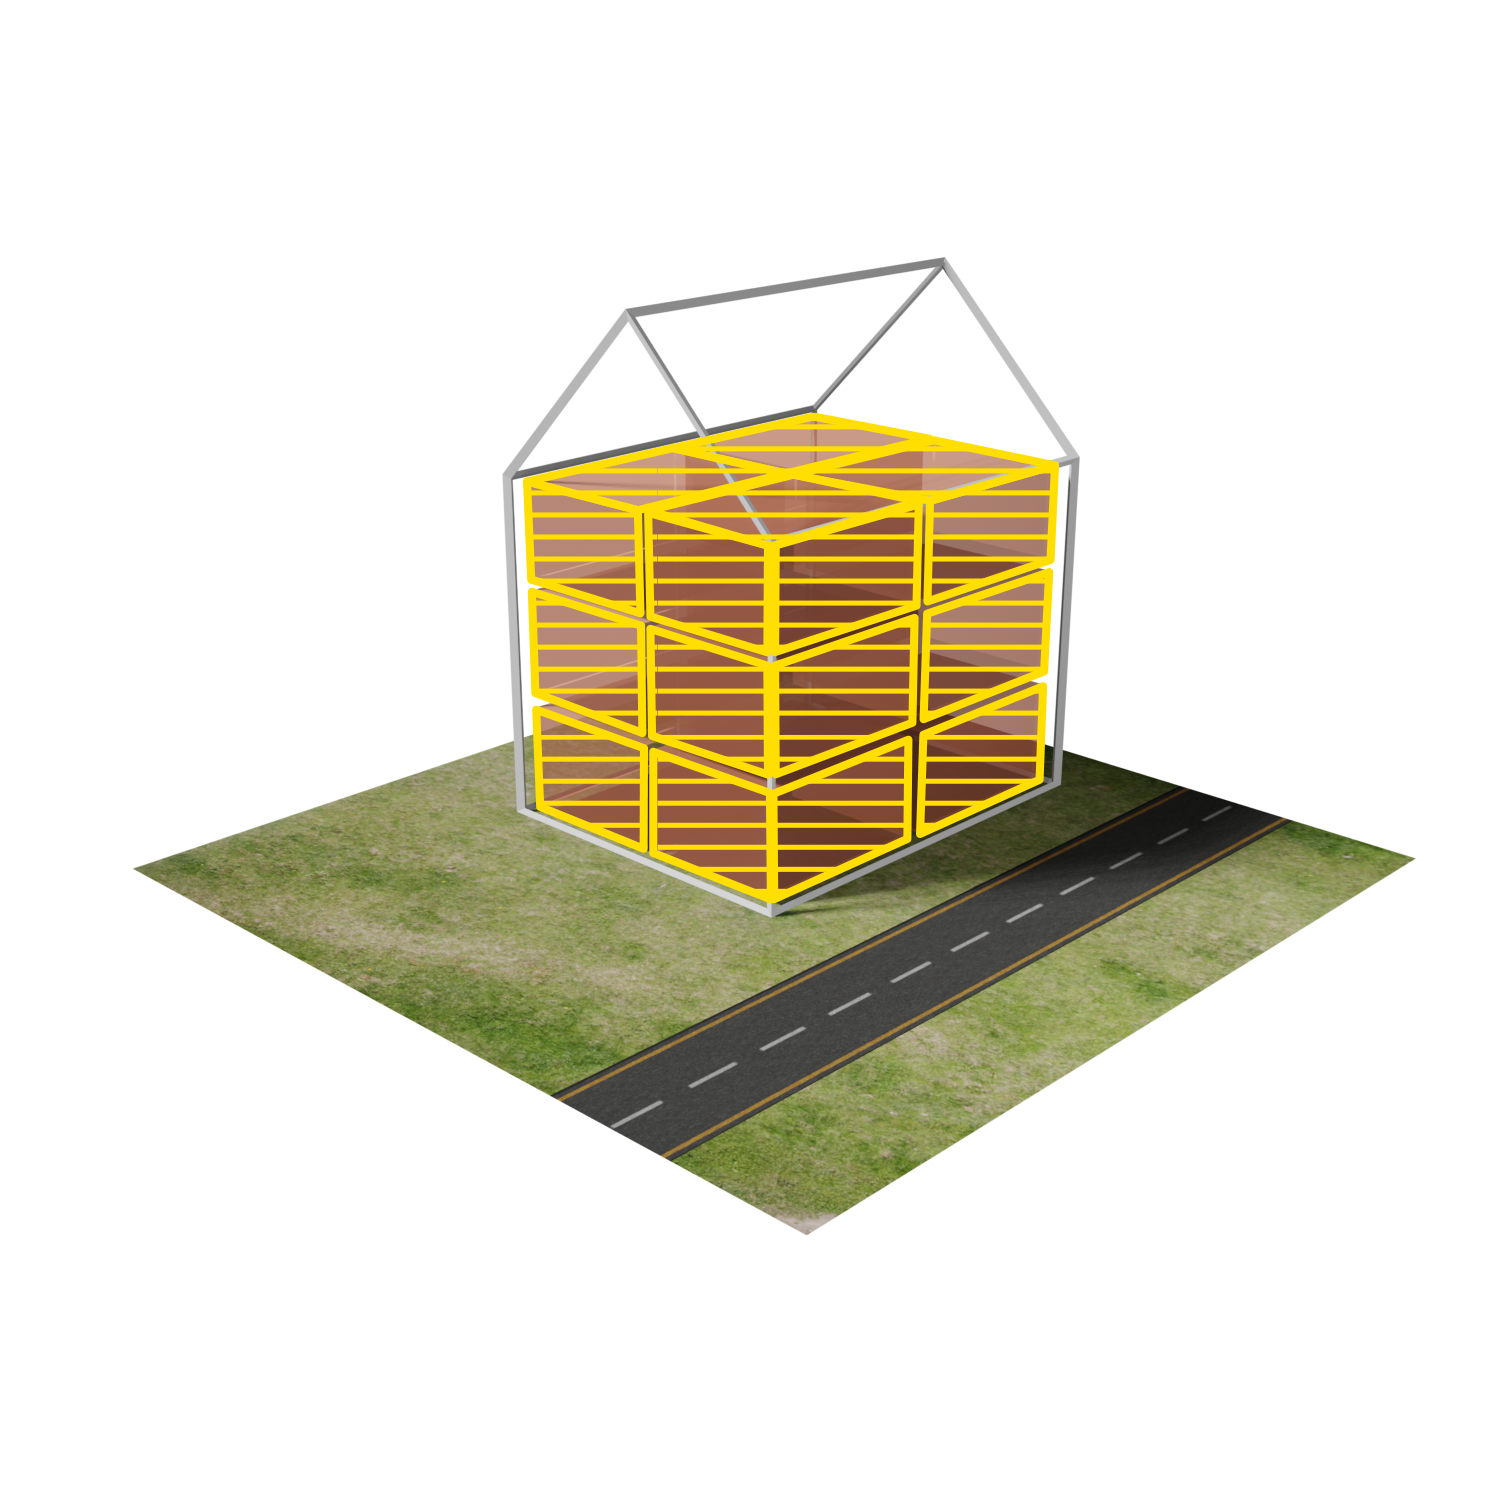
Units: housing units based on floorsize.


Clauses
Adding proper clauses to queries is vital for obtaining exact subsections of data relevant to address specific questions. Each clause will form a prerequisite which the data must meet before being included in the results. If multiple clauses are included, all those prerequisites must be met simultaneously. Construct the following queries and see the results:
- WHERE_NEIGHBORHOOD_IS_...
- The data must be related to, or inside of, this Neighborhood.
Create and execute the following query:
SELECT_UNITS_WHERE_NEIGHBORHOOD_IS_...
The result is the total amount of housing units in the specified Neighborhood. Note that this may include a fractional housing unit, as it is calculated based on the known/computable floor sizes.

- WHERE_CATEGORY_IS_...
- The data requested is related to Buildings, and those Buildings must be of a specific Category.
Create and execute the following query:
SELECT_FLOORSIZE_WHERE_CATEGORY_IS_OFFICES
The result is the amount of office space in the Project area.

- WHERE_STAKEHOLDER_IS...
- The data must be related to, or owned by, this Stakeholder.
Create and execute the following query, with the Municipal Stakeholder selected for the STAKEHOLDER clause:
SELECT_LOTSIZE_WHERE_STAKEHOLDER_IS...
The result is the amount of built surface area which is owned by the Municipality.

- WHERE_FUNCTIONMULT_IS_...
- WHERE_CATEGORYMULT_IS_...
- WHERE_ATTRIBUTE_MULT_IS_...
- The data requested is related to Buildings, and the found amount is multiplied by the respective Function Values or Attributes.
Create and execute the following query:
SELECT_FLOORSIZE_WHERE_CATEGORYMULT_IS_PARKING_LOTS_DEMAND_PER_M2
The result is the amount of parking spots which are required to meet the parking demand of all Buildings in the Project area. This is calculated by obtaining all the floorsize of all Buildings, and then multiplying it by the respective parking demand for all Buildings.

Create and execute the following query:
SELECT_FLOORSIZE_WHERE_CATEGORYMULT_IS_PARKING_LOTS_PER_M2
The result is the amount of parking spots which are available in the Project area. This is calculated by obtaining all the floorsize of all Buildings, and then multiplying it by the respective parking supply for all Buildings.

Assignments
- Create a query to find the amount of social housing in the Project area which is owned by a collective corporation.
- Create a query to find the surface area in a Neighborhood which is taken up by shops and restaurants.
Grid queries
Queries can be used to consult grid data as well. Spatial calculations can produce produce results which allow for a general estimation of outcomes, but of which the exact values may be more difficult to read. For example, a Heat Stress Overlay may compute the location of hot or cool locations, but it may be difficult to compare optically how two different locations compare to one another.
Grid clauses
The following clauses, related to accessing grids, are important to be aware of to properly work with grids.
Because an important part of querying grids can be filtering based on grid values, it is again important to note that TQL does not have an inherent concept of units. Instead, whenever a Grid Overlays values are consulted, those values are considered as numerical only. The intended unit should be implicitly considered to be the same as that of the consulted grid.
- WHERE_GRID_IS_...
- The grid to use. Whenever a query is constructed to consult data related to a query, the consulted grid must be specified as well.
- WHERE_MINGRIDVALUE_IS_...
- Consulting only grid cells the value of which is at least the specified value. (Inclusive, so a cell with the exact value is included.)
- WHERE_MAXGRIDVALUE_IS_...
- Consulting only grid cells the value of which is at most the specified value. (Exclusive, so a cell with the exact value is excluded.)
Create and execute the following query, with the Heat Stress Overlay's PE Temperature selected for the GRID clause:
SELECT_LANDSIZE_WHERE_MINGRIDVALUE_IS_35.0_AND_MAXGRIDVALUE_IS_45.0_AND_GRID_IS_...
The result is the surface area in the Project area which has calculated temperatures in the range of 35°C to 45°C.

- WHERE_TIMEFRAME_IS_...
- The Timeframe of the grid to use. When absent, the last Timeframe of the Grid Overlay is used.
Create and execute the following query, with the Water Overlay selected for the GRID clause:
SELECT_LANDSIZE_WHERE_MINGRIDVALUE_IS_0.2_AND_TIMEFRAME_IS_0_AND_GRID_IS_...
The result is the surface area in the Project area which has at least 20 cm (0.2 meters) of water on it at the first recorded timeframe (timeframe 0) of the Water Overlay's calculation.

- WHERE_GRIDVALUE_IS_...
- Consulting only grid cells the value of which is exactly the specified value.
Create and execute the following query, with the Water Overlay selected for the GRID clause:
SELECT_LANDSIZE_WHERE_GRIDVALUE_IS_0.0_AND_GRID_IS_...
The result is the surface area in the Project area which, at the end of the Water Overlay's calculation, has no water on it.

Grid statements
Construct the following queries and see the results.
- SELECT_GRIDAVG
- The average value of grid values.
Create and execute the following query, with the Heat Stress Overlay's PE Temperature selected for the GRID clause:
SELECT_GRIDAVG_WHERE_GRID_IS_...
The result is the average temperature in the Project area.

- SELECT_GRIDVOLUME
- The volume of grid values. The surface area of each individual grid cell, multiplied by its respective value.
Create and execute the following query, with the Water Overlay selected for the GRID clause:
SELECT_GRIDVOLUME_WHERE_GRID_IS_...
The result is the volume of water in the Project area.

Boolean results
A boolean value is a value which is either "true" or "false". Computationally, a "0" is generally representative of "false", and a "1" is generally representative of "true".
When working with grids which only output a 0 or 1, some statements can be used in slightly more efficient ways as well.
Create and execute the following query, with the Heat Stress Overlay's Shade Coverage selected for the GRID clause:
SELECT_GRIDAVG_WHERE_GRID_IS_...
The result is the average value of shade coverage in the Project area.

However, because all the values in the Grid Overlay are only a 1 or a 0, the result can also be read as the fraction of Project area which has shade coverage.
Create and execute the following query, with the Heat Stress Overlay's Shade Coverage selected for the GRID clause:
SELECT_GRIDVOLUME_WHERE_GRID_IS_...
The result is the "volume" of shade coverage in the Project area.

However, because all the values in the Grid Overlay are only a 1 or a 0, the value as read as a volume can equally be read as a surface area. (Because all surface area which should be taken into account is multiplied by "1", leaving the value unchanged) Therefore, the result can also be read as the surface area which has shade coverage.
Assignments
- Create a query to obtain the average temperature in a specific neighborhood.
- Create a query to obtain the surface area of roads in a specific neighborhood with a temperature of at most 40 degrees.
- Create a query to obtain the surface area of roads in a specific neighborhood with shade coverage.
Combined queries
Queries are composed of a single statement, and a number of clauses. The clauses are always connected with an "AND" operation. This means that the data obtained by the query must match all the clauses.
Although TQL does not have an "OR" operation, its functionality can be easily replicated simply by performing complementary statements.
A practical example is obtaining the amount of floorspace of all types of housing combined. There are multiple categories of housing: SOCIAL, NORMAL, LUXE, SENIOR, STUDENT. By using 5 queries, one for each category, the total amount of floorspace of housing can be obtained:
SELECT_FLOORSIZE_WHERE_CATEGORY_IS_SOCIAL
SELECT_FLOORSIZE_WHERE_CATEGORY_IS_NORMAL
SELECT_FLOORSIZE_WHERE_CATEGORY_IS_LUXE
SELECT_FLOORSIZE_WHERE_CATEGORY_IS_SENIOR
SELECT_FLOORSIZE_WHERE_CATEGORY_IS_STUDENT
This principle extends beyond cumulative or complementary data. Other mathematical operations are possible as well.
A practical example is that the amount of actual land can be obtained using the following queries, and subtracting the results from one another:
SELECT_LANDSIZE_WHERE_
SELECT_LANDSIZE_WHERE_TERRAIN_WITH_ATTRIBUTE_IS_WATER
By subtracting all surface area which is a Water Terrain from the total surface area, what remains is all the surface area which is not water.
Another example is calculating fractions, percentages, and ratios. For example, with the same queries listed above for landsize and the surface area for water, it is possible to calculate as a percentage how much of the Project area is covered by water.
Final assignments
These assignments require multiple queries. Perform the required queries in sequence, note the results, and manually perform any calculations using the results to obtain the answer.
- Using a LANDSIZE query and a LOTSIZE query, compute the amount of surface area which does not contain a Building in a specific Neighborhood.
- Compute the percentage of a specific Neighborhood in use for housing.
- Using a UNITS query and a FLOORSIZE query, compute the average size of houses in a specific Neighborhood.
- Continuing from that, compare the average size of social housing in a specific Neighborhood with the average size of luxury housing in that same Neighborhood.
- Pick 2 or 3 Neighborhoods, and using the Water Overlay, determine which neighborhood remains driest relative to their size. Test for the existence of more that 10cm of water on land (not on Terrain which itself is Water).
Tutorial completed
Congratulations. You have now completed this tutorial. In it, you have learned how to create Combo Overlays, and how to create TQL queries, and the most commonly used query components.