How to add and remove an Attribute: Difference between revisions
Jump to navigation
Jump to search
No edit summary |
No edit summary |
||
| Line 16: | Line 16: | ||
<gallery> | <gallery> | ||
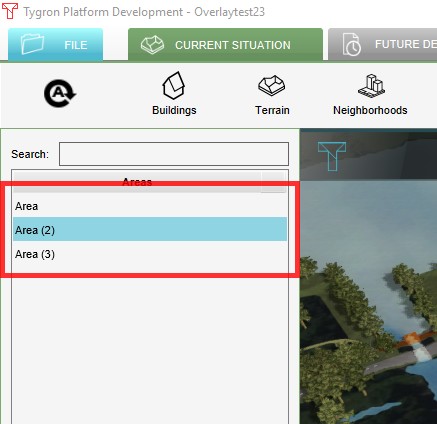
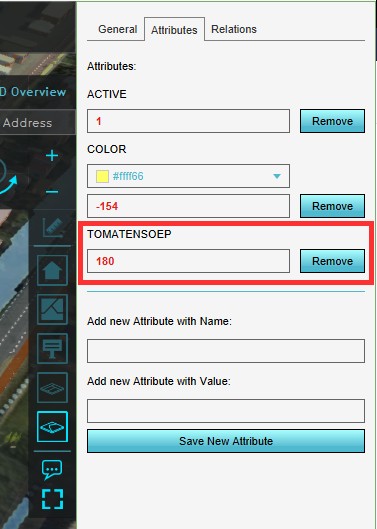
File: | File:SelectFeatureToAddAttr1.jpg|1. Select the feature where you would like to remove the Attribute from | ||
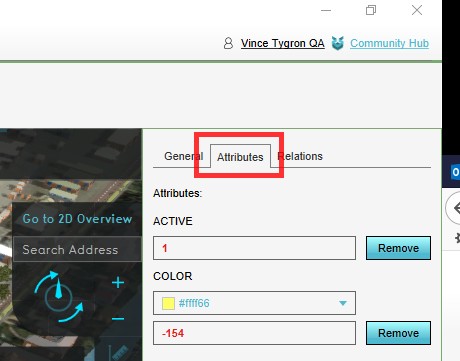
File: | File:SelectAttributeTab1.jpg|2. Select the Attribute tab on the right side | ||
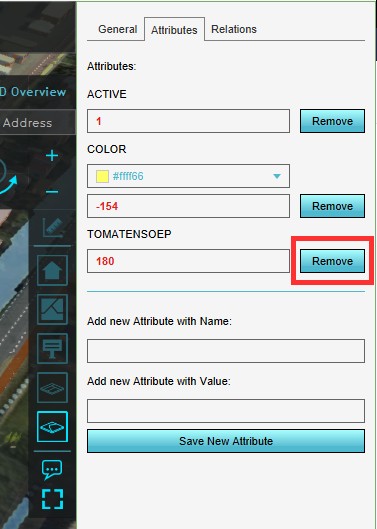
File: | File:RemoveAttributeBtn1.jpg|3. Select 'remove' next to the Attribute you would like to remove | ||
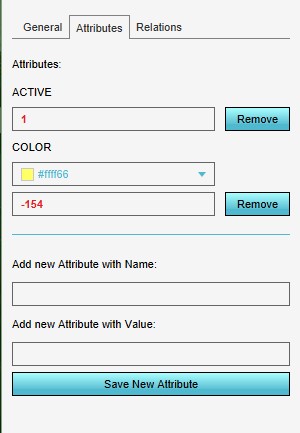
File: | File:SttributeRemoved1.jpg|4. Notice the Attribute is removed | ||
</gallery> | </gallery> | ||
Revision as of 14:38, 3 April 2019
Attributes can be added to features such as Buildings, Terrain, Neighborhoods, Plots, Areas and Overlays.
Adding and removing an Attribute is a generic process, however, certain feautures are dependent on other assets being present too, such as indicators, terrains, vacancy, images, etc. For more information please refer to the respective main articles for the specific feauture.
How to add an Attribute:
- Select in the editor the feature where you would like to add an Attribute to
- Select the Attribute tab on the right side
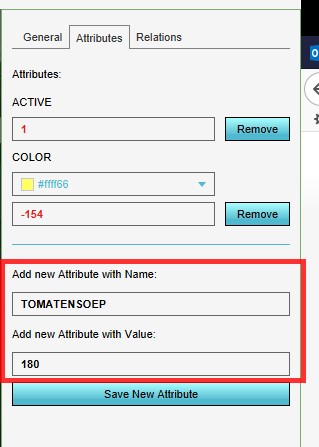
- Enter a name/ value pair for the new Attribute
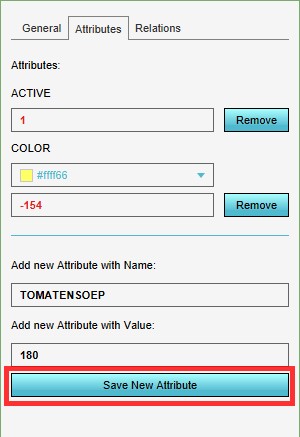
- Select 'Save New Attribute'
- Notice the new attribute is added to the feature
-
1. Select the feature where you would like to add an Attribute to
-
2. Select the Attribute tab
-
3. Enter a name/ value pair for the new Attribute
-
4. Select 'Save New Attribute'
-
5. Notice the new attribute is added to the feature
How to remove an Attribute:
- Select in the editor the feature where you would like to remove the Attribute from
- Select the Attribute tab on the right side
- Select 'remove' next to the Attribute you would like to remove
- Notice the Attribute is removed
-
1. Select the feature where you would like to remove the Attribute from
-
2. Select the Attribute tab on the right side
-
3. Select 'remove' next to the Attribute you would like to remove
-
4. Notice the Attribute is removed

Sometimes it can be convenient to reset all attributes at once. To do so, select 'Reset Attributes' in the bottom corner on the right side.
