Export Geo data: Difference between revisions
| Line 23: | Line 23: | ||
===Raster data=== | ===Raster data=== | ||
[[File:Polygons_exporteren_wiki.png|link=https://www.tygron.com/nl/2020/04/23/naast-geotiff-ook-polygons-exporteren-2/]] | |||
(In Dutch) | |||
[[Grid_Overlay|Grid overlays]] can be exported as raster data or as vector data. With the exported data, calculations from for example the [[Water_Overlay|Water overlay]] can be exported to be further processed for analysis in GIS software. For exporting the grid overlays, take also note of the [[Grid_Overlay#Grid_size|grid size]]. The smaller the grid size, the more accurate the exported GeoTIFF is. <br> | [[Grid_Overlay|Grid overlays]] can be exported as raster data or as vector data. With the exported data, calculations from for example the [[Water_Overlay|Water overlay]] can be exported to be further processed for analysis in GIS software. For exporting the grid overlays, take also note of the [[Grid_Overlay#Grid_size|grid size]]. The smaller the grid size, the more accurate the exported GeoTIFF is. <br> | ||
The export options for raster are: | The export options for raster are: | ||
Revision as of 10:13, 13 May 2020
Vector data
The components that make up the 3D world can be exported as 2D vector data in GeoJSON format. With this data, further/other calculations or analysis can be done in for example GIS software. In the Current Situation tab, each of the following menus has an export GeoJSON option:
- Hover over the desired menu you want to export objects from.
- Select Export GeoJSON file
- Choose additional options to make a selection of the to be exported data or for export all, click on the Export button.
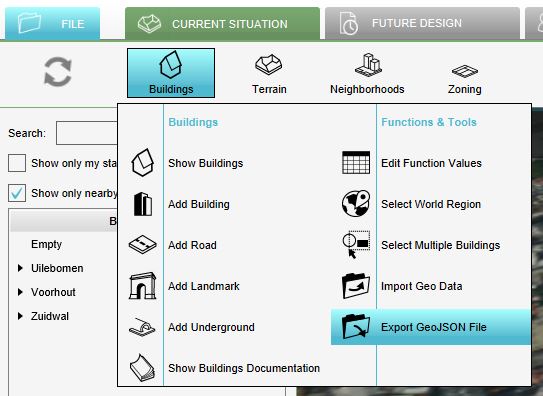
Export GeoJSON button in the Buildings menu.
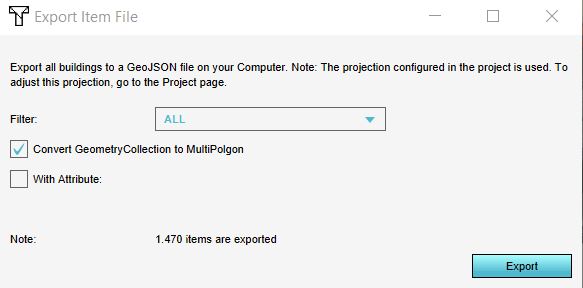
Make a selection based on category and/or attribute or export all objects by clicking on the Export button.


In the Export Item File panel that will show up, different options for exporting are available:
- Objects from a certain category/type (only for the Buildings and Terrains) can be exported by selecting the desired category/type.
- Only objects that have a certain attribute can be exported by checking the With Attribute option and selecting the desired attribute. For example if you only want culverts, you can select the category Underground (since the function culverts belongs to the category Underground) and check the With Attribute option and select the attribute name CULVERT_DIAMETER for example. This will export culverts, since only these objects have this attribute in common.
Raster data

(In Dutch)
Grid overlays can be exported as raster data or as vector data. With the exported data, calculations from for example the Water overlay can be exported to be further processed for analysis in GIS software. For exporting the grid overlays, take also note of the grid size. The smaller the grid size, the more accurate the exported GeoTIFF is.
The export options for raster are:
- GeoTIFF
- ASCII
- WMS
The export options for vector are:
Note that the corresponding option in the Export panel is named Legend polygons. Based on the legend colors of the Grid overlay, a vectorisation of the raster data is created and can be exported as a GeoJSON. See also this page for more information on how to change the legend and this video tutorial: https://www.tygron.com/nl/2020/04/23/naast-geotiff-ook-polygons-exporteren-2/
- Select any grid overlay in the editor.
- On the right panel, select "Export Grid File".
- Choose the overlay, format and click on the Export button.
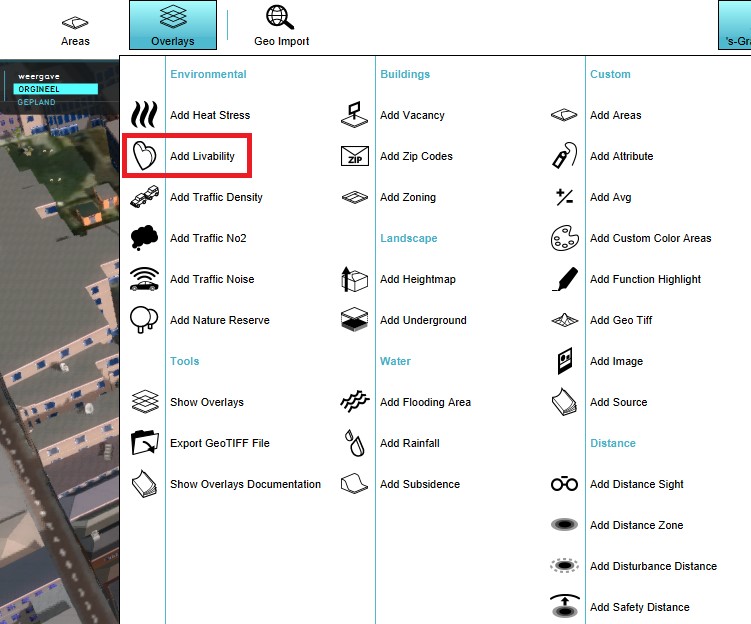
Select a grid overlay
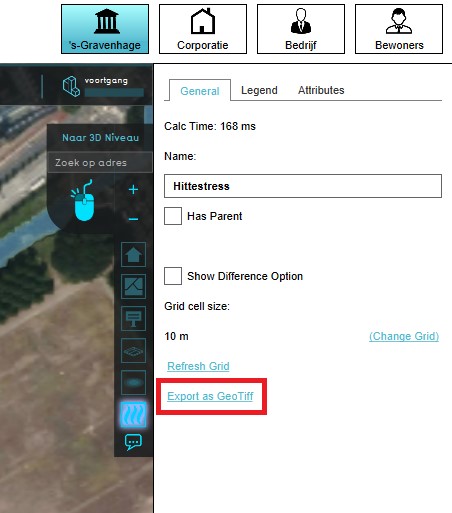
Select "Export Grid File"
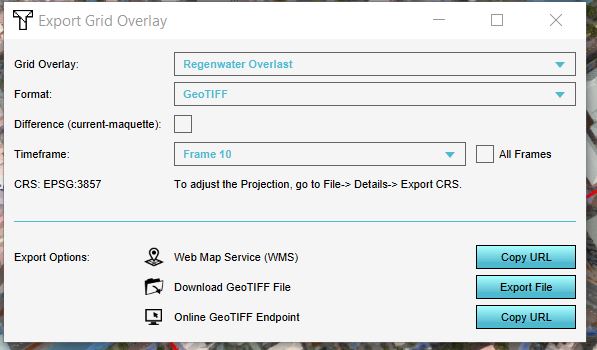
Choose the desired overlay to export, if applicable the difference overlay and/or timeframe and the desired format.


In the Export Grid File panel that will show up, different options for exporting are available:
- If in a test run the option Difference (current - maquette) is selected, the difference in results between the maquette state and the current state will be exported. If you checked this option outside of the test run, or did not do any Actions yet, the exported dataset will consist no difference.
- For grid overlays which produce multiple timeframes as results, it is possible to export a dataset at a certain timeframe, by selecting the ID of the timeframe. It is also possible to export all timeframes at once by checking the All frames box.