How to use a limit map in a Scenario
Jump to navigation
Jump to search
This howto uses the project Demo Heat Stress as a basis.
How to use a limit map in a Scenario:
- Select Current Situation in the ribbon bar
- Hover over Overlays, and under Administrative, select Scenario
- Activate the Scenario Overlay that was added to the Navigation Panel
- Click on the 'Go to 2D Map' button in the Navigation panel to zoom out to map view.
- Select Multi Scenario in the ribbon bar
- Select Scenarios in the ribbon bar
- Select the Scenario named 'Scenario'
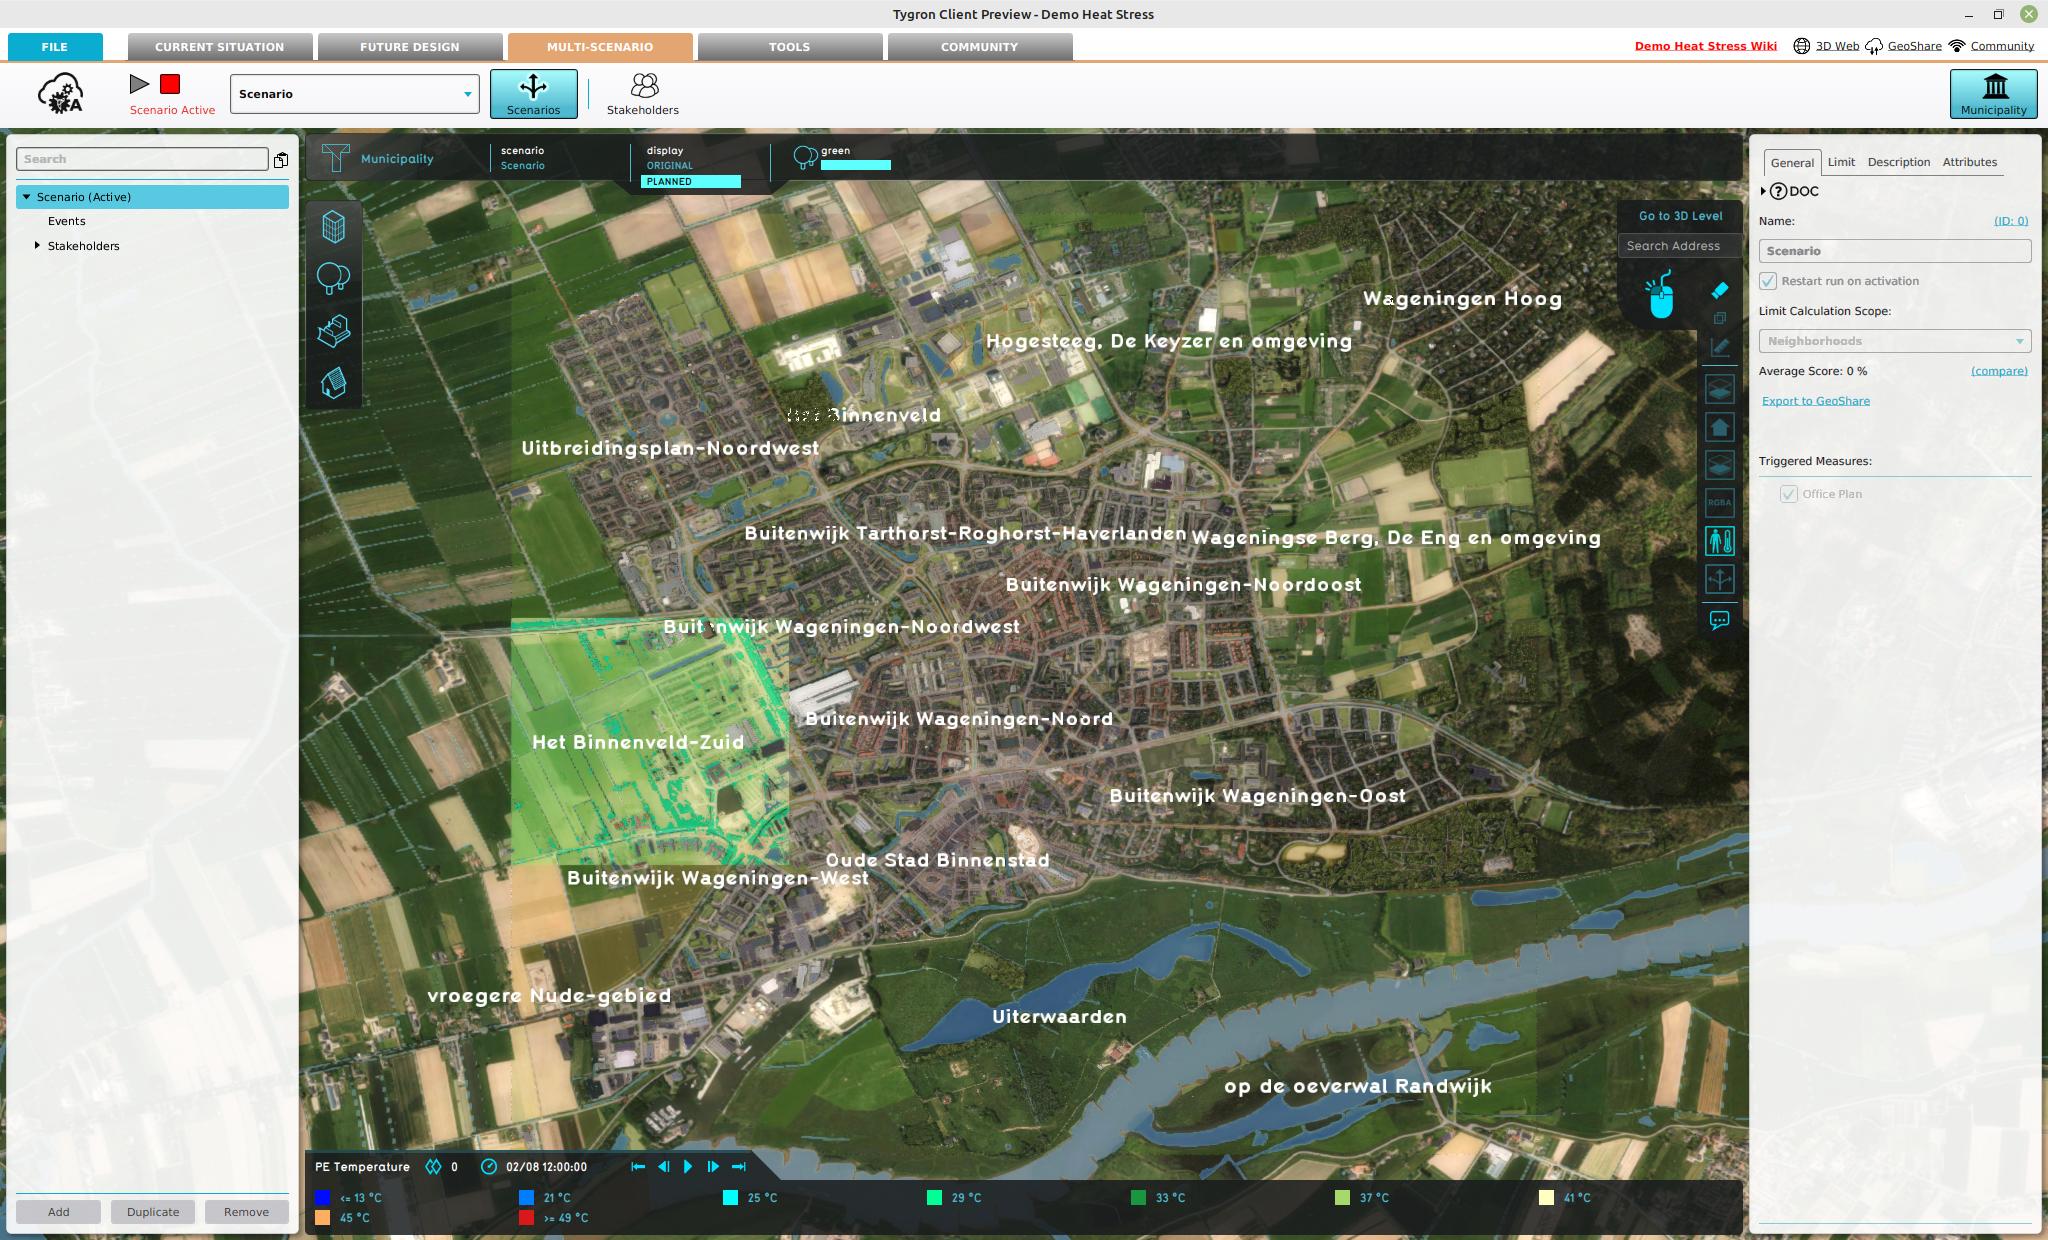
- In the Scenario detail panel, adjust the Limit Calculation Scope to Measure Neighborhoods
- Set the Measure named Office Plan as a Triggered Measure.
- Select the Limit tab
- Notice the Margin set to 500 and the list of Neighborhoods containing all Neighborhoods.
- Inspect Scenario Overlay in the 3D visualization
- In the Scenario detail panel, Adjust the Margin to 0.
- Notice the list of neighborhoods reduced.
- Verify that the Scenario Overlay became smaller as well
- Select the general tab and adjust the limit scope to Neighborhoods.
- Select the limit tab and remove the first neighborhood.
- Verify that the Scenario Overlay became even smaller.
- Activate a test run by clicking on the play button and verify that the calculated overlays are limited as well, once the calculations have completed
-
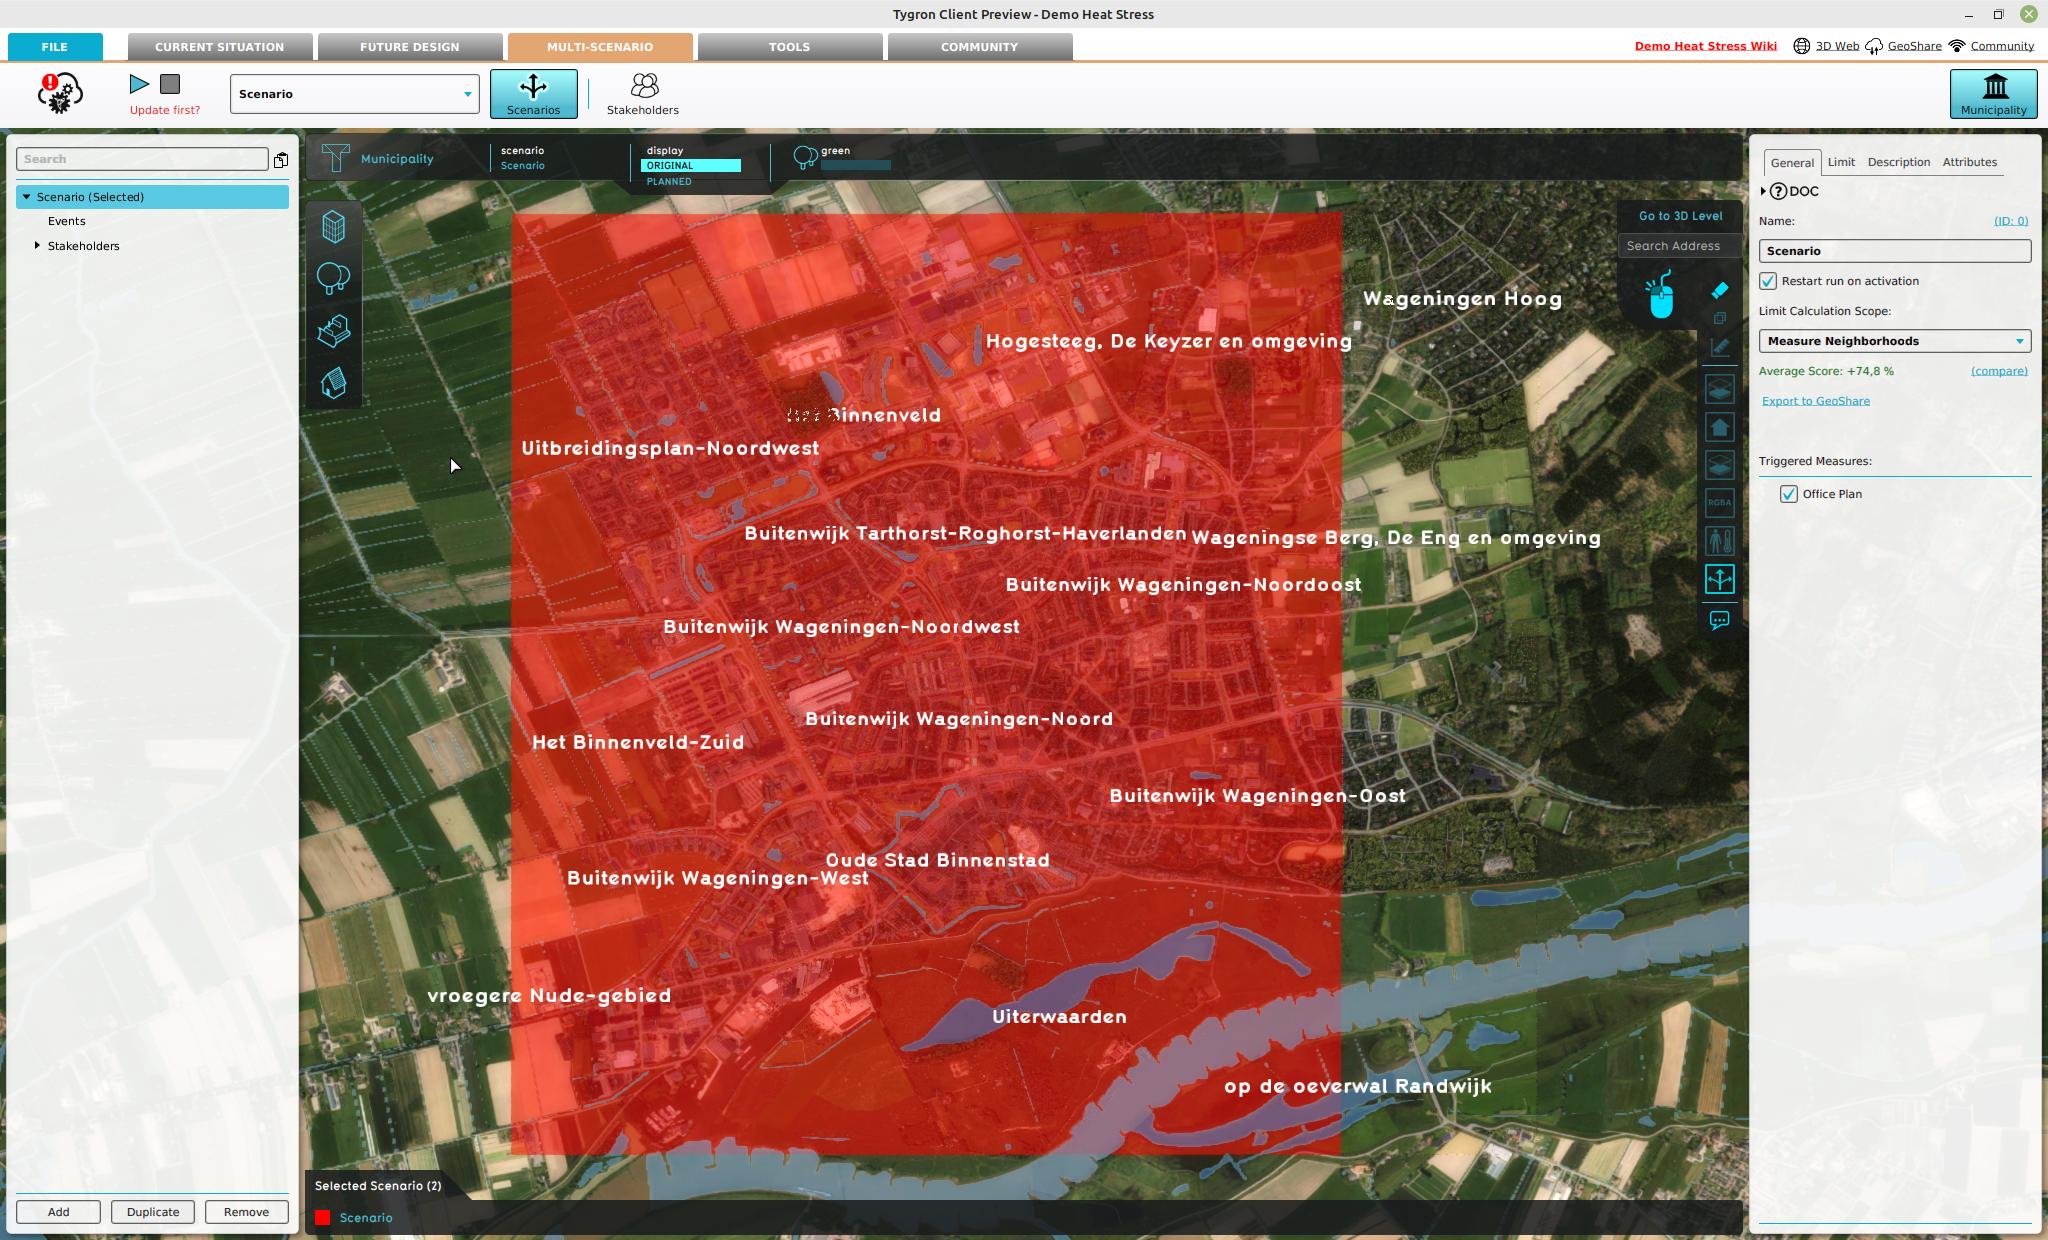 Scenario Overlay with a Neighbhorhood Measure scope limited by neighborhoods and a margin of 500 meters.
 -
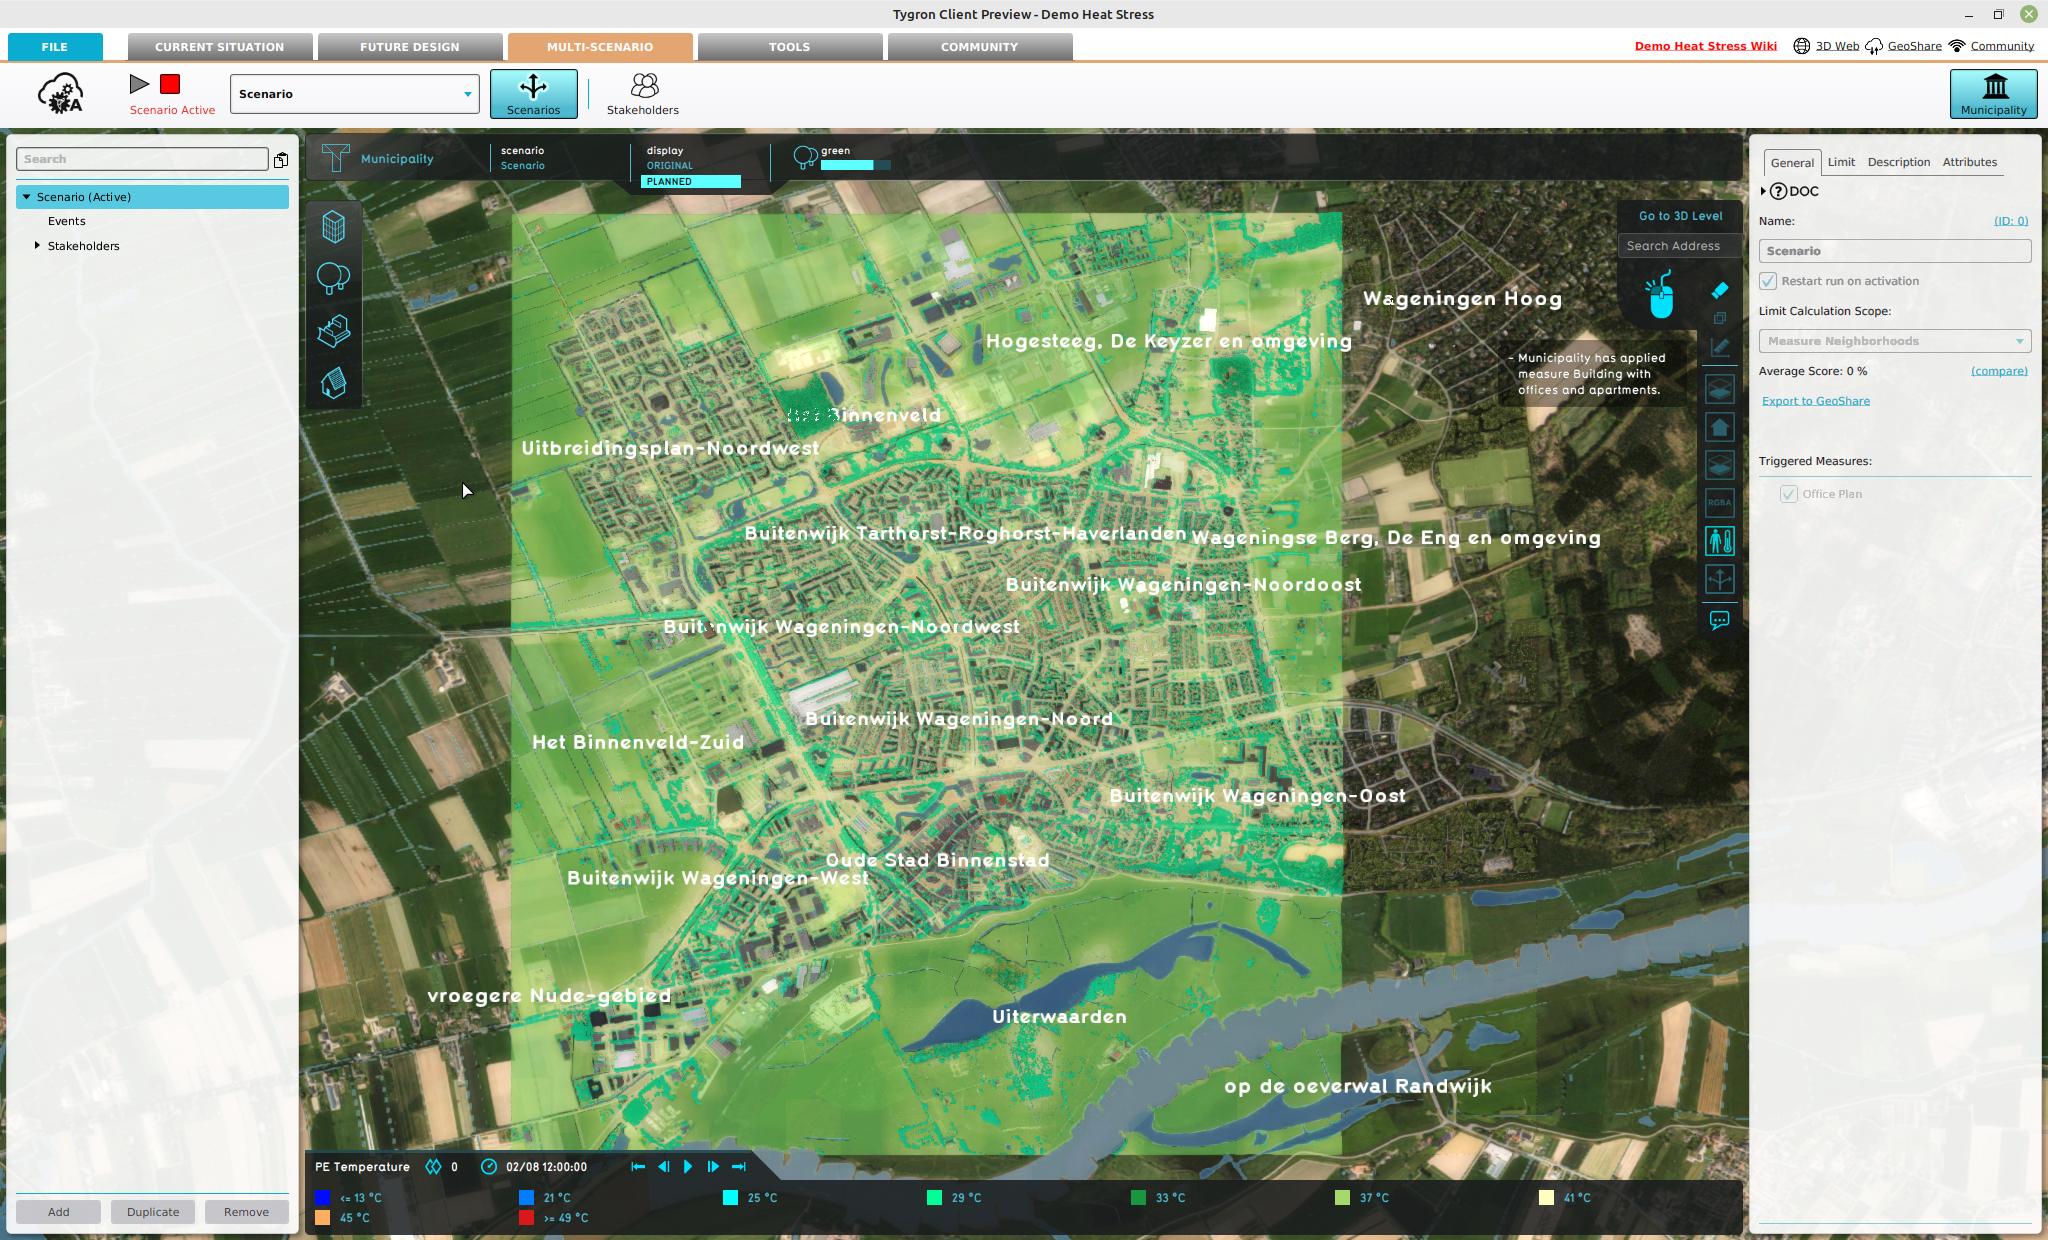 Heatstress Overlay with a Neighbhorhood Measure scope limited by neighborhoods and a margin of 500 meters.
 -
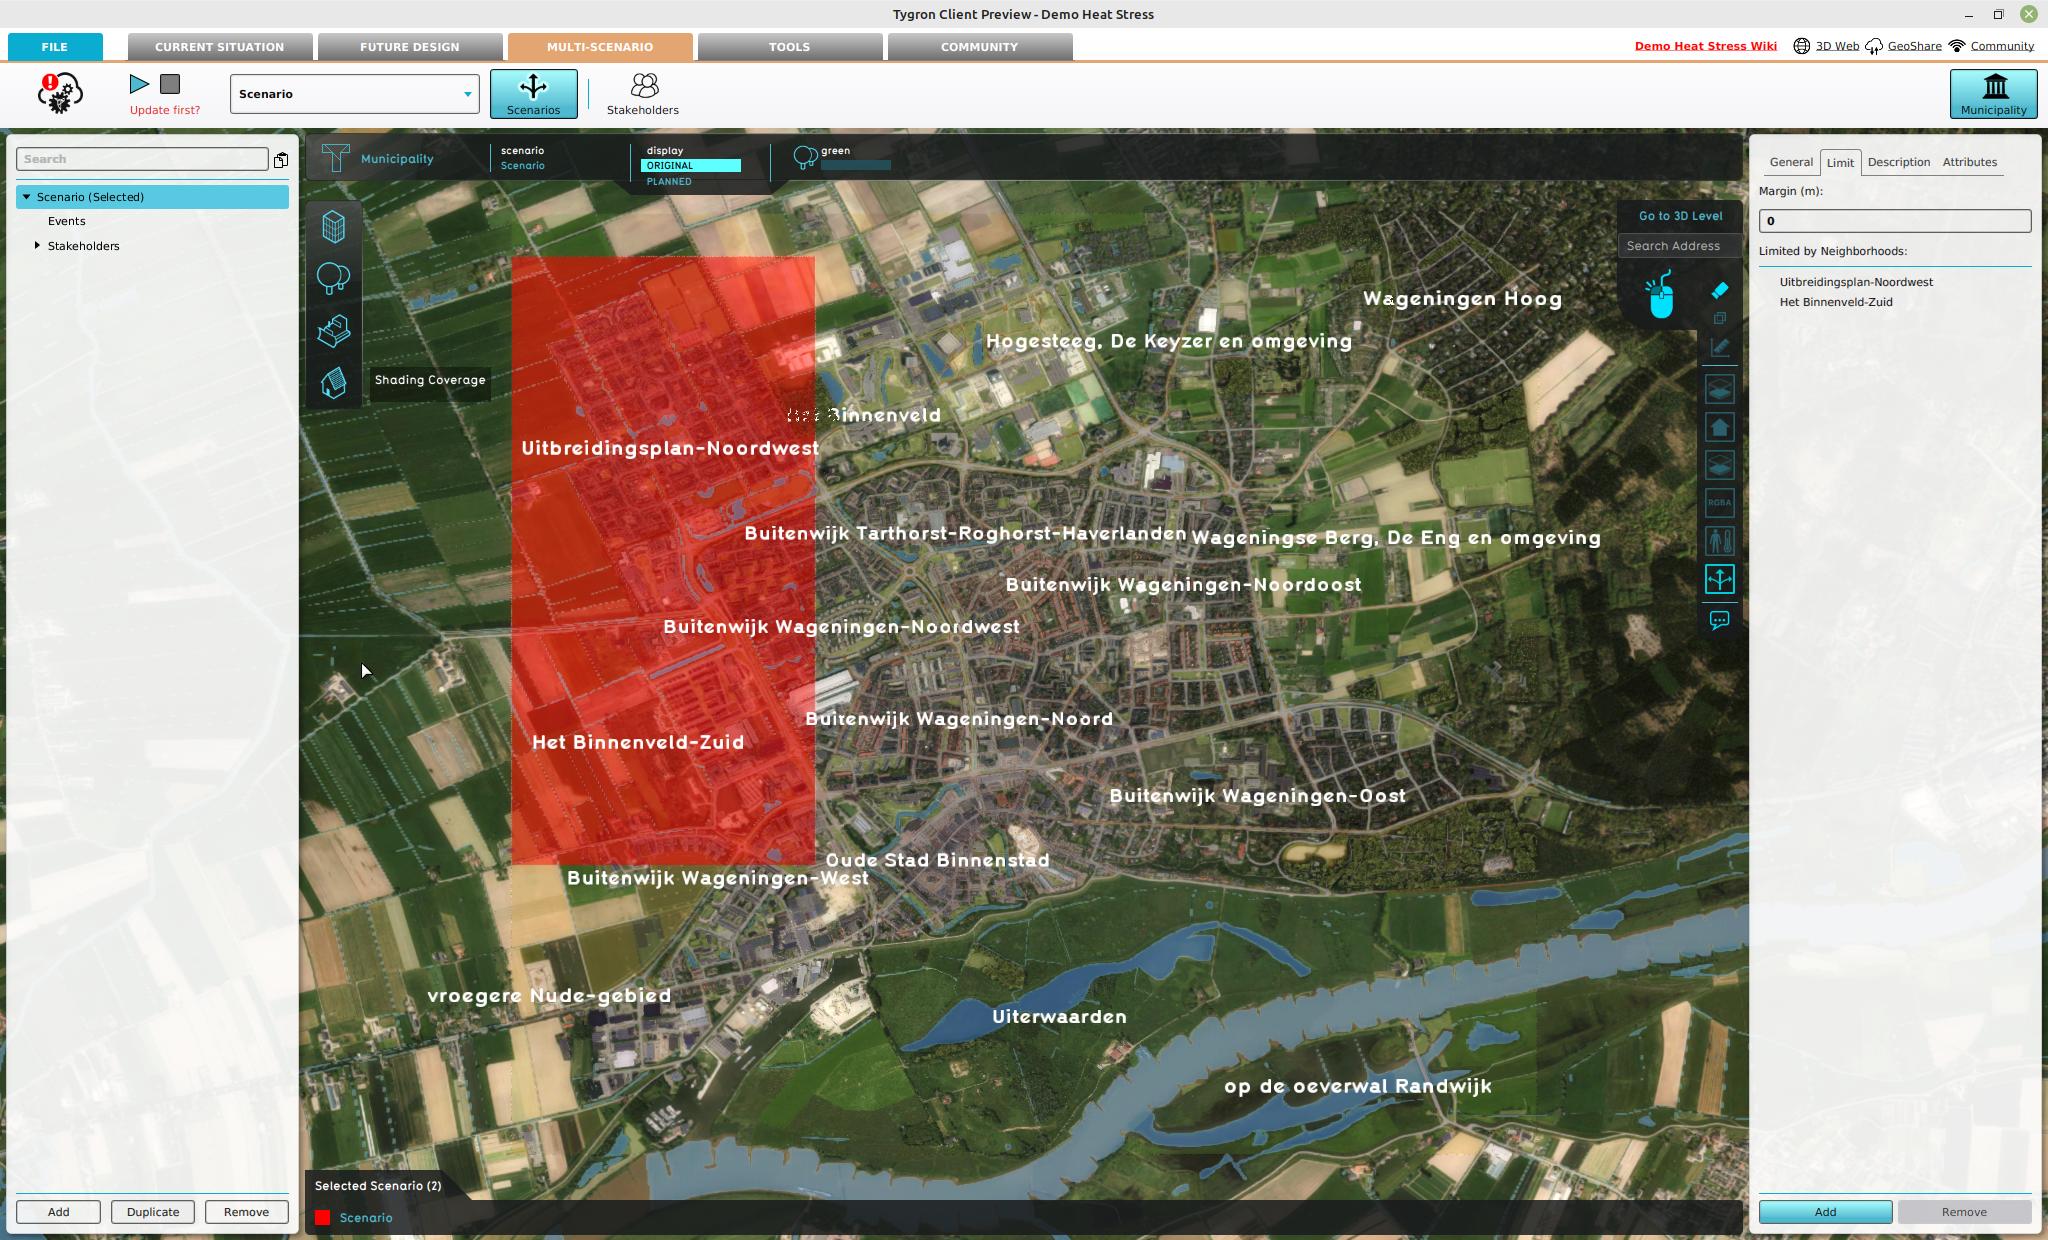 Scenario Overlay with a Neighbhorhood Measure scope limited by neighborhoods and a margin of 0 meter.
 -
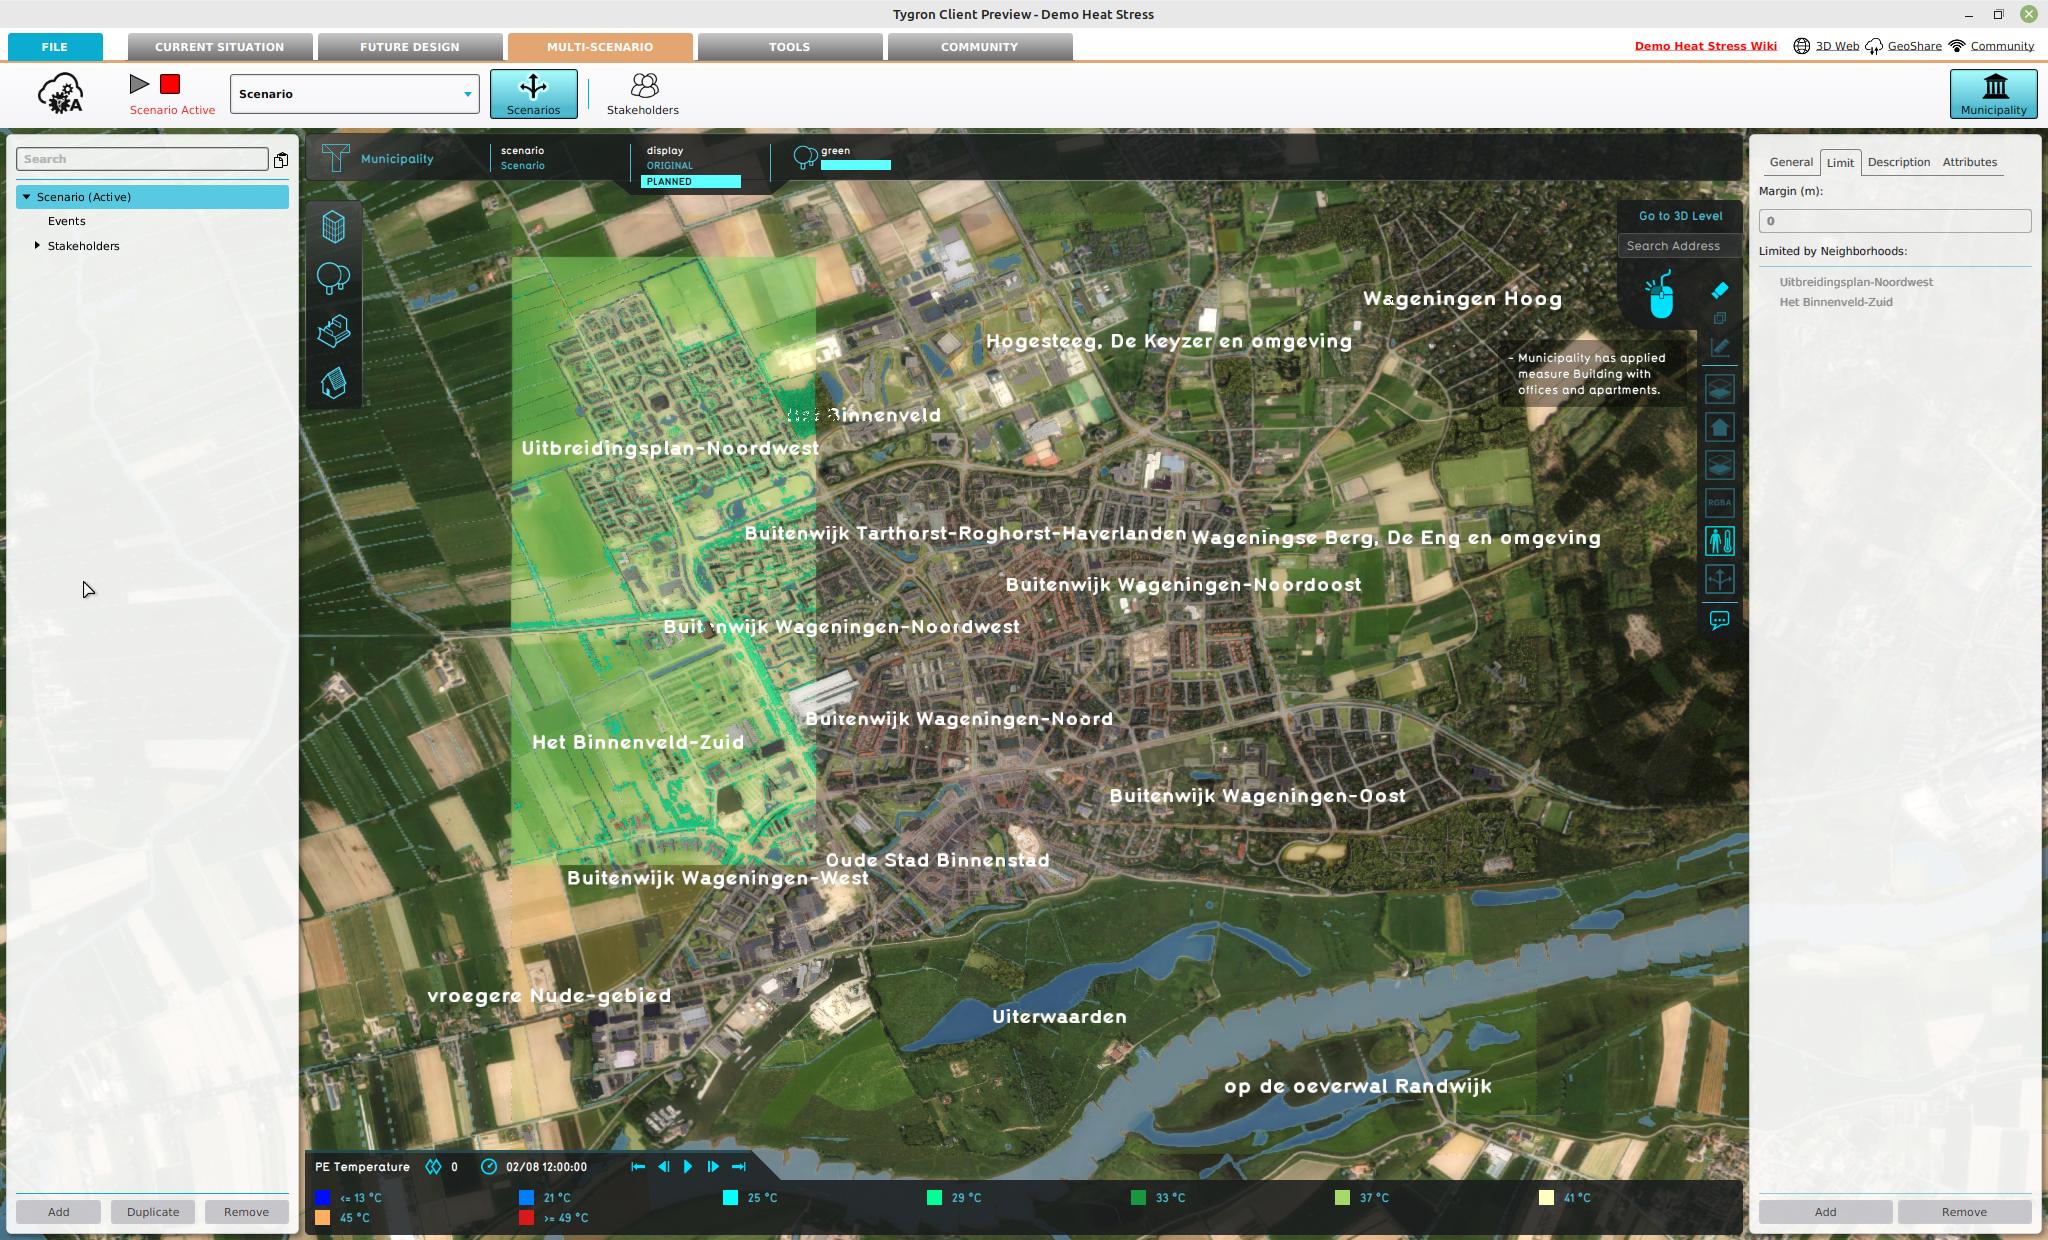 Heatstress Overlay with a Neighbhorhood Measure scope limited by neighborhoods and a margin of 0 meter.
 -
 Heatstress Overlay with a Neighbhorhood scope limited by one selected neighborhood.


